CameraX的使用
文章目录
我在 googleIO 前查看演讲主题,看到了有一篇标题是关于 cameraX ,当时在 android 官网没有搜索到教程
在 flutter web 基本体验完毕后, 再去搜索果然从官网查看到了 cameraX 的相关介绍
介绍
CameraX 是 Jetpack 的一部分, 旨在帮助更好更简单的使用照相机
最低支持的 API 等级是 API 21(5.0)
开发环境
我当前的开发环境是
MacOS 10.13.6
Android Studio 3.4
小米 8 MIUI 10.3 稳定版 10.3.2.0(android 9.0)
最低支持 官方说明为 AndroidStudio 3.3 API 21+的设备
编码准备
新建项目
修改这两项
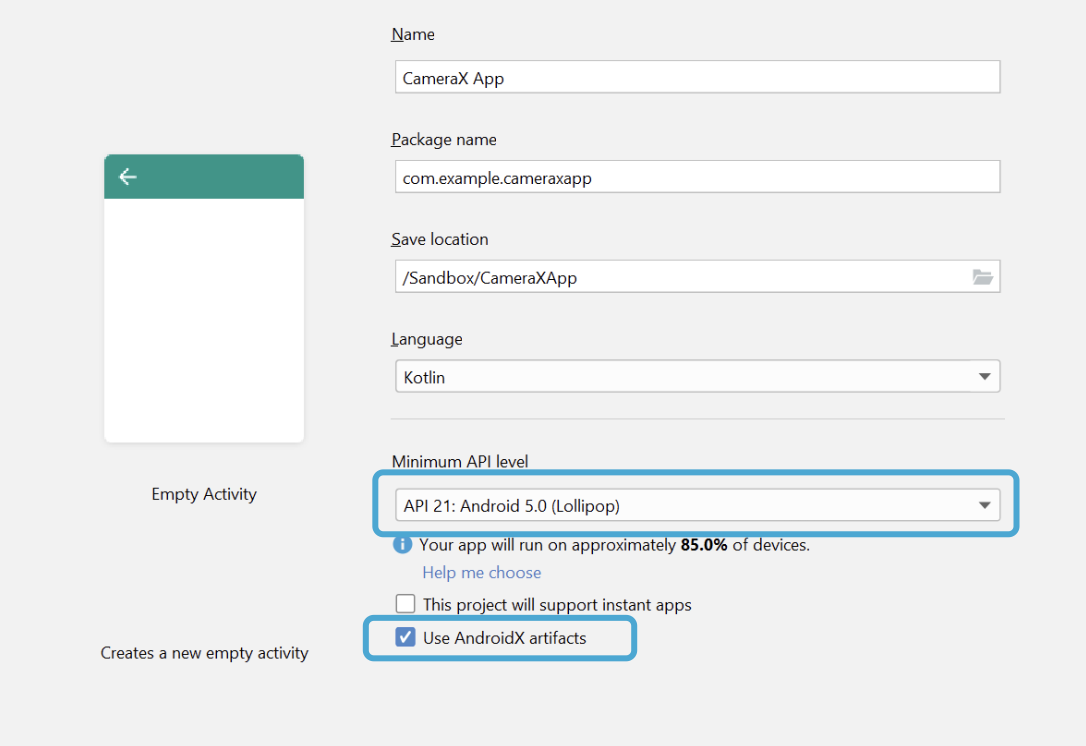
最低 21, 使用 androidX
添加依赖
在 app 级别的 build.gradle 中添加如下依赖
这个版本当前还是 alpha 版本,后续可能会升级为正式版, 可以查看
1dependencies {
2    def camerax_version = "1.0.0-alpha01"
3    implementation "androidx.camera:camera-core:${camerax_version}"
4    implementation "androidx.camera:camera-camera2:${camerax_version}"
5}
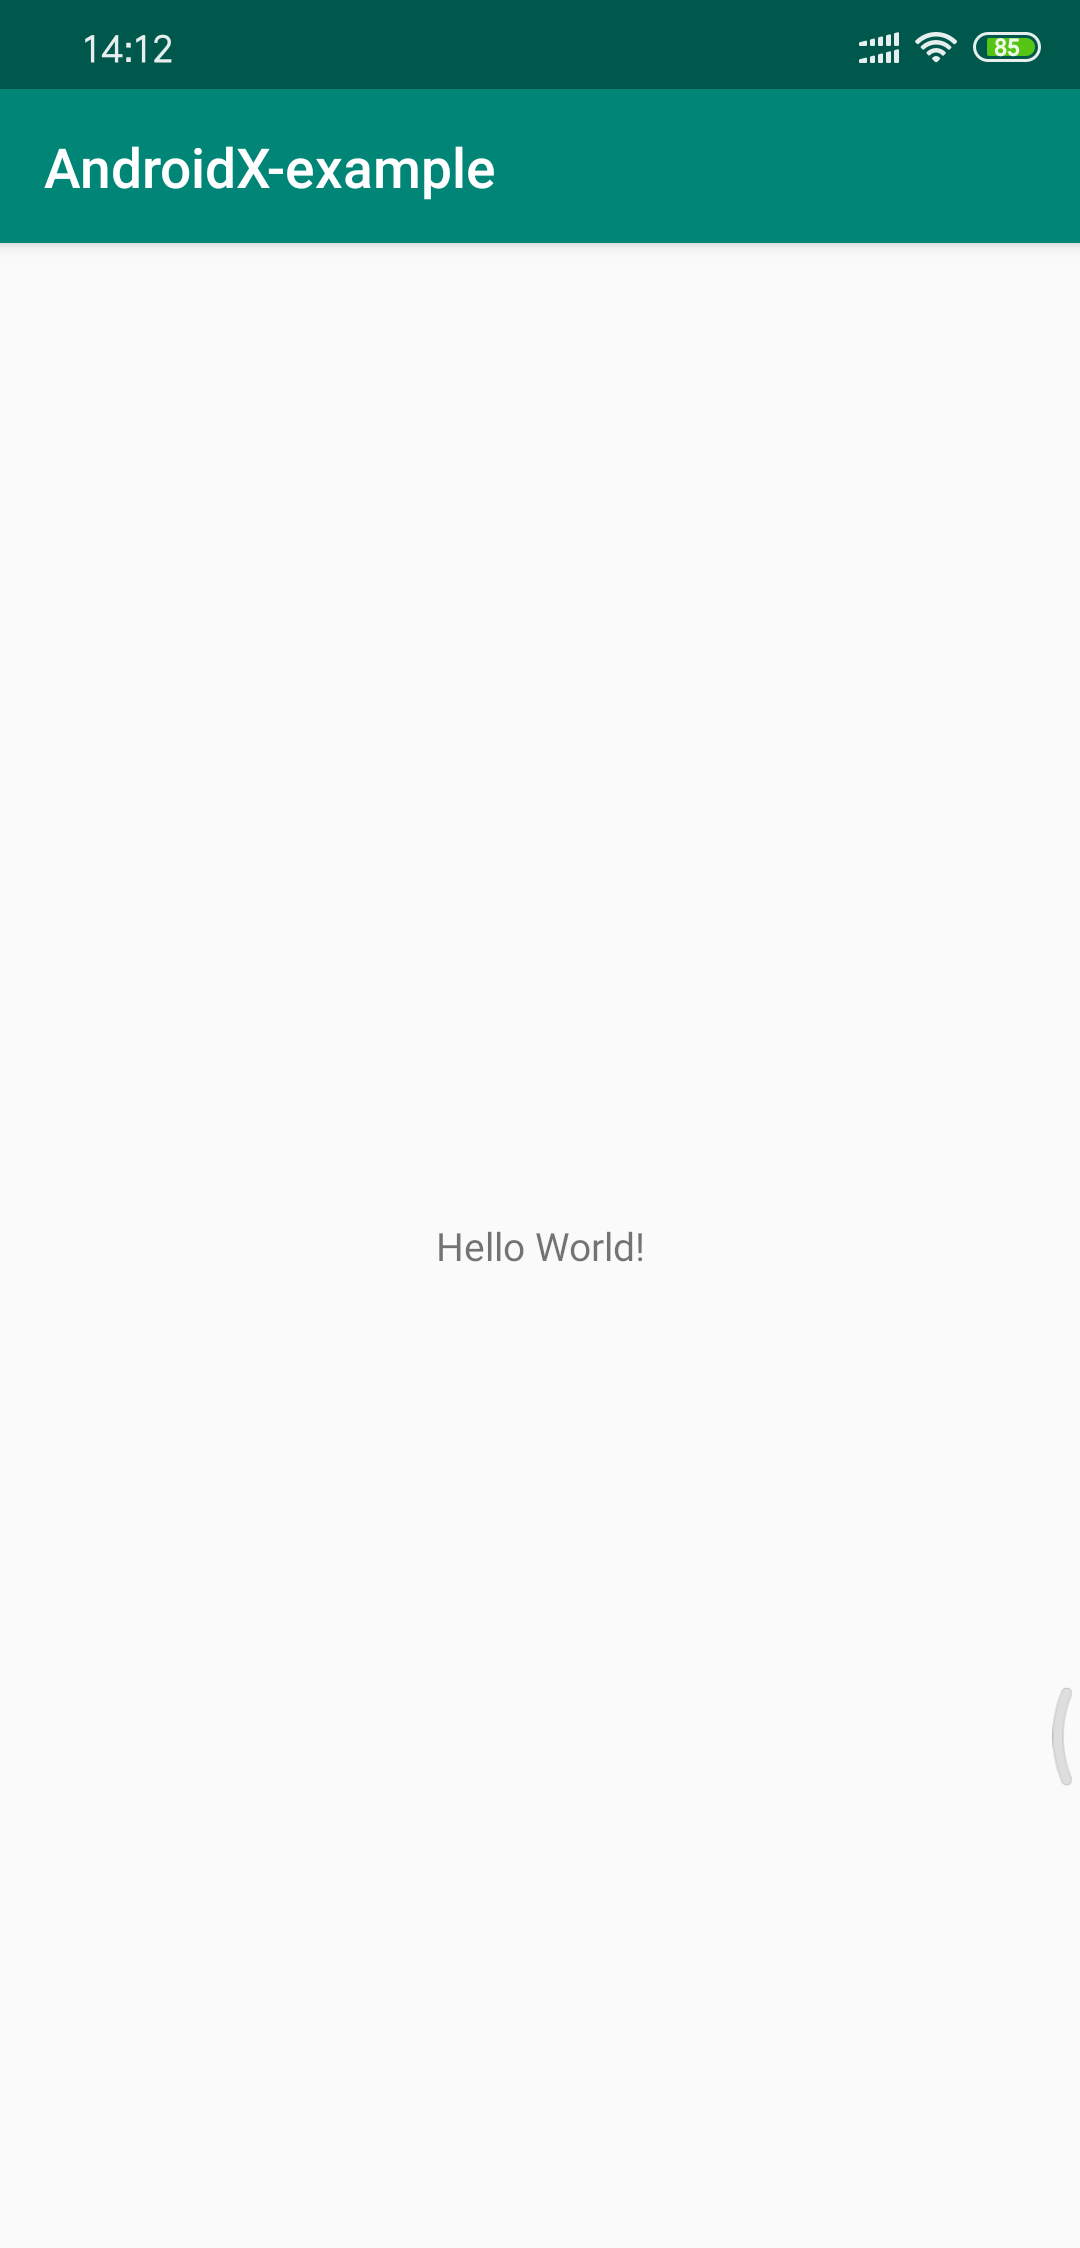
尝试运行项目
运行项目,我这里可以成功跑起来,说明依赖添加是成功的
编码
修改 xml 文件
 1<?xml version="1.0" encoding="utf-8"?>
 2<androidx.constraintlayout.widget.ConstraintLayout
 3        xmlns:android="http://schemas.android.com/apk/res/android"
 4        xmlns:tools="http://schemas.android.com/tools"
 5        xmlns:app="http://schemas.android.com/apk/res-auto"
 6        android:layout_width="match_parent"
 7        android:layout_height="match_parent"
 8        tools:context=".MainActivity">
 9
10    <TextureView
11            android:id="@+id/view_finder"
12            android:layout_width="640px"
13            android:layout_height="640px"
14            app:layout_constraintTop_toTopOf="parent"
15            app:layout_constraintBottom_toBottomOf="parent"
16            app:layout_constraintStart_toStartOf="parent"
17            app:layout_constraintEnd_toEndOf="parent" />
18
19</androidx.constraintlayout.widget.ConstraintLayout>
使用TextureView作为显示的 View
申请权限
添加到 manifest
1<uses-permission android:name="android.permission.CAMERA" />
申请动态访问权限,这一步可以借助第三方插件,也可以自己写
截至目前为止,代码如下
 1package top.kikt.camerax.usage
 2
 3import android.Manifest
 4import android.content.pm.PackageManager
 5import android.os.Bundle
 6import android.view.TextureView
 7import android.widget.Toast
 8import androidx.appcompat.app.AppCompatActivity
 9import androidx.core.app.ActivityCompat
10import androidx.core.content.ContextCompat
11import kotlinx.android.synthetic.main.activity_main.*
12
13private const val REQUEST_CODE_PERMISSIONS = 10
14private val REQUIRED_PERMISSIONS = arrayOf(Manifest.permission.CAMERA)
15
16class MainActivity : AppCompatActivity(), LifecycleOwner {
17
18    private lateinit var viewFinder: TextureView
19
20    override fun onCreate(savedInstanceState: Bundle?) {
21        super.onCreate(savedInstanceState)
22        setContentView(R.layout.activity_main)
23        viewFinder = view_finder
24
25        // Request camera permissions
26        if (allPermissionsGranted()) {
27            viewFinder.post { startCamera() }
28        } else {
29            ActivityCompat.requestPermissions(
30                this, REQUIRED_PERMISSIONS, REQUEST_CODE_PERMISSIONS
31            )
32        }
33
34        // Every time the provided texture view changes, recompute layout
35        viewFinder.addOnLayoutChangeListener { _, _, _, _, _, _, _, _, _ ->
36            updateTransform()
37        }
38    }
39
40
41    private fun startCamera() {
42
43    }
44
45    private fun updateTransform() {}
46
47    /**
48     * Process result from permission request dialog box, has the request
49     * been granted? If yes, start Camera. Otherwise display a toast
50     */
51    override fun onRequestPermissionsResult(
52        requestCode: Int, permissions: Array<String>, grantResults: IntArray
53    ) {
54        if (requestCode == REQUEST_CODE_PERMISSIONS) {
55            if (allPermissionsGranted()) {
56                viewFinder.post { startCamera() }
57            } else {
58                Toast.makeText(
59                    this,
60                    "Permissions not granted by the user.",
61                    Toast.LENGTH_SHORT
62                ).show()
63                finish()
64            }
65        }
66    }
67
68    /**
69     * Check if all permission specified in the manifest have been granted
70     */
71    private fun allPermissionsGranted(): Boolean {
72        for (permission in REQUIRED_PERMISSIONS) {
73            if (ContextCompat.checkSelfPermission(
74                    this, permission
75                ) != PackageManager.PERMISSION_GRANTED
76            ) {
77                return false
78            }
79        }
80        return true
81    }
82}
实现照相的功能
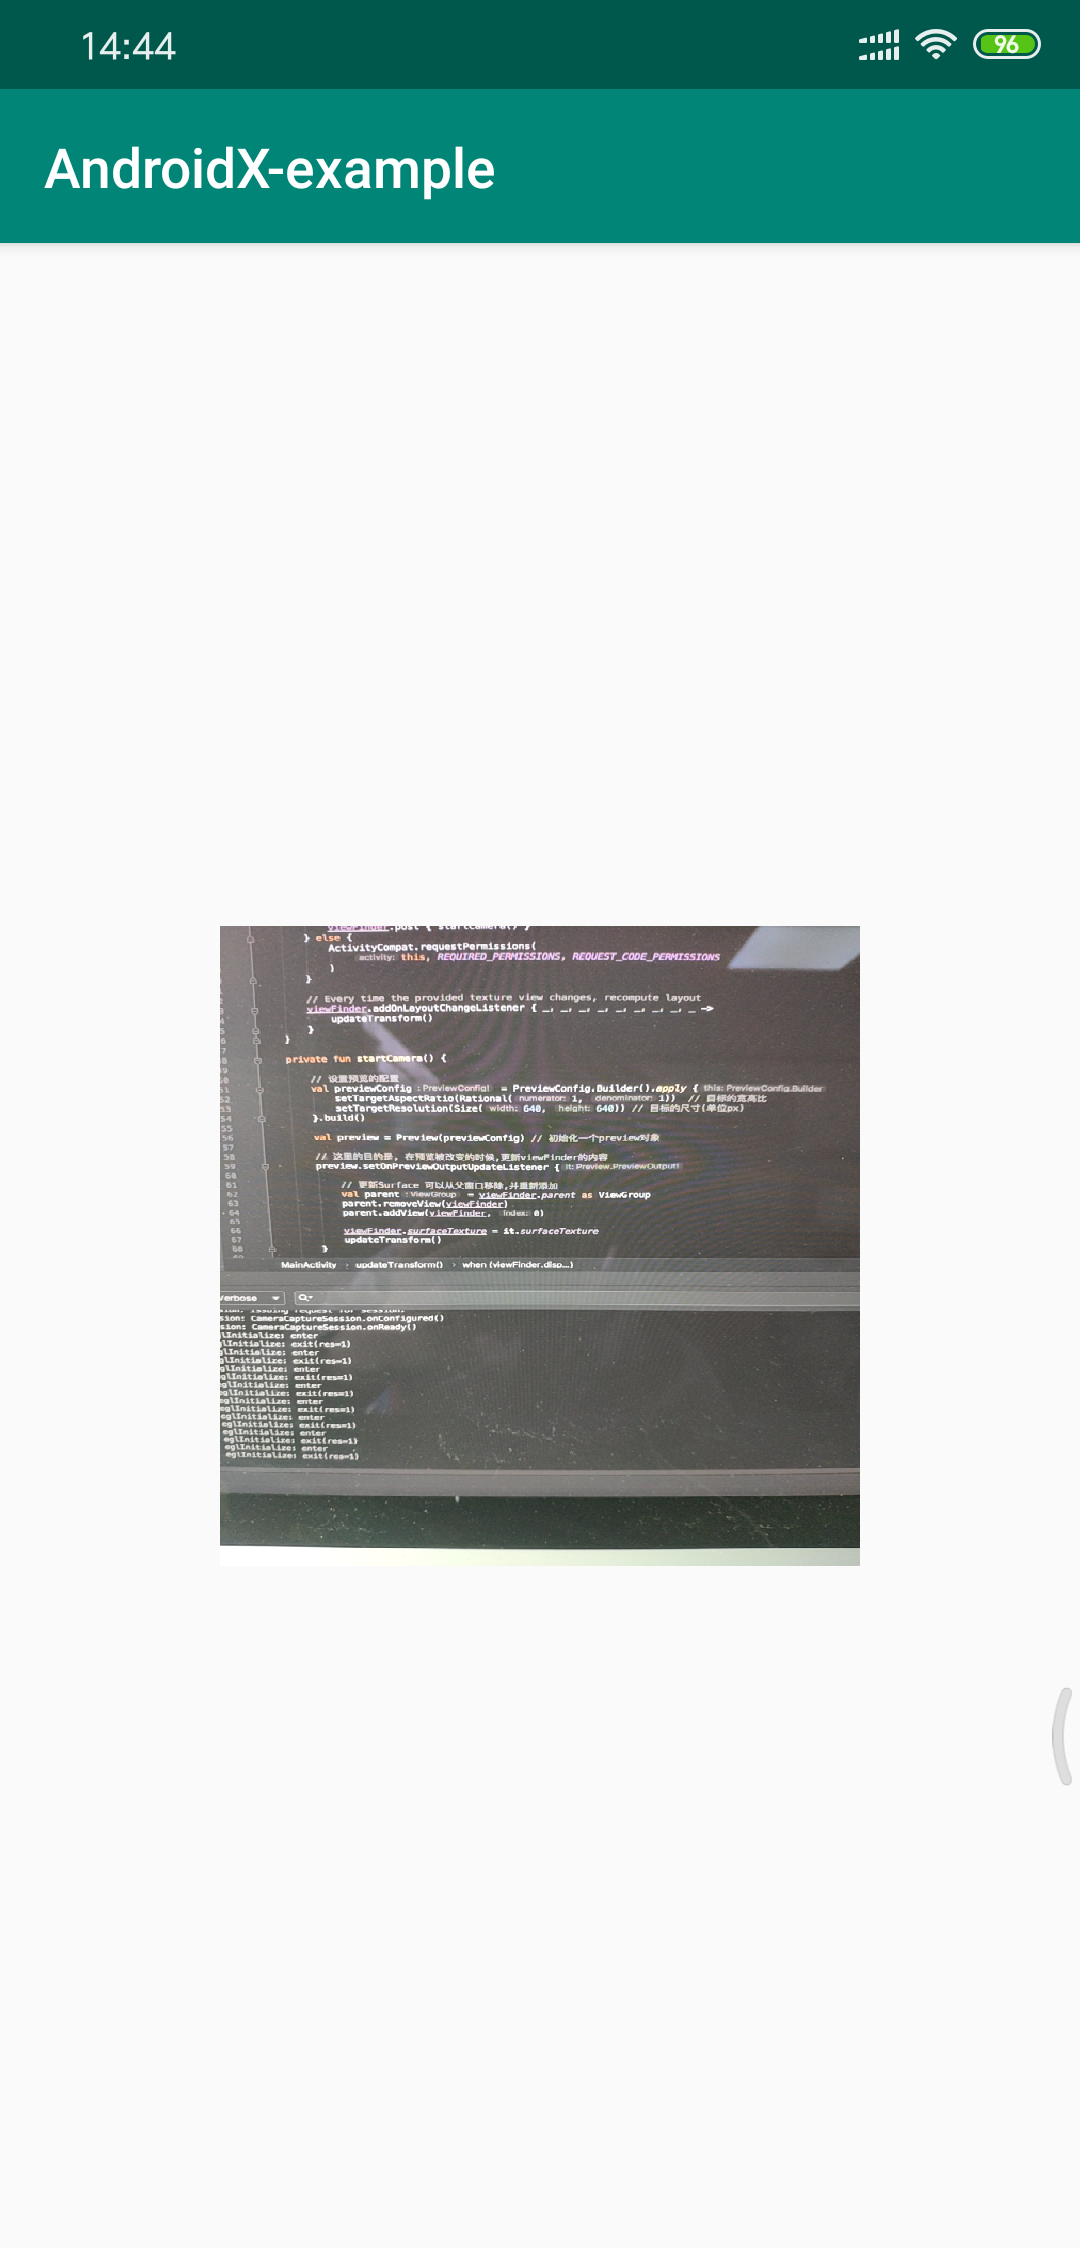
实现 startCamera 的逻辑
 1    private fun startCamera() {
 2
 3        // Create configuration object for the viewfinder use case
 4        val previewConfig = PreviewConfig.Builder().apply {
 5            setTargetAspectRatio(Rational(1, 1))
 6            setTargetResolution(Size(640, 640))
 7        }.build()
 8
 9        // Build the viewfinder use case
10        val preview = Preview(previewConfig)
11
12        // Every time the viewfinder is updated, recompute layout
13        preview.setOnPreviewOutputUpdateListener {
14
15            // To update the SurfaceTexture, we have to remove it and re-add it
16            val parent = viewFinder.parent as ViewGroup
17            parent.removeView(viewFinder)
18            parent.addView(viewFinder, 0)
19
20            viewFinder.surfaceTexture = it.surfaceTexture
21            updateTransform()
22        }
23
24        // Bind use cases to lifecycle
25        // If Android Studio complains about "this" being not a LifecycleOwner
26        // try rebuilding the project or updating the appcompat dependency to
27        // version 1.1.0 or higher.
28        CameraX.bindToLifecycle(this, preview)
29    }
30
31    private fun updateTransform() {
32        val matrix = Matrix()
33
34        // 计算中心
35        val centerX = viewFinder.width / 2f
36        val centerY = viewFinder.height / 2f
37
38        // 纠正屏幕方向的错误
39        val rotationDegrees = when (viewFinder.display.rotation) {
40            Surface.ROTATION_0 -> 0
41            Surface.ROTATION_90 -> 90
42            Surface.ROTATION_180 -> 180
43            Surface.ROTATION_270 -> 270
44            else -> return
45        }
46        matrix.postRotate(-rotationDegrees.toFloat(), centerX, centerY)
47
48        // 把纠正错误后的矩阵传给viewFinder
49        viewFinder.setTransform(matrix)
50    }
可能遇到的错误:
1java.lang.NoSuchMethodError: No super method getLifecycle()Landroidx/lifecycle/Lifecycle; in class Landroidx/core/app/ComponentActivity; or its super classes (declaration of 'androidx.core.app.ComponentActivity' appears in ........
在上找到了一个解释
简单来说, 修改一下依赖
1//    implementation 'androidx.appcompat:appcompat:1.0.2'
2    implementation 'androidx.appcompat:appcompat:1.1.0-alpha05'
因为 1.0.2 版本中还没有实现 LifecycleOwner 的接口, 然后就可以删掉 Activity 声明上的 LifecycleOwner 了
1.1.0-alpha05 版本的继承关系图如下:
然后目前的预览是这样的:
预览这一步就完成了,相对于以前的 api 来说, 真实的编码量很小
拍照
接着就是获取当前的画面了
先添加一个按钮
1<ImageButton
2        android:id="@+id/capture_button"
3        android:layout_width="72dp"
4        android:layout_height="72dp"
5        android:layout_margin="24dp"
6        app:srcCompat="@android:drawable/ic_menu_camera"
7        app:layout_constraintBottom_toBottomOf="parent"
8        app:layout_constraintEnd_toEndOf="parent"
9        app:layout_constraintStart_toStartOf="parent" />
修改 startCamera 方法
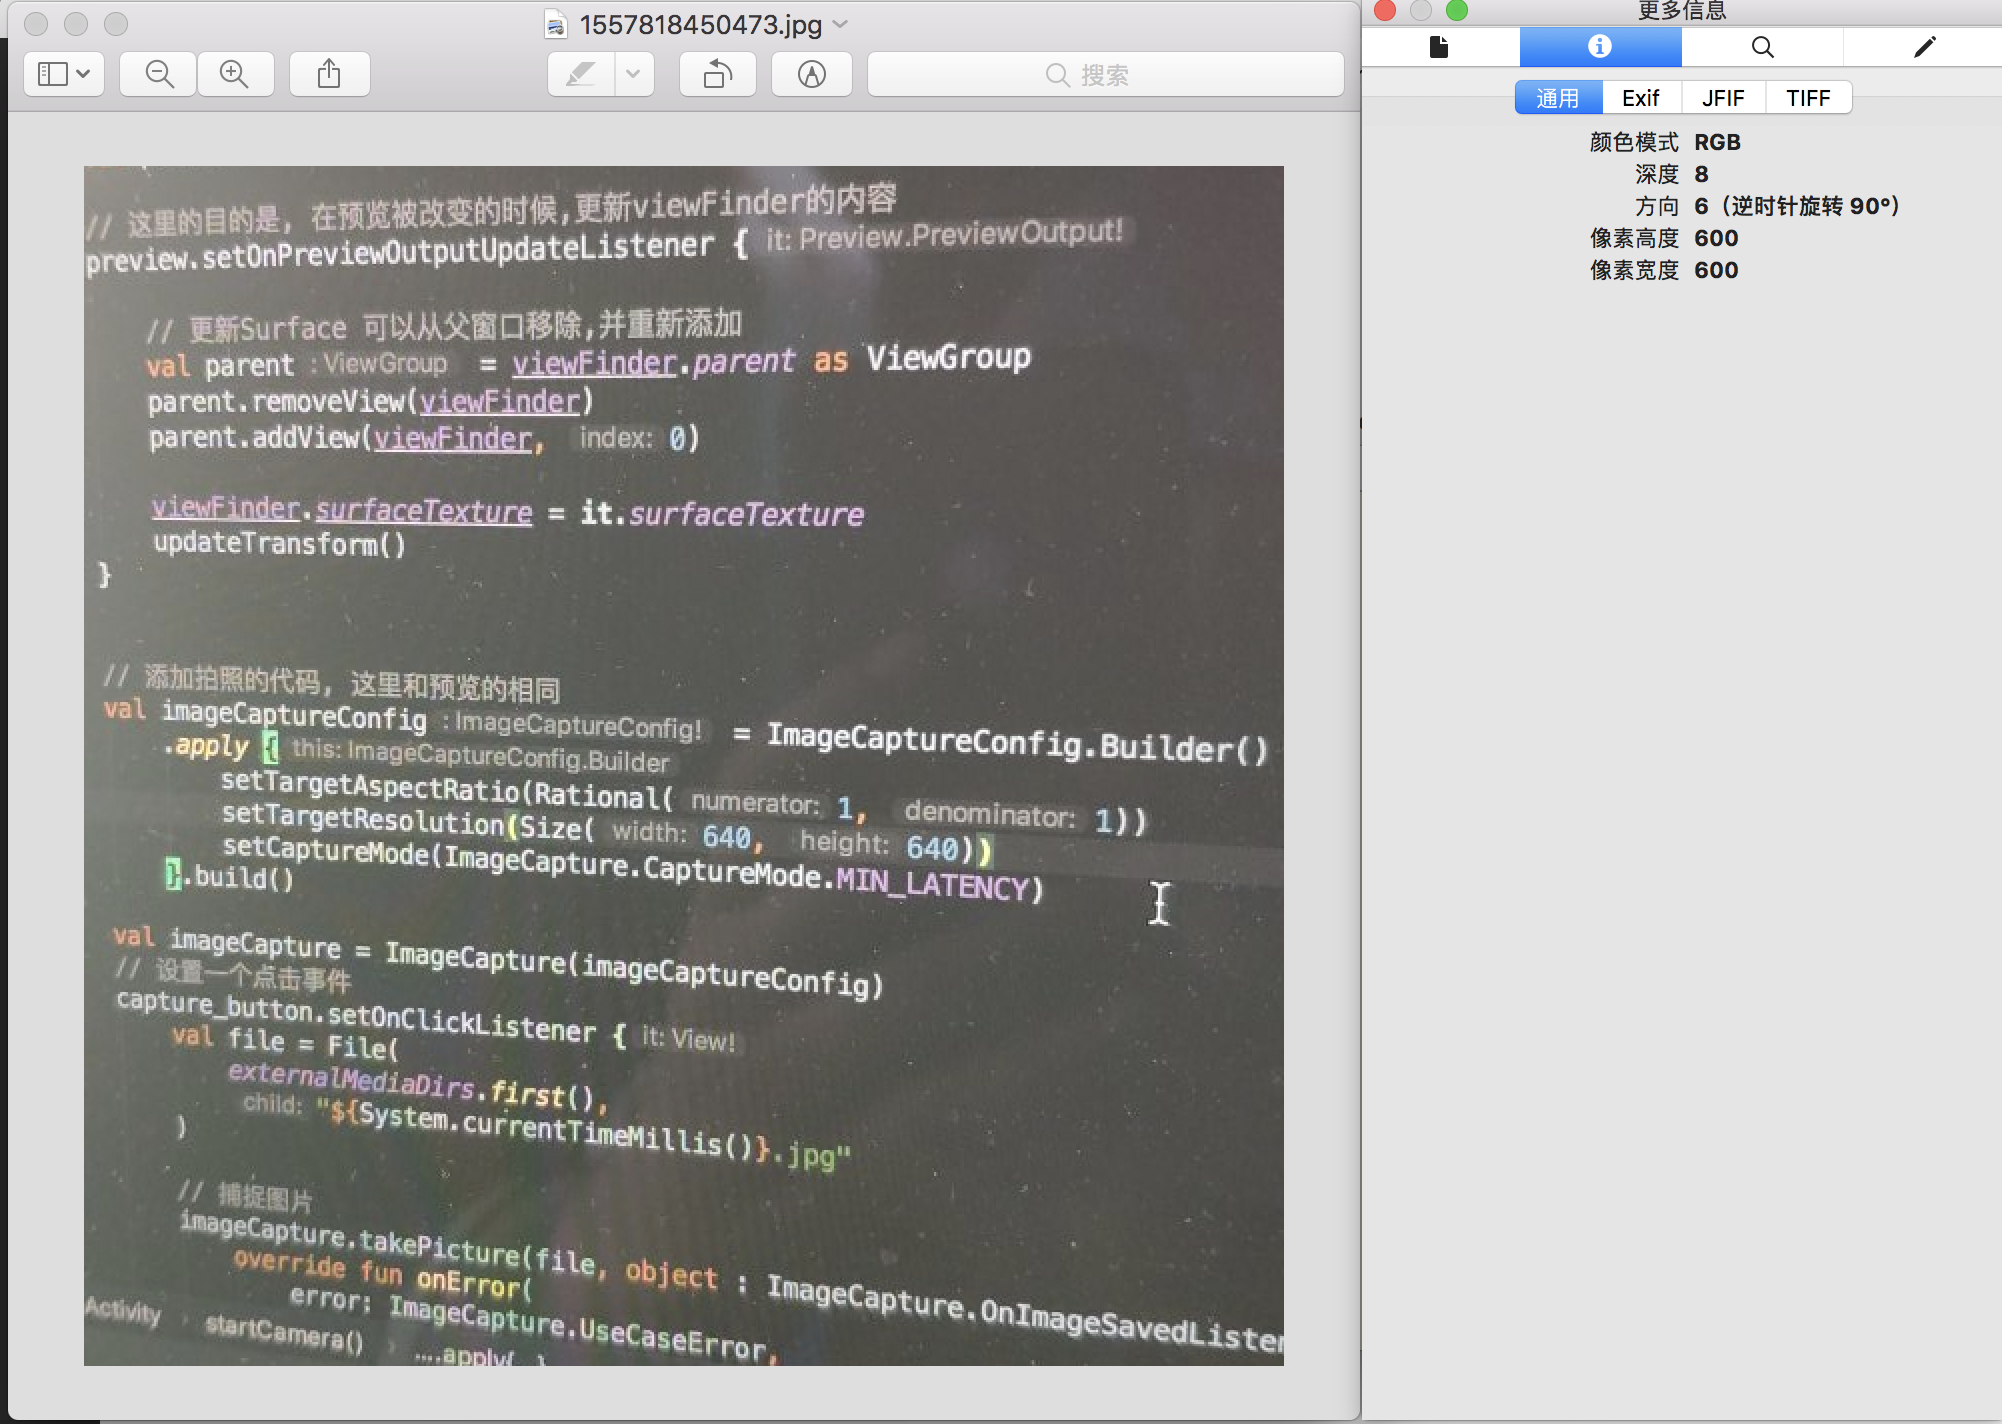
添加一段代码
 1     // 添加拍照的代码, 这里和预览的相同
 2        val imageCaptureConfig = ImageCaptureConfig.Builder()
 3            .apply {
 4                setTargetAspectRatio(Rational(1, 1))
 5                // setTargetResolution(Size(640, 640)) // 设置这个,但实际获取则会根据这个有所不同,根据注释说明, 会是与目标更接近的一个分辨率, 但是可能会因为设备的不同而造成可能崩溃的问题, 不确定就不设置
 6                setCaptureMode(ImageCapture.CaptureMode.MIN_LATENCY)
 7            }.build()
 8
 9        val imageCapture = ImageCapture(imageCaptureConfig)
10        // 设置一个点击事件
11        capture_button.setOnClickListener {
12            val file = File(
13                externalMediaDirs.first(),
14                "${System.currentTimeMillis()}.jpg"
15            )
16
17            // 捕捉图片
18            imageCapture.takePicture(file, object : ImageCapture.OnImageSavedListener {
19                override fun onError(
20                    error: ImageCapture.UseCaseError,
21                    message: String, exc: Throwable?
22                ) {
23                    val msg = "Photo capture failed: $message"
24                    Toast.makeText(baseContext, msg, Toast.LENGTH_SHORT).show()
25                    Log.e("CameraXApp", msg)
26                    exc?.printStackTrace()
27                }
28
29                override fun onImageSaved(file: File) {
30                    val msg = "Photo capture succeeded: ${file.absolutePath}"
31                    Toast.makeText(baseContext, msg, Toast.LENGTH_SHORT).show()
32                    Log.d("CameraXApp", msg)
33                }
34            })
35        }
别忘了修改这里
1CameraX.bindToLifecycle(this, preview, imageCapture)
然后点击拍照按钮
12019-05-14 15:20:50.839 13521-13521/top.kikt.camerax.usage D/CameraXApp: Photo capture succeeded: /storage/emulated/0/Android/media/top.kikt.camerax.usage/1557818450473.jpg
可以看到我们成功的拍了一张照片
使用 adb 命令导出这个图片, 没有配置的话建议你去配置一下
1adb pull /storage/emulated/0/Android/media/top.kikt.camerax.usage/1557818450473.jpg
2open 1557818450473.jpg
分析器
新建一个分析器类,需要继承 ImageAnalysis.Analyzer
备注: 这个代码来自于官方示例(开篇那个连接)
目的是记录平均亮度
 1
 2import android.util.Log
 3import androidx.camera.core.ImageAnalysis
 4import androidx.camera.core.ImageProxy
 5import java.nio.ByteBuffer
 6import java.util.concurrent.TimeUnit
 7
 8/// create 2019-05-14 by cai
 9class LuminosityAnalyzer : ImageAnalysis.Analyzer {
10    private var lastAnalyzedTimestamp = 0L
11
12    /**
13     * Helper extension function used to extract a byte array from an
14     * image plane buffer
15     */
16    private fun ByteBuffer.toByteArray(): ByteArray {
17        rewind()    // Rewind the buffer to zero
18        val data = ByteArray(remaining())
19        get(data)   // Copy the buffer into a byte array
20        return data // Return the byte array
21    }
22
23    override fun analyze(image: ImageProxy, rotationDegrees: Int) {
24        val currentTimestamp = System.currentTimeMillis()
25        // Calculate the average luma no more often than every second
26        if (currentTimestamp - lastAnalyzedTimestamp >=
27            TimeUnit.SECONDS.toMillis(1)
28        ) {
29            // Since format in ImageAnalysis is YUV, image.planes[0]
30            // contains the Y (luminance) plane
31            val buffer = image.planes[0].buffer
32            // Extract image data from callback object
33            val data = buffer.toByteArray()
34            // Convert the data into an array of pixel values
35            val pixels = data.map { it.toInt() and 0xFF }
36            // Compute average luminance for the image
37            val luma = pixels.average()
38            // Log the new luma value
39            Log.d("CameraXApp", "Average luminosity: $luma")
40            // Update timestamp of last analyzed frame
41            lastAnalyzedTimestamp = currentTimestamp
42        }
43    }
44}
还是回到startCamera方法
 1
 2    /// 统计配置
 3    val analyzerConfig = ImageAnalysisConfig.Builder().apply {
 4        // Use a worker thread for image analysis to prevent glitches
 5        val analyzerThread = HandlerThread(
 6            "LuminosityAnalysis"
 7        ).apply { start() }
 8        setCallbackHandler(Handler(analyzerThread.looper))
 9        // In our analysis, we care more about the latest image than
10        // analyzing *every* image
11        setImageReaderMode(ImageAnalysis.ImageReaderMode.ACQUIRE_LATEST_IMAGE)
12    }.build()
13
14    // 设置
15    val analyzerUseCase = ImageAnalysis(analyzerConfig).apply {
16        analyzer = LuminosityAnalyzer()
17    }
别忘了绑定生命周期
1    // 绑定生命周期和CameraX , 这里第二步修改的时候别忘了把imageCapture 也一起绑定上
2    // 同理,第三步的时候需要绑上分析器
3    CameraX.bindToLifecycle(this, preview, imageCapture, analyzerUseCase)
接着重新运行代码,随着预览的图像不同会呈现一个平均亮度
 12019-05-14 15:37:32.883 14412-14435/top.kikt.camerax.usage D/CameraXApp: Average luminosity: 136.85490234375
 22019-05-14 15:37:33.889 14412-14435/top.kikt.camerax.usage D/CameraXApp: Average luminosity: 118.26471354166667
 32019-05-14 15:37:34.883 14412-14435/top.kikt.camerax.usage D/CameraXApp: Average luminosity: 137.15953450520834
 42019-05-14 15:37:35.934 14412-14435/top.kikt.camerax.usage D/CameraXApp: Average luminosity: 136.98435221354165
 52019-05-14 15:37:36.929 14412-14435/top.kikt.camerax.usage D/CameraXApp: Average luminosity: 137.244296875
 62019-05-14 15:37:37.964 14412-14435/top.kikt.camerax.usage D/CameraXApp: Average luminosity: 136.60428059895833
 72019-05-14 15:37:38.984 14412-14435/top.kikt.camerax.usage D/CameraXApp: Average luminosity: 136.93064127604165
 82019-05-14 15:37:39.967 14412-14435/top.kikt.camerax.usage D/CameraXApp: Average luminosity: 125.22169921875
 92019-05-14 15:37:41.001 14412-14435/top.kikt.camerax.usage D/CameraXApp: Average luminosity: 115.343046875
102019-05-14 15:37:42.045 14412-14435/top.kikt.camerax.usage D/CameraXApp: Average luminosity: 107.64242838541666
112019-05-14 15:37:43.061 14412-14435/top.kikt.camerax.usage D/CameraXApp: Average luminosity: 76.732939453125
122019-05-14 15:37:44.082 14412-14435/top.kikt.camerax.usage D/CameraXApp: Average luminosity: 112.82620442708334
132019-05-14 15:37:45.105 14412-14435/top.kikt.camerax.usage D/CameraXApp: Average luminosity: 116.12317057291666
142019-05-14 15:37:46.086 14412-14435/top.kikt.camerax.usage D/CameraXApp: Average luminosity: 115.94841796875
152019-05-14 15:37:47.142 14412-14435/top.kikt.camerax.usage D/CameraXApp: Average luminosity: 117.0526171875
162019-05-14 15:37:48.165 14412-14435/top.kikt.camerax.usage D/CameraXApp: Average luminosity: 114.96781901041666
编码结束
到这一步为止, 编码的过程就结束了
进阶探索
通常来说,相机现在会结合很多其他的用途
- 摄像
- 直播视频上传(视频通话)
- 图像识别
- 增强现实
- 其他...
别看我说的很热闹,但是让我结合这几个方向来写的话,篇幅不允许是一点, 而且这些东西每一行都是能写一整个系列文章的...(我才不会说是我不会做呢, 哼 😒)
还记得 ImageAnalysis.Analyzer 这个类吗, 这个类的analyze方法会回调一些信息
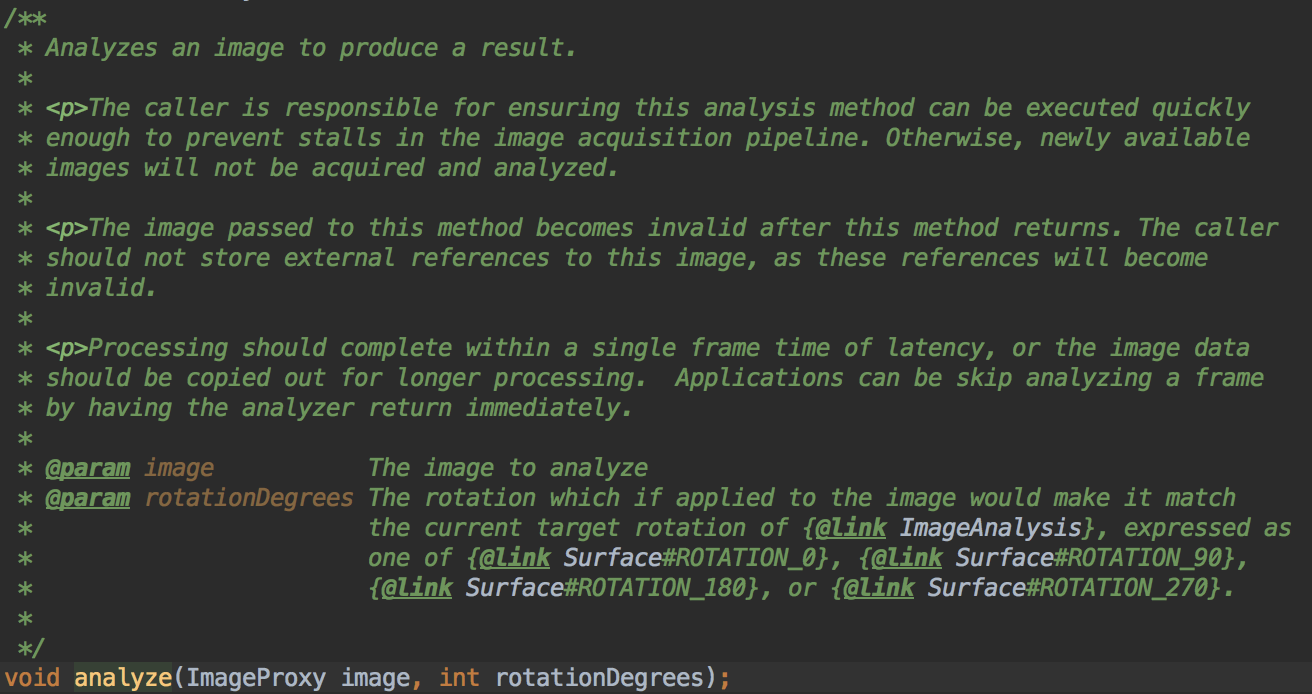
简单来说, 会回调一些 image 的信息和角度
ImageProxy 中包含很多的信息
常用的有:
getFormat: 视频格式 ,具体查看
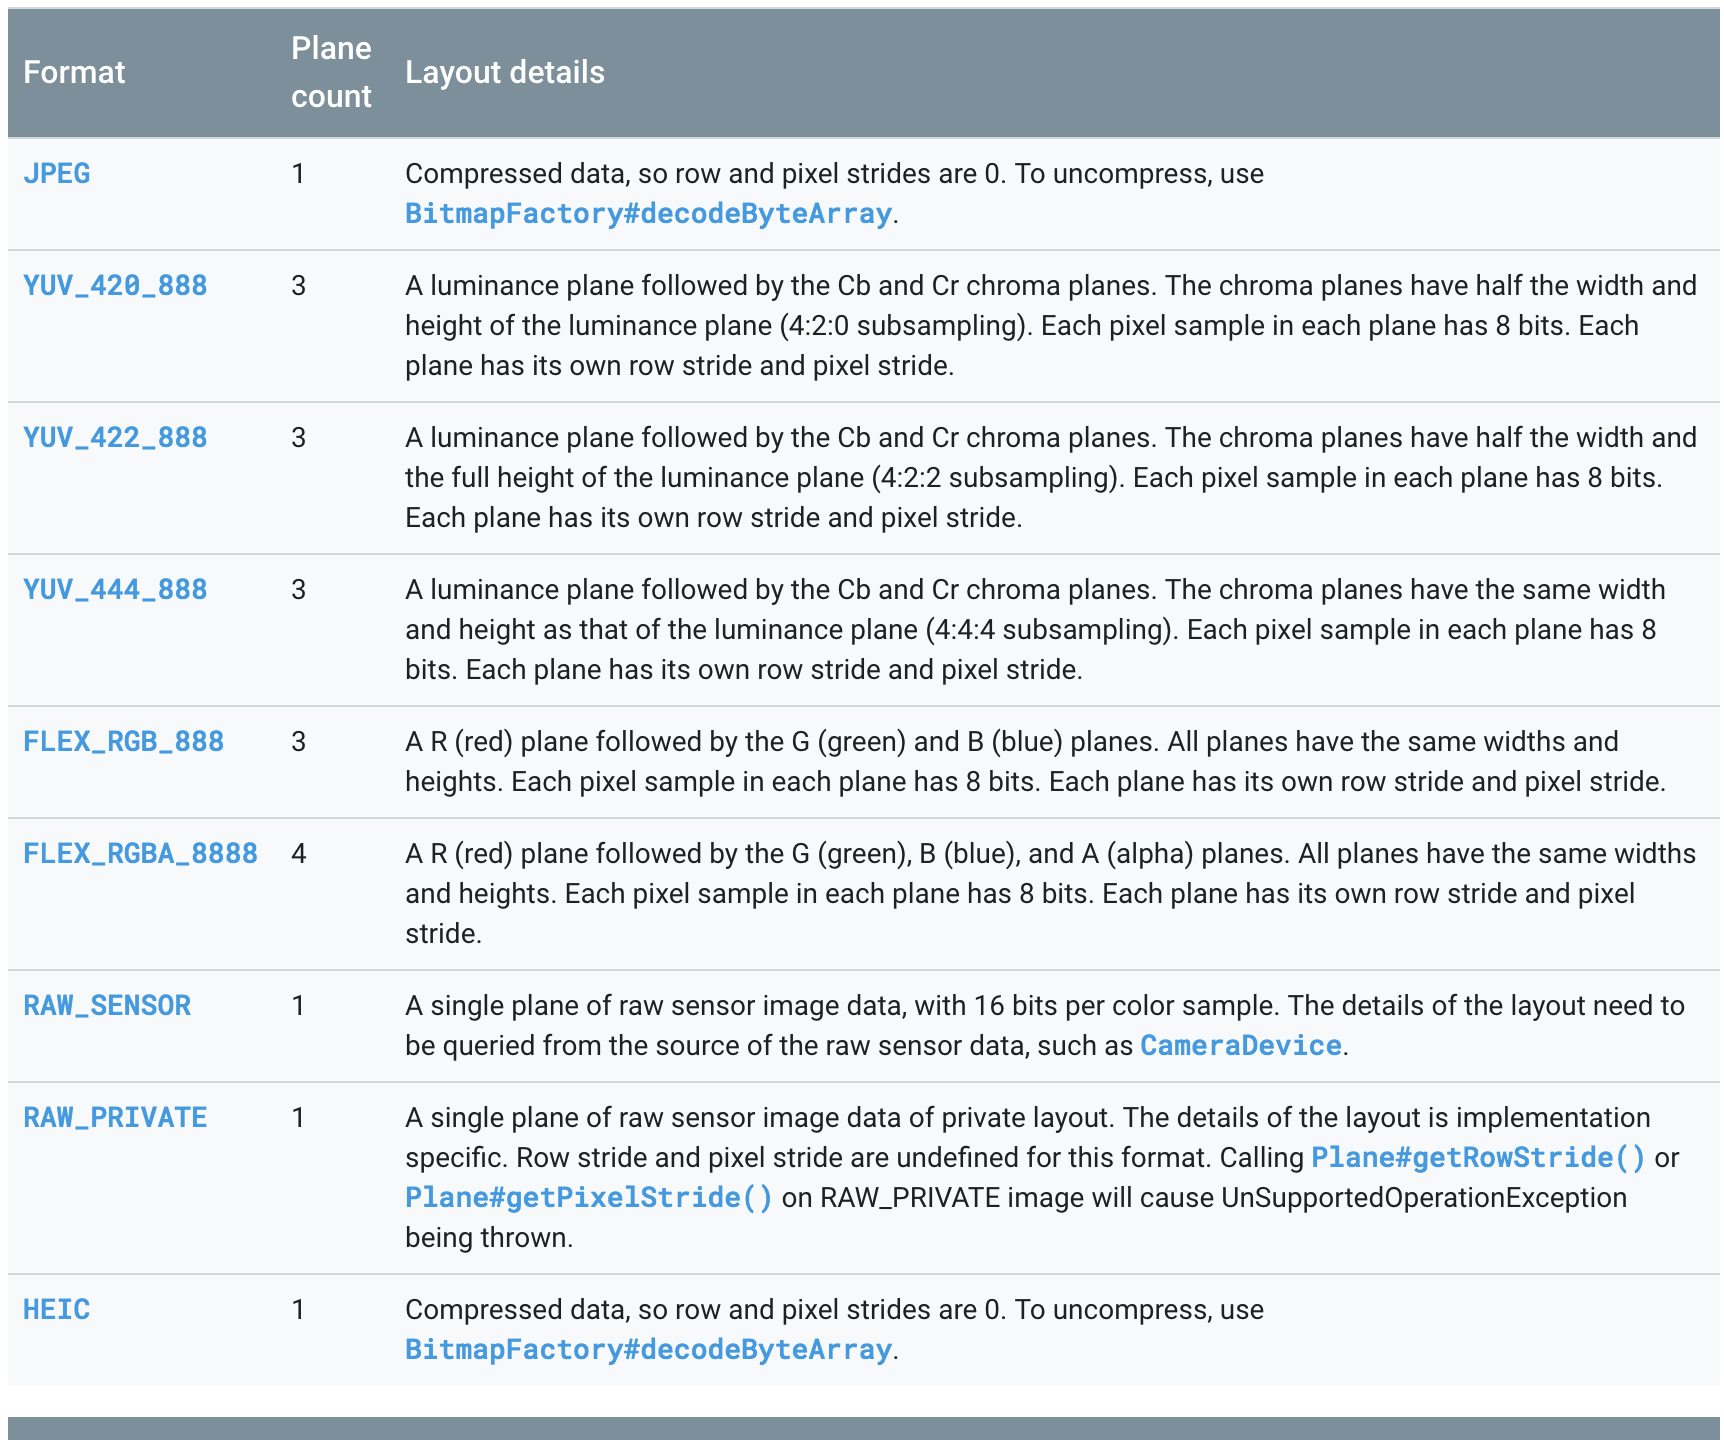
一般来说都应该是YUV_420_888
getWidth: 宽度
getHeight: 高度
getTimeStamp: 据说是纳秒单位, 和设备的时间基有关, 我是没看懂什么意思 😁
getPlanes: 视频数据, 类型是PlaneProxy[] kotlin 对应:Array<PlaneProxy>, 这东西的 size 是根据 getFormat 的格式决定的
关于 YUV_420_888 这部分可以查看 和
然后通过解析数据封装成需要的格式就可以了
后记
简单来说, CameraX 的 api 比 Camera2 和 Camera 看起来都要好很多
项目地址:
以上