flutter Jenkins+fastlane 自动化打测试包, 并上传蒲公英
文章目录
自动化打包上传是一个释放双手的过程, 本文就简单重复一下打包的过程
本文包括 iOS 和 android 篇.
如果有需要, macOS 和 web 也可以加进来, 步骤并不复杂, 但本篇暂时不讲
开发环境
- macOS, 如果你不是 macOS, 那你只能打包安卓部分
- Xcode, 因为 Xcode 会自动安装包含 git 在内的一些其他环境, 所以理论上有这个就够了
- brew
- android sdk
- flutter sdk
- jenkins
- fastlane
到 flutter sdk 为止就不讲了, 我相信看这篇文章的人, 起码 flutter 程序已经开发完了, 只是因为修改个文案就要打包的事被搞的不胜其扰, 才决定自动化的
而开发 flutter 基本上可以理解为包含如下工具/SDK
- ruby
- git
- Xcode
- brew
- Android SDK
- Flutter SDK
Jenkins
有几点要写在前面, 这东西建议使用 brew 安装, 当然你要是坚持, 也可以用 jendins 的 war/jar 包自己部署,见仁见智
但不要使用 docker 的方式, 因为 docker 不包含 xcode 的环境, 执行起来比较麻烦
brew install jenkins-lts安装命令, 执行这个等着就好了, 具体的过程就不说了, 用过 brew 的人都懂- 启动, 这里使用一个小技巧启动
nohup jenkins-lts > /tmp/jenkins.log 2>&1 &用 nohup 的方式启动, 好处有如下两个- 命令行窗口可以关闭, 不重启则不用重新运行, 当然你要是自己建 service 也可以, 看你自己的水平
- 可以记录一些日志, 当然我这里觉得不重要, 所以暂时先放在/tmp 文件夹里, 如果需要保留, 则放在别的文件夹里, 因为 /tmp 内的文件重启后会被自动删除
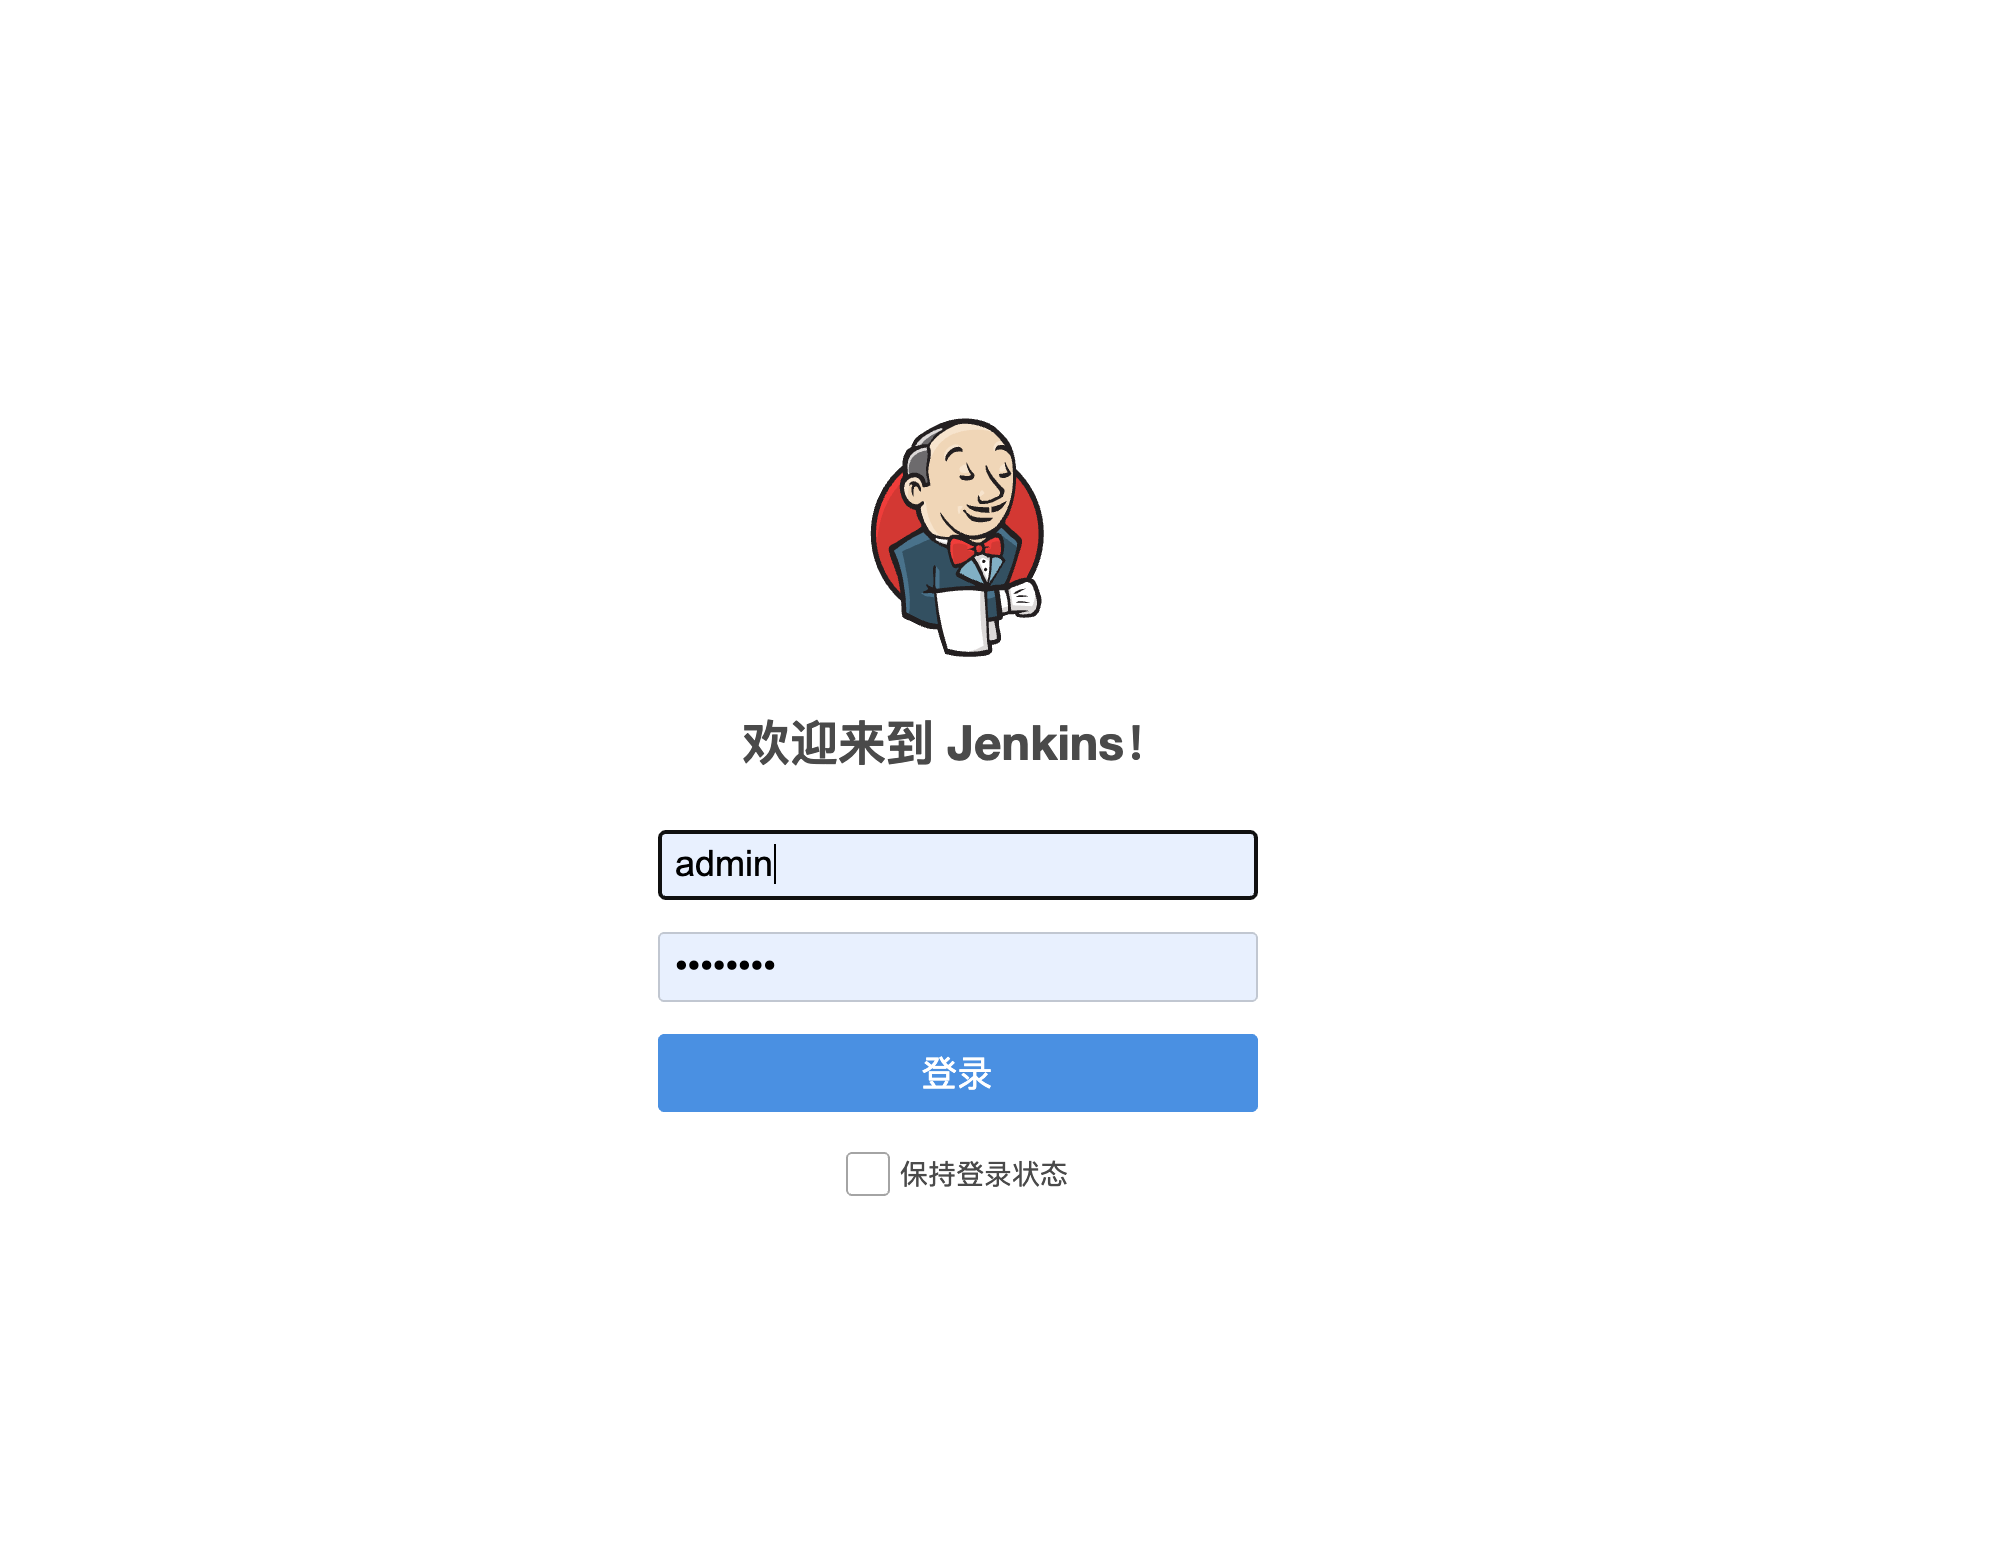
- 启动,在浏览里打开
http://localhost:8080/
这里要注意几点
- 初始化运行的时候, 根据提示, 去查看对应的初始化密码, macOS 一般是在启动后在
~/.jenkins/secrets/initialAdminPassword位置,~代表你的用户目录, 比如我的就是/Users/Caijinglong - 初始化后, 建议安装的插件你就都安装上就行, 不用考虑那么多
- 用户名和密码一定要记住, 不然后面很麻烦
当一切准备就绪的时候, 可能是这样的, 也可能是这样的
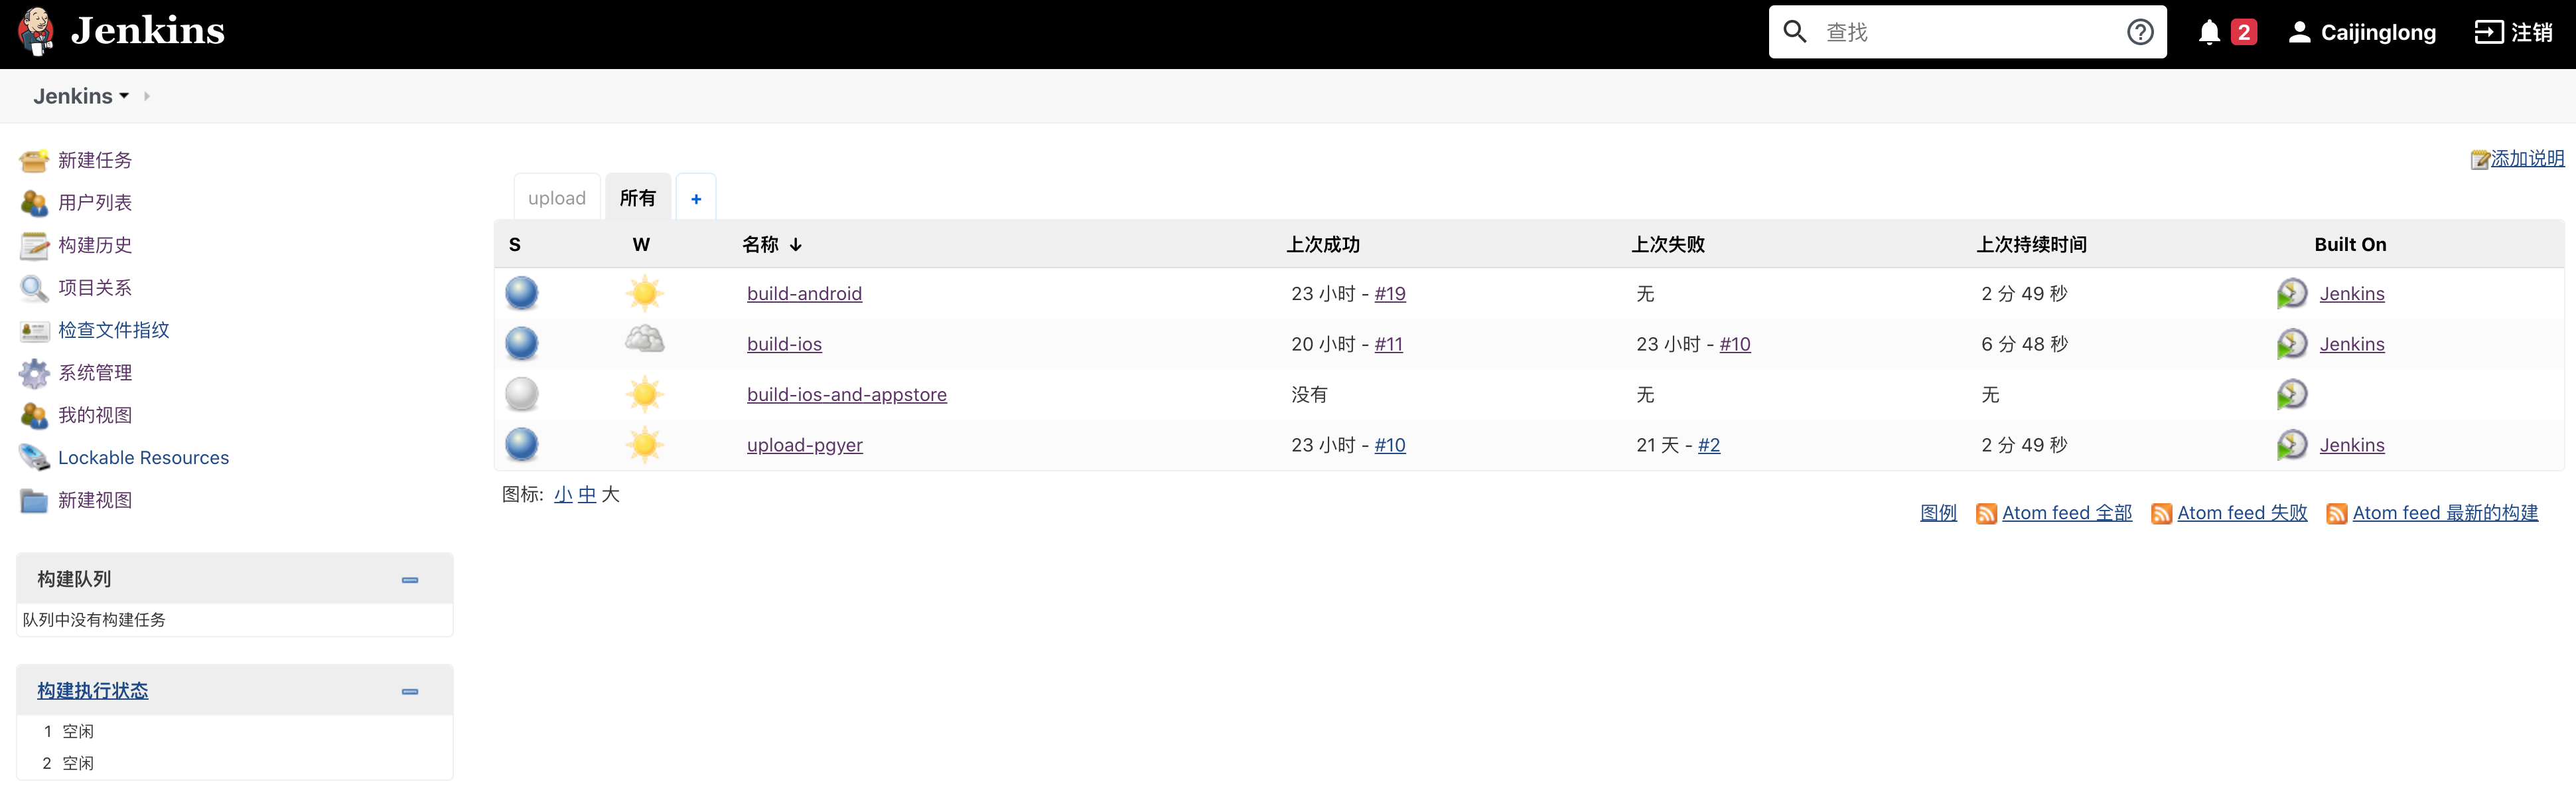
我这里是因为已经加入了一些任务, 初始化的应该是空的.
安装插件
系统管理, 插件管理


这里建议安装的插件有如下几个
- , 发布测试包到蒲公英的插件
- 这个插件是能把多个任务结合到一起的插件, 方便插入子任务, 比如我有 build ios 和 build android 两个任务, 这东西可以指定顺序, 让两个任务顺序执行
Jenkins 的安装告一段落, 具体的配置到了配置篇再写
FastLane
这东西的安装看你的实际情况, 一般情况下, 使用 brew 安装也是可以的, 然后, 这东西是一个 ruby 写的自动化打包的工具, 也可以用 gem 安装
1$ brew install fastlane
1$ sudo gem install fastlane
brew 发布的版本不是最新的, 所以, 根据你的情况选择使用哪种方式安装, 提示: sudo 会要求输入密码(系统的登录密码, 输入完回车)
蒲公英账号
官网:
具体的申请步骤就不讲了, 然后, 现在发布 apk 需要实名制, 自己传身份吧
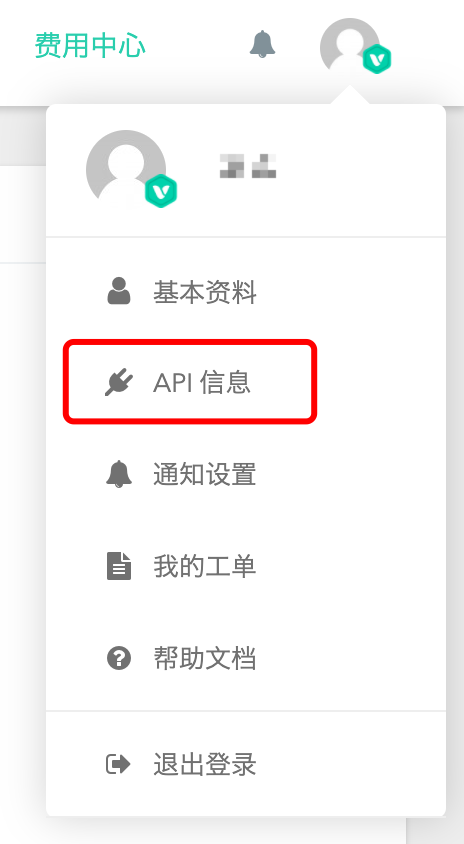
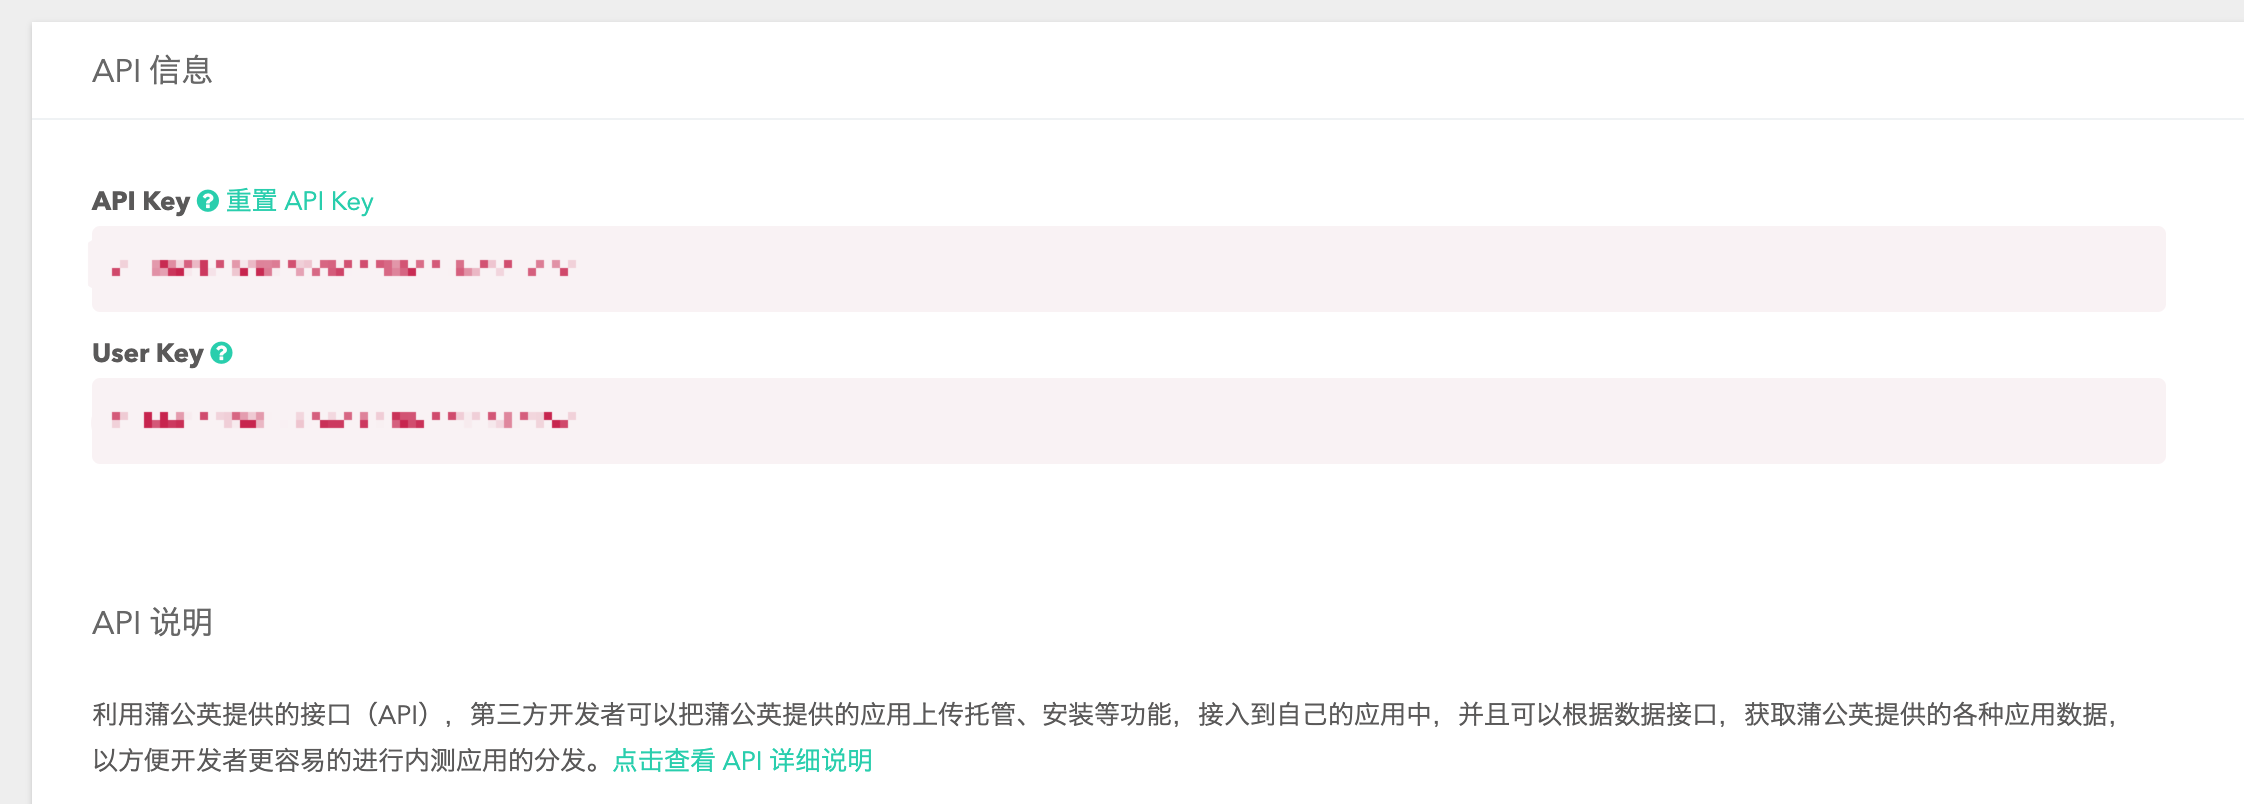
这里的信息上传的时候会用到, 先
编写打包脚本
在使用 Jenkins 之前需要先在外部环境尝试, 因为 Jenkins 中调试错误比较麻烦
创建个测试项目先
1$ flutter create auto_build_example
2$ code auto_build_example
我这里用 vscode 打开, 大家呢则根据自己的习惯
安卓打包脚本
这个很简单, 其实只需要flutter build apk --release -v --split-per-abi 就可以了, 你则看自己的情况修改参数即可
1[   +3 ms] ✓ Built build/app/outputs/apk/release/app-armeabi-v7a-release.apk (5.1MB).
2[        ] ✓ Built build/app/outputs/apk/release/app-arm64-v8a-release.apk (5.4MB).
3[        ] ✓ Built build/app/outputs/apk/release/app-x86_64-release.apk (5.6MB).
打包结尾会有具体放置的位置, 我个人建议使用 v7a 的, 也就是build/app/outputs/apk/release/app-armeabi-v7a-release.apk, 因为某些 2018 2019 年的手机甚至都还是 v7a 架构(实测), 所以嘛, 先这样
我们需要记录的信息就是 打包命令 和 打包产物的位置
iOS 打包
这个就是需要装 fastlane 的原因了, 因为使用命令行打包的命令比较复杂, 而且还有证书相关的问题, 很容易遇到问题.
但很多问题 fastlane 都帮我们解决过了
注意: 本篇的打包是 ad-hoc 的, 而不是 appstore 的, 所以想要使用的人, udid 必须被包含在证书内, 然后, 这个是有名额限制的, 一个自然年内, 只可以有 100 个, 来年是否继续有效, 需要续约, 具体添加的方法可以自行搜索一下(提示, 直接通过 usb 线插在电脑上, 通过 xcode register device 的会被包含在这个名额内)
初始化 fastlane 配置
1$ fastlane init

这里有 4 个选项
- 自动截图
- 自动发布到 beta 的 TestFlight
- 自动发布到 AppStore
- 手动配置
因为我们其实目前的目的是打包 ad-hoc 的包, 给测试人员安装, 而不用给每个人都插上手机, 所以我们选 4

稍等片刻后会让连点几下回车, 主要就是把文档之类的地址什么的贴上来, 让有问题的朋友可以快速点进去
然后就是, 我这的版本不是最新版,提示应该更新之类的
修改配置文件
ios 目录下会多一个 fastlane 目录
1$ tree fastlane
2fastlane
3├── Appfile
4└── Fastfile
Appfile 是 app 的信息
Fastfile 是配置信息
我们先修改 Fastfile
默认的是这样的
 1# This file contains the fastlane.tools configuration
 2# You can find the documentation at https://docs.fastlane.tools
 3#
 4# For a list of all available actions, check out
 5#
 6#     https://docs.fastlane.tools/actions
 7#
 8# For a list of all available plugins, check out
 9#
10#     https://docs.fastlane.tools/plugins/available-plugins
11#
12
13# Uncomment the line if you want fastlane to automatically update itself
14# update_fastlane
15
16default_platform(:ios)
17
18platform :ios do
19  desc "Description of what the lane does"
20  lane :custom_lane do
21    # add actions here: https://docs.fastlane.tools/actions
22  end
23end
默认的长这样, 是 ruby 语法, 和 cocoapod 的配置文件语法基本相同, do end 可以简单理解为{}, 其中就是具体要执行的代码了
lane :custom_lane do 这行的 custom_lane 就是任务的名字, 里面可以添加 actions, 会按照顺序执行
我们可以按照提示打开 看看都有啥东西, 比如添加一个
然后我把任务名字修改为 ad_hoc
1default_platform(:ios)
2
3platform :ios do
4  desc "Description of what the lane does"
5  lane :ad_hoc do
6    # add actions here: https://docs.fastlane.tools/actions
7    build_ios_app
8  end
9end
然后执行
1$ fastlane ad_hoc
 12020-08-19 13:41:19.521 xcodebuild[64867:9469238] Unknown simulator cpu type (16777228)
 2
 3❌  error: Signing for "Runner" requires a development team. Select a development team in the Signing & Capabilities editor. (in target 'Runner' from project 'Runner')
 4
 5
 6** ARCHIVE FAILED **
 7[13:41:21]: Exit status: 65
 8[13:41:21]:
 9[13:41:21]: Maybe the error shown is caused by using the wrong version of Xcode
10[13:41:21]: Found multiple versions of Xcode in '/Applications/'
11[13:41:21]: Make sure you selected the right version for your project
12[13:41:21]: This build process was executed using '/Applications/Xcode.app'
13[13:41:21]: If you want to update your Xcode path, either
14[13:41:21]:
15[13:41:21]: - Specify the Xcode version in your Fastfile
16[13:41:21]: ▸ xcversion(version: "8.1") # Selects Xcode 8.1.0
17[13:41:21]:
18[13:41:21]: - Specify an absolute path to your Xcode installation in your Fastfile
19[13:41:21]: ▸ xcode_select "/Applications/Xcode8.app"
20[13:41:21]:
21[13:41:21]: - Manually update the path using
22[13:41:21]: ▸ sudo xcode-select -s /Applications/Xcode.app
23[13:41:21]:
24
25+-------------+-------------------------+
26|           Build environment           |
27+-------------+-------------------------+
28| xcode_path  | /Applications/Xcode.app |
29| gym_version | 2.156.1                 |
30| sdk         | iPhoneOS13.5.sdk        |
31+-------------+-------------------------+
32
33[13:41:21]: ▸ note: Using new build system
34[13:41:21]: ▸ note: Building targets in parallel
35[13:41:21]: ▸ note: Planning build
36[13:41:21]: ▸ note: Constructing build description
37[13:41:21]: ▸ error: Signing for "Runner" requires a development team. Select a development team in the Signing & Capabilities editor. (in target 'Runner' from project 'Runner')
38[13:41:21]:
39[13:41:21]: ⬆️  Check out the few lines of raw `xcodebuild` output above for potential hints on how to solve this error
40[13:41:21]: 📋  For the complete and more detailed error log, check the full log at:
41[13:41:21]: 📋  /Users/jinglongcai/Library/Logs/gym/Runner-Runner.log
42[13:41:21]:
43[13:41:21]: Looks like fastlane ran into a build/archive error with your project
44[13:41:21]: It's hard to tell what's causing the error, so we wrote some guides on how
45[13:41:21]: to troubleshoot build and signing issues: https://docs.fastlane.tools/codesigning/getting-started/
46[13:41:21]: Before submitting an issue on GitHub, please follow the guide above and make
47[13:41:21]: sure your project is set up correctly.
48[13:41:21]: fastlane uses `xcodebuild` commands to generate your binary, you can see the
49[13:41:21]: the full commands printed out in yellow in the above log.
50[13:41:21]: Make sure to inspect the output above, as usually you'll find more error information there
51[13:41:21]:
52+------------------+------------+
53|         Lane Context          |
54+------------------+------------+
55| DEFAULT_PLATFORM | ios        |
56| PLATFORM_NAME    | ios        |
57| LANE_NAME        | ios ad_hoc |
58+------------------+------------+
59[13:41:21]: Error building the application - see the log above
60
61+------+------------------+-------------+
62|           fastlane summary            |
63+------+------------------+-------------+
64| Step | Action           | Time (in s) |
65+------+------------------+-------------+
66| 1    | default_platform | 0           |
67| 💥   | build_ios_app    | 5           |
68+------+------------------+-------------+
69
70[13:41:21]: fastlane finished with errors
71
72[!] Error building the application - see the log above
好吧, 有一堆的日志, 其中会告诉我们哪个任务出错了, 原因是啥
我这里检查了一下, 这里是签名问题, 查一下 fastlane 里的解决方案, 告诉我们使用来解决
配置 match
match 其实是将一些签名的配置文件储存在某个位置, 然后达到多设备能同步的目的
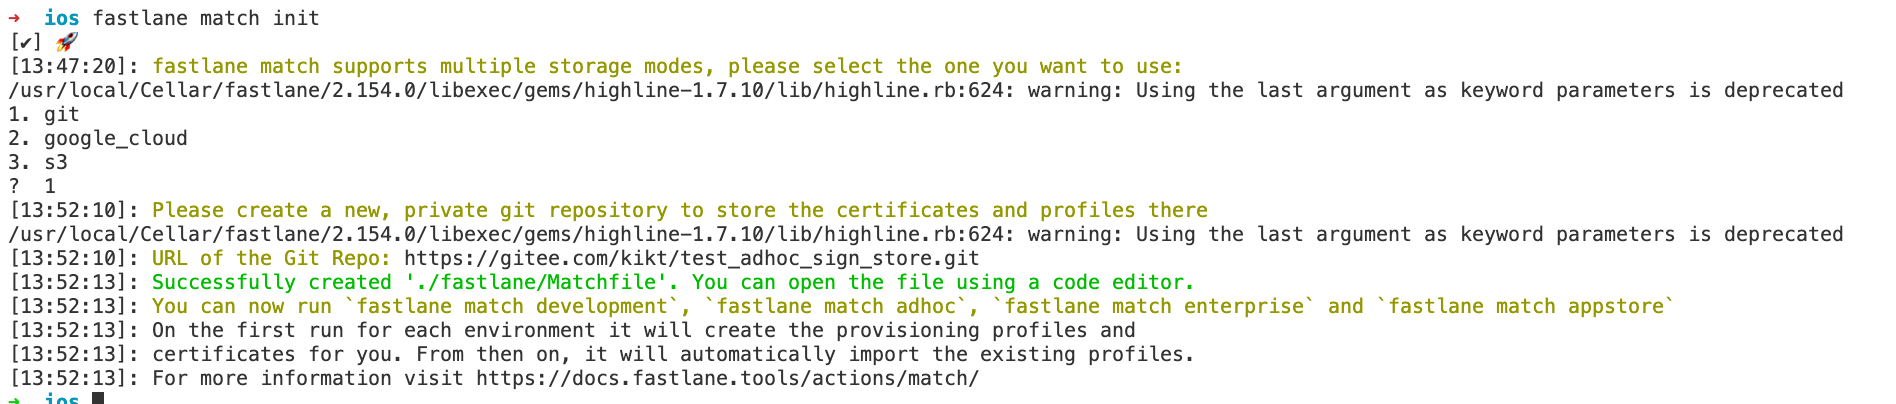
1$ fastlane match init

fastlane 提供了三种储存方案, 你如果有谷歌云或者 S3, 也可以选择用那两个, 然后根据提示来
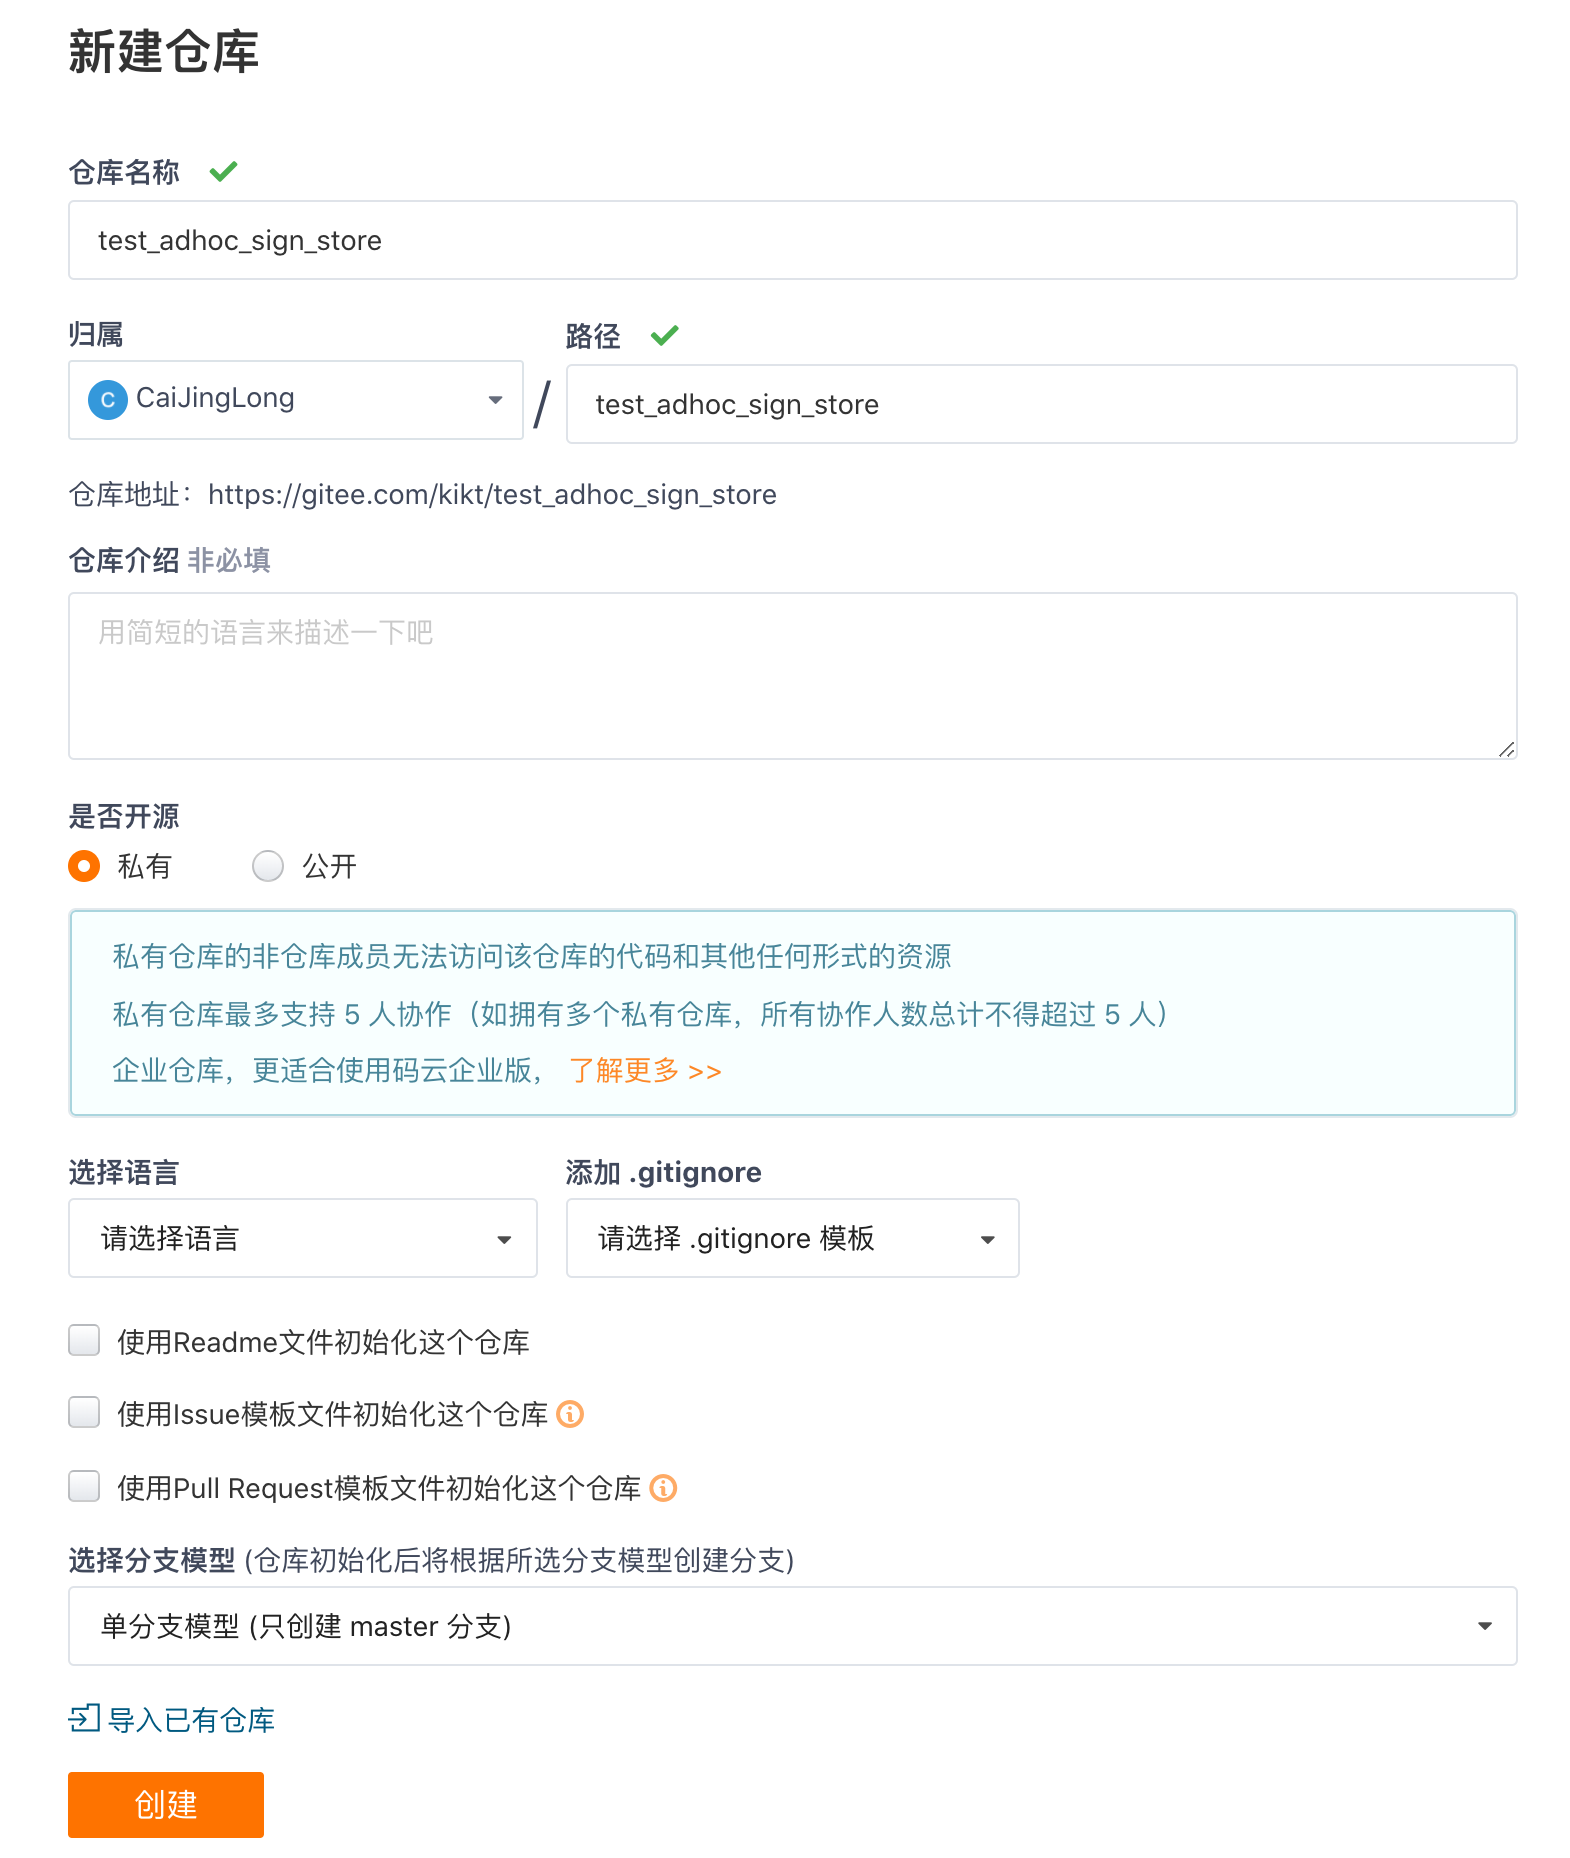
这里我选择 git, 毕竟贫穷限制了我, 我去 gitee 创建仓库, 你也可以存在任何你认为合适的 git 仓库
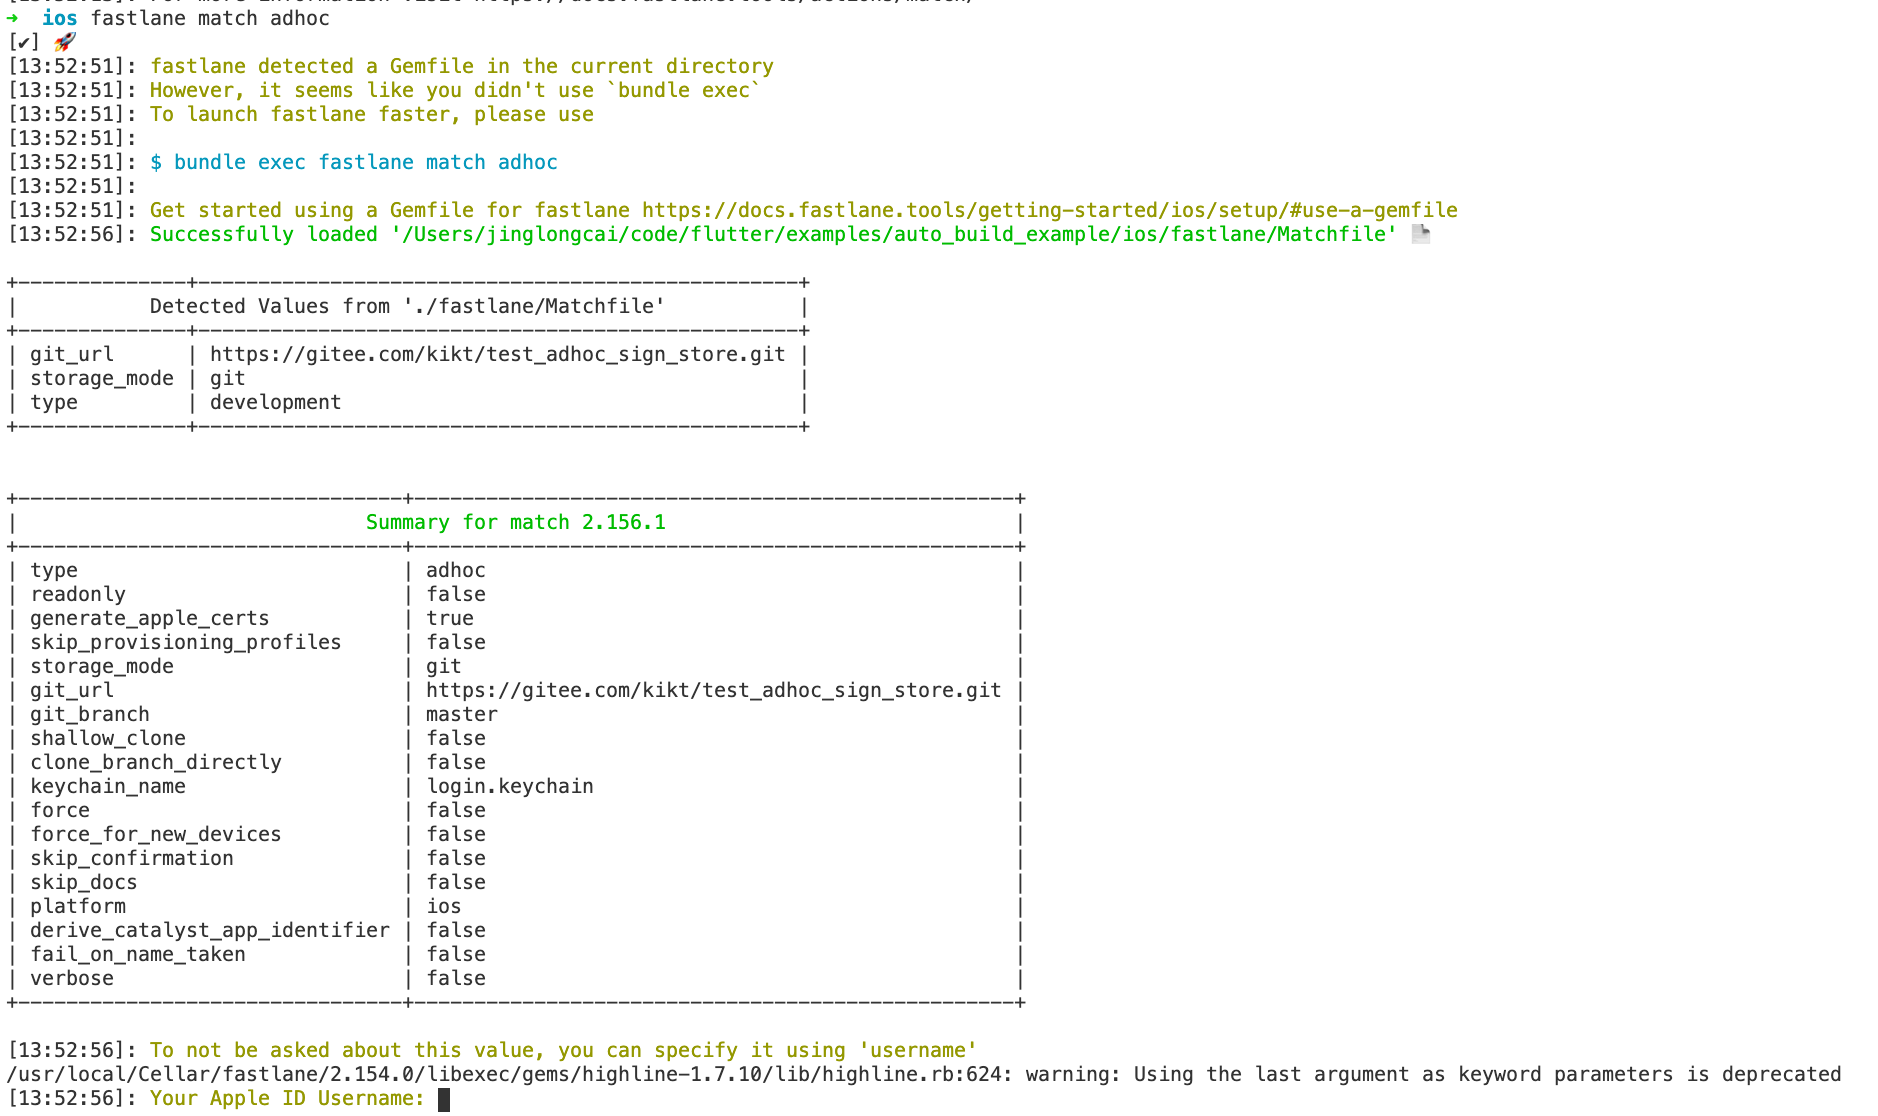
这里输入你的苹果账号
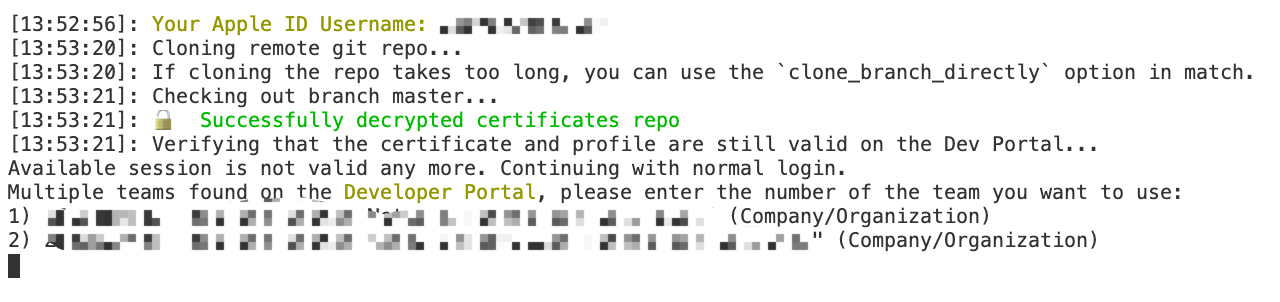
我这里因为这个账号对应有 2 个公司开发者, 所以需要选一个. 输入 1 或 2 回车继续, 如果你只有一个, 估计这一步会自动跳过

下一步是输入你的 app 的 bundle id
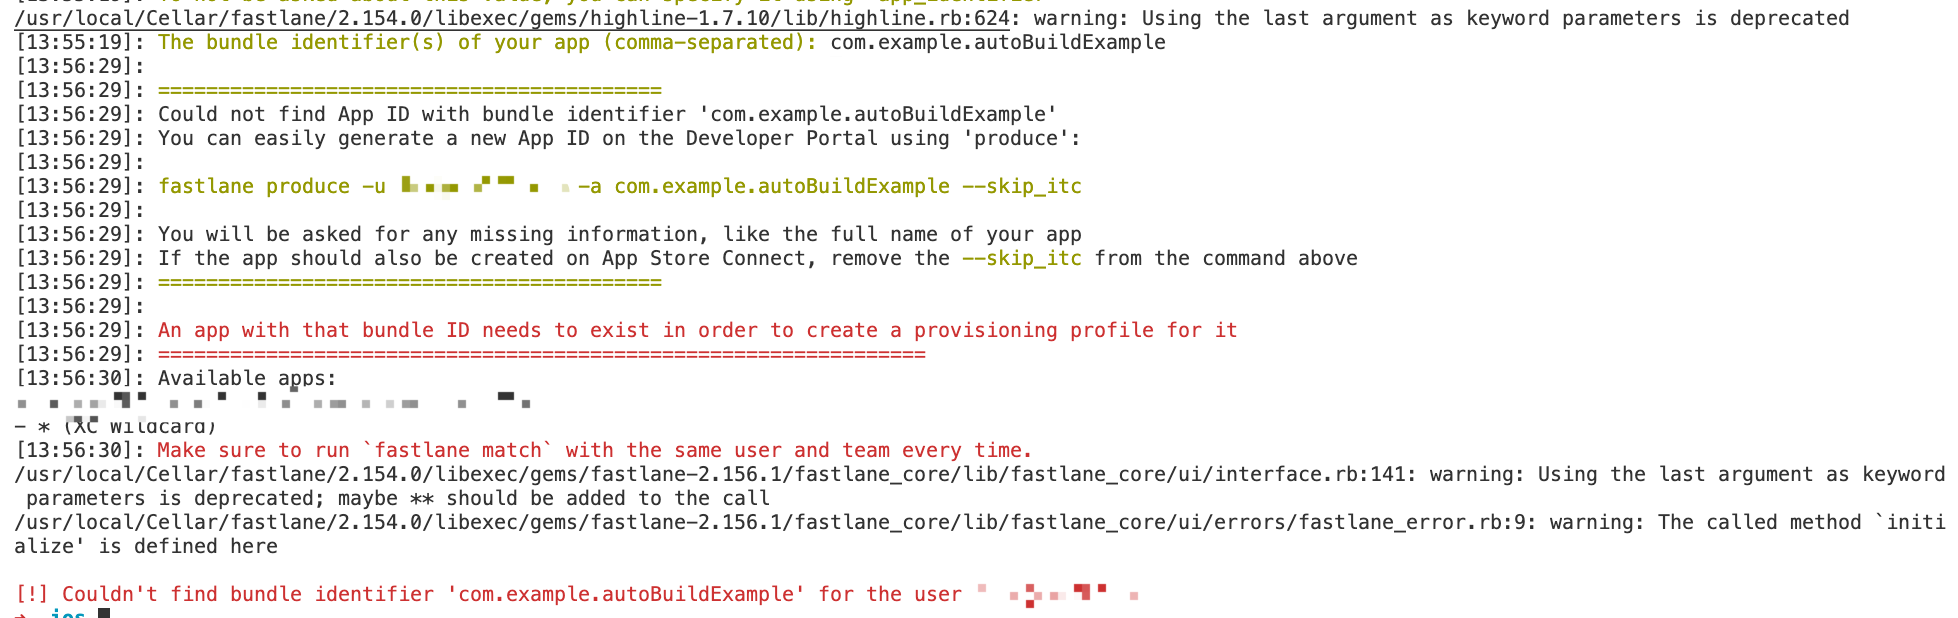
这一步是提示, 没有找到签名文件, 其实这是因为这一步只会找现成的签名, 如果没有的话则不会自动创建, 我们去 xcode 里创建一个签名
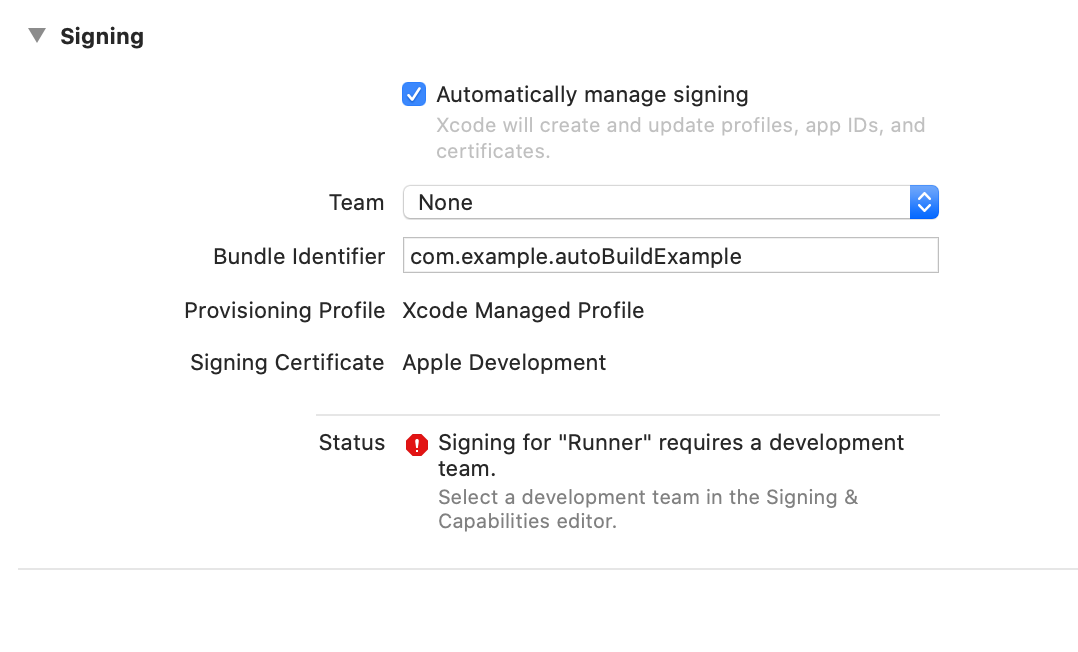
在这里选择一个 Team, 然后等成功后再重新执行上面的 match adhoc
这里可能会有朋友发现, 还是会报错, 无法 match, 其实这是因为你的帐号在 appstore 上并没有对应的 App 的原因, 两个解决方案
- 选择已有的 app bundle id
- 创建新的 app
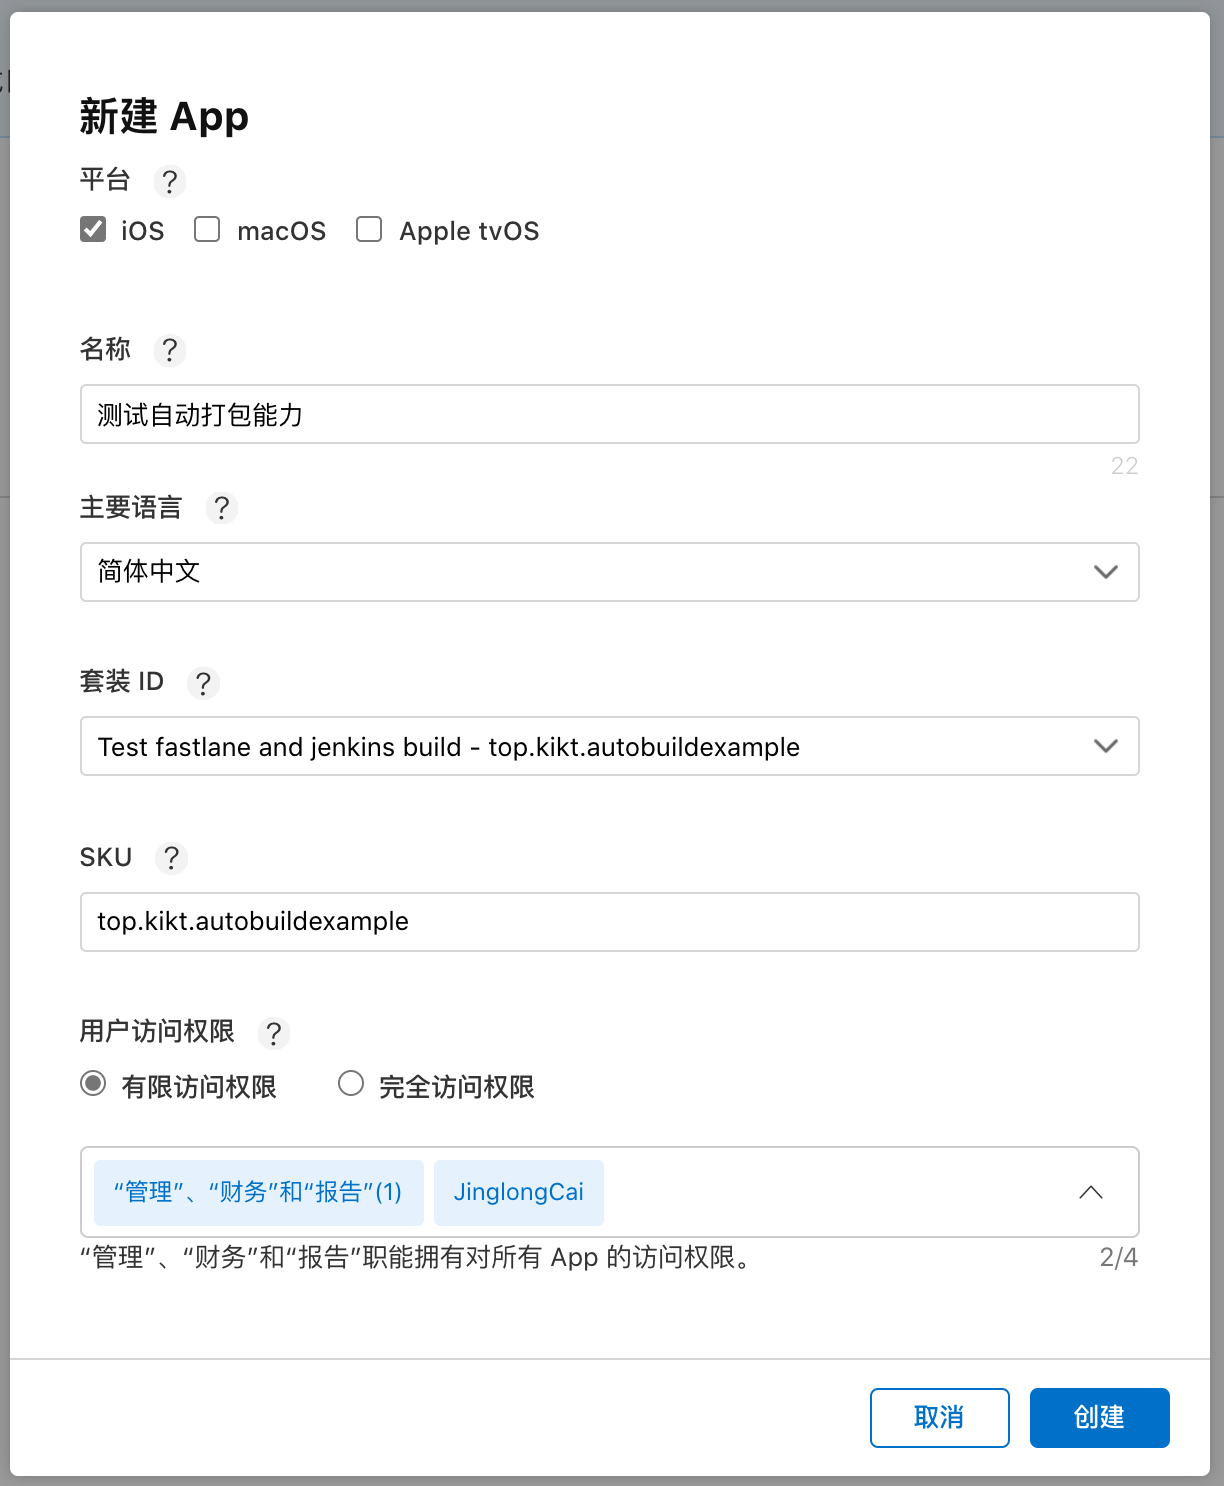
我这里为了演示, 在公司的帐号上创建一个 app(不发布就行了 😁)
- 创建新的"套装 ID"
- 新建一个 app

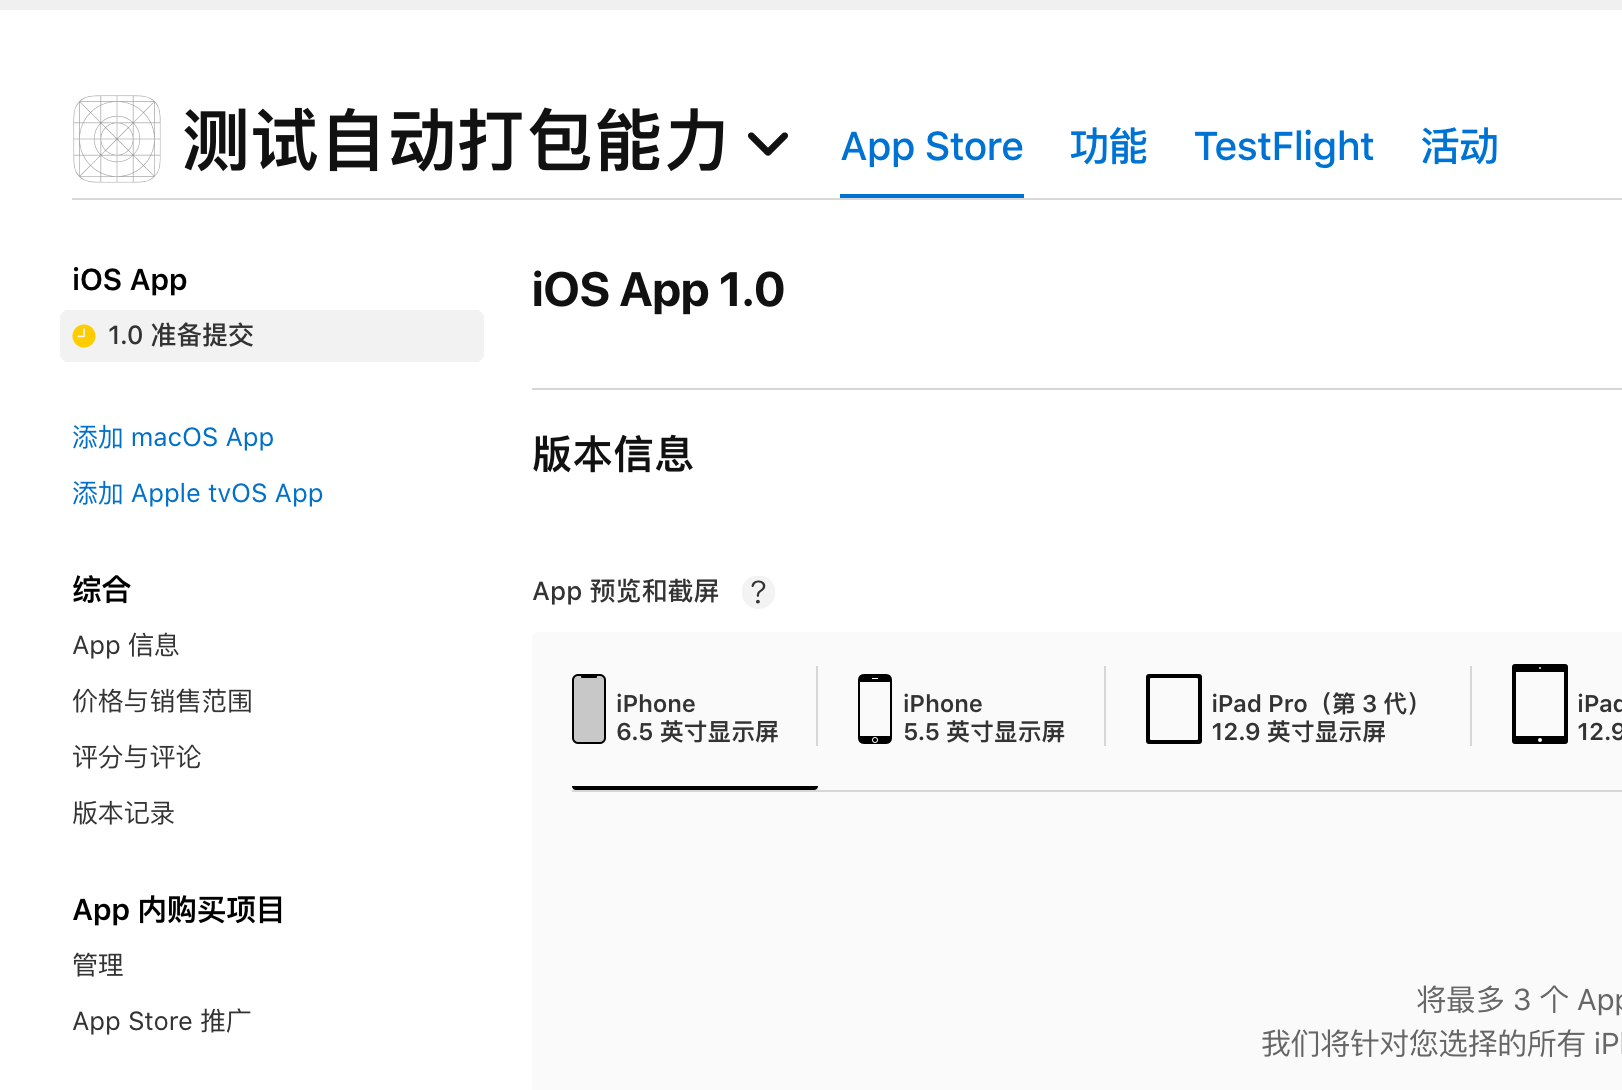
然后再去执行 match 就可以成功了
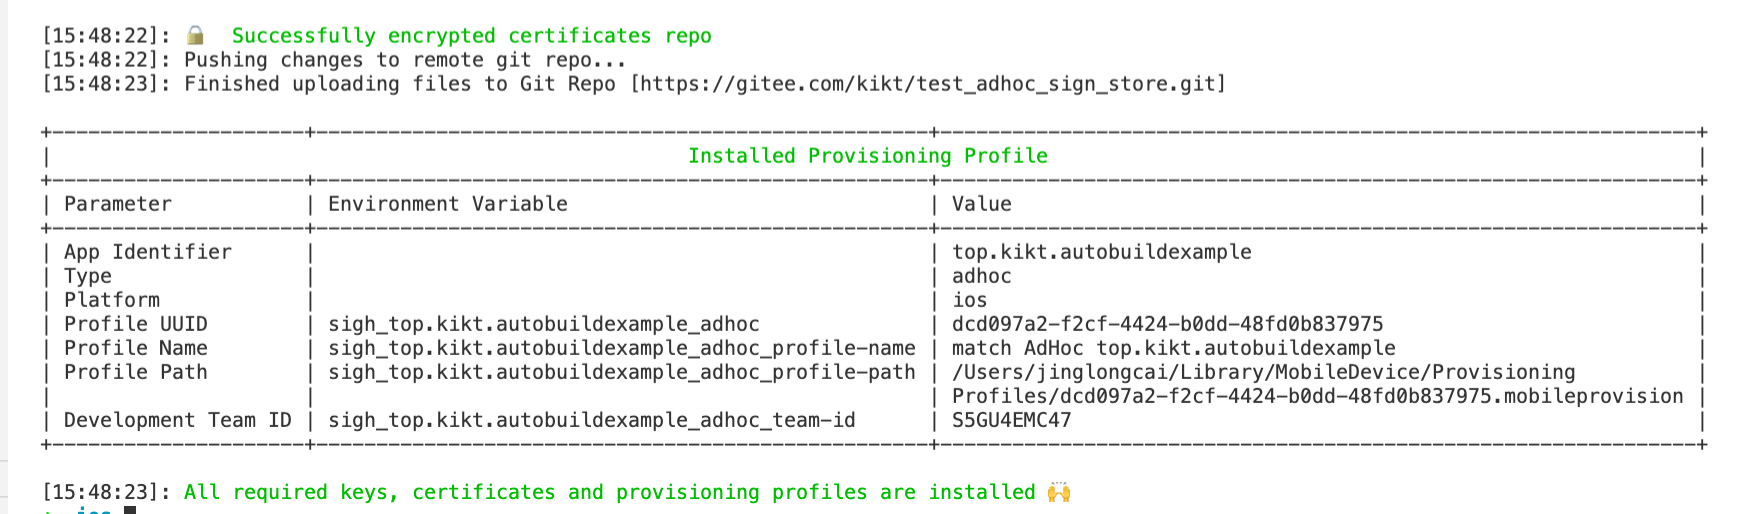
然后查看 git 仓库
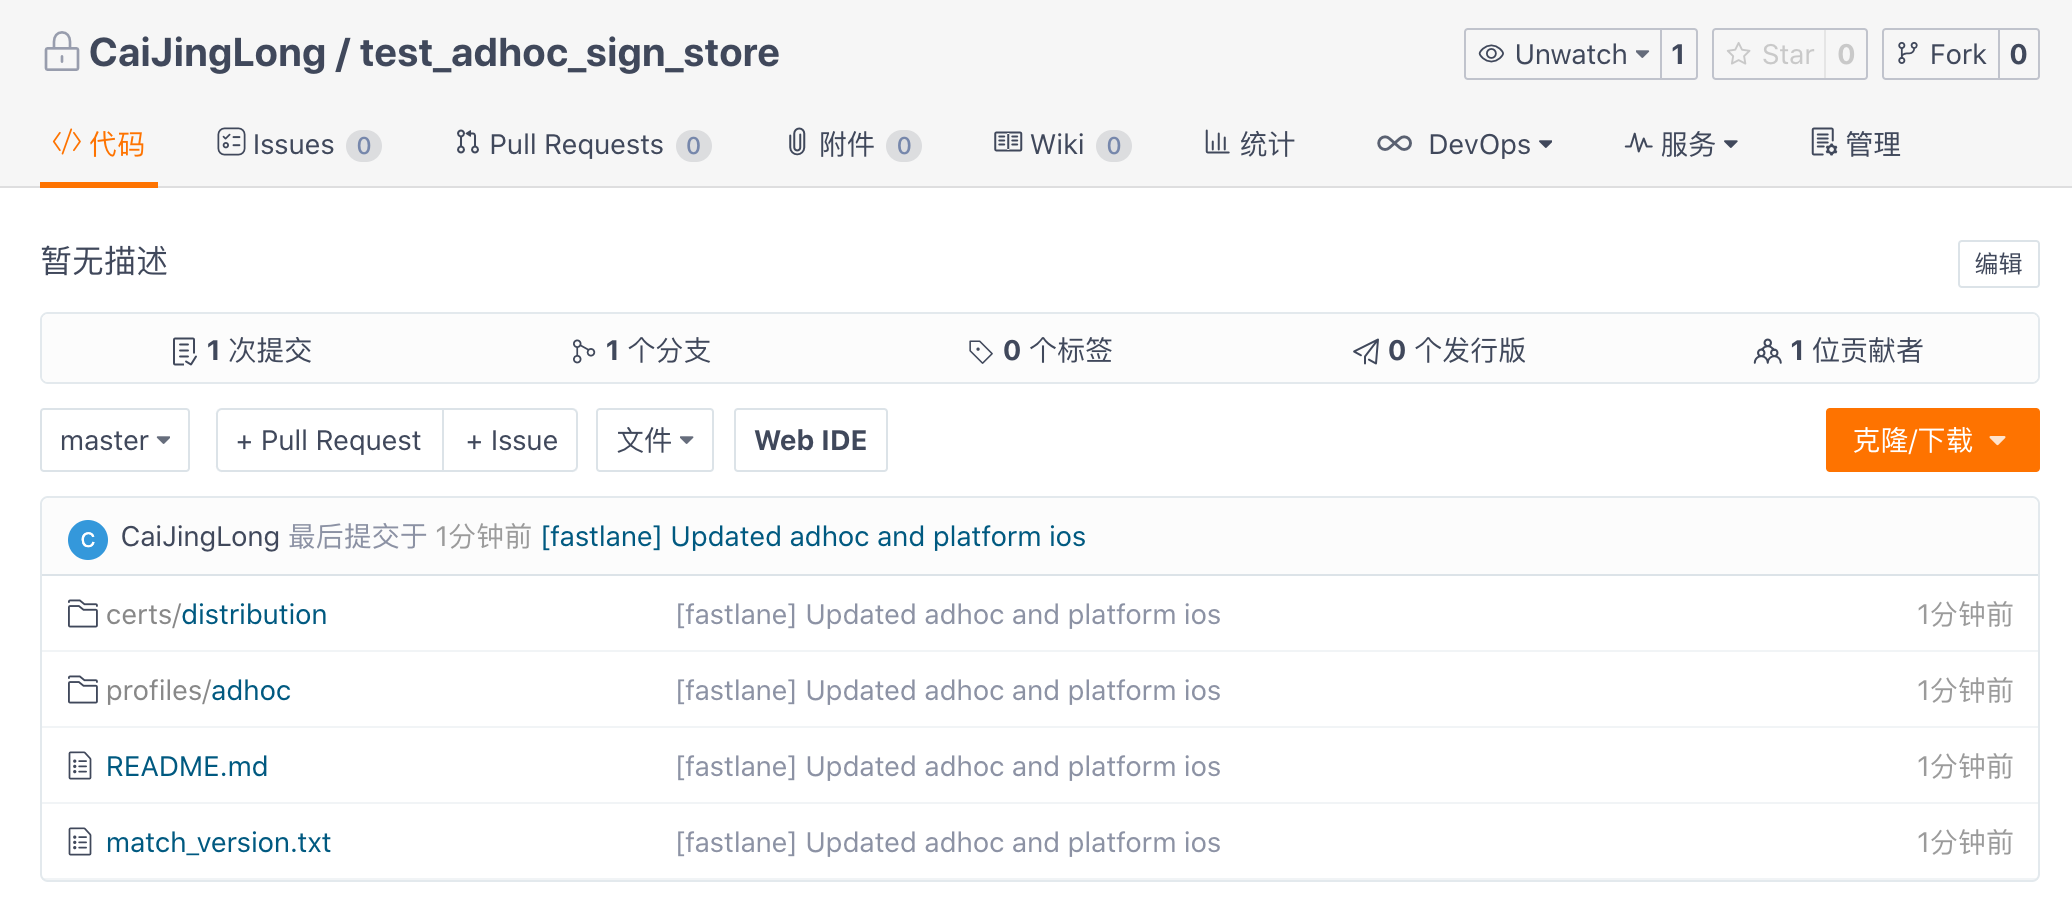
发现也有东西了, 接着就可以回去配置 match 了
修改 Fastline
 1platform :ios do
 2  desc "Description of what the lane does"
 3  lane :ad_hoc do
 4    # add actions here: https://docs.fastlane.tools/actions
 5    match(
 6      type: "adhoc",
 7      app_identifier: "top.kikt.autobuildexample",
 8      team_id: "", # 你的team id, 只有一个可以直接删了这行
 9    ) # 添加这个
10    build_ios_app(
11      scheme: "Release",
12      export_options: {
13        method: "ad-hoc",
14      }
15    )
16  end
17end
team_id 注意: 如果你的 apple 帐号, 只对应一个公司, 则不用填这个, 填这个的目的是为了自动化
接着执行
1$ fastlane ad_hoc
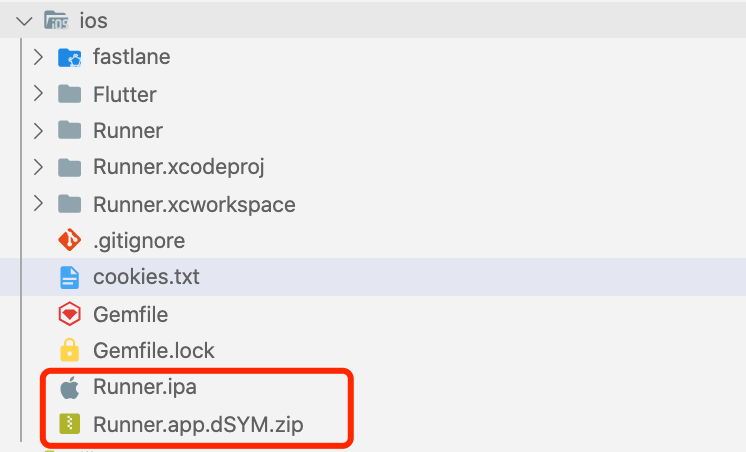
多出来的两个文件, 一个是 ipa 包, 一个是对应的 dsym(用于还原堆栈)
这个是 ad-hoc, 所以可能不需要两步验证, 但拿出来说一下, 也许后面会用到
两步验证的问题
iOS 中打包可能会遇到两步验证的问题, 而且经常要验证, 在自己本地命令行打包的时候还可以交互一下, 但 Jenkins 是不支持交互的, 这个能否解决呢?
答案是肯定的, 但需要经过如下的步骤
-

-
获取 Cookie
-
1$ export FASTLANE_APPLE_APPLICATION_SPECIFIC_PASSWORD=<PWD> # 上一步的app专用密码 -
1$ fastlane spaceauth -u <apple_id> # apple id
-
-
将 cookie 保存下载, 至于是环境变量还是文件看你自己的情况, 我这里选择的是文件的方式, 然后存到代码仓库中以便于 jenkins 读取, 你存到环境变量里也是可以的
比如如下的 cookie(为了安全性, 我这里删除了一部分字符, 所以你拿过去是用不了的) 请根据你自己的情况来拿到这个
1---\n- !ruby/object:HTTP::Cookie\n name: DES5d68a2334f25aa752d511d\n value: HSARMTKNSRVXWFla+6da0vxQCwQOICU+fwfLb6VaikjljuH6uDxOu6UWoLsJfDGnDolKcfUcKtnU5aQ5nskxgurrnxdOubXWidJF7JzxjbyzxmH6Tq/vD3JrCTSRVX\n domain: idmsa.apple.com\n for_domain: true\n path: "/"\n secure: true\n httponly: true\n expires:\n max_age: 2592000\n created_at: 2020-08-11 09:56:46.642442000 +08:00\n accessed_at: 2020-08-18 13:45:59.234609000 +08:00\n- !ruby/object:HTTP::Cookie\n name: myacinfo\n value: DAWTKNV2da5c169c5551bd40dc5d6ffd58c42656bc39c57326c4686e7ba67cf58b38a017214dba13ef41247a84ae2909fa56863ffda004b4fcec4402e48d0a8c6a38a8b1593411a21da63fdf0b95ad37d33567598e684da6390f9b525c51cf6e1ea6e42a021dc1b798703c769d8380a23f8ac2b6890dfdc92a035acb48 domain: apple.com\n for_domain: true\n path: "/"\n secure: true\n httponly: true\n expires:\n max_age:\n created_at: 2020-08-18 13:46:00.175666000 +08:00\n accessed_at: 2020-08-18 13:46:00.176071000 +08:00\n- !ruby/object:HTTP::Cookie\n name: dqsid\n value: mp0aSI6IlFYS3E3MmI1SmVkVFV5THFcsh58p8zWIpcqviQIYYqJ8oW18qxcM\n domain: appstoreconnect.apple.com\n for_domain: false\n path: "/"\n secure: true\n httponly: true\n expires:\n max_age: 1800\n created_at: &1 2020-08-18 13:46:00.842456000 +08:00\n accessed_at: *1\n


注意, 这里有两端"乱码", 复制第一段, 第二段是 fastlane 给的示例而已, 这里提示输入 y,则自动复制到剪切板
我创建一个文件 cookies.txt, 把这段东西粘贴进去, 这一步是为了 Jenkins 考虑
小结
总体来说, 配置好了以后
安卓:
1$ flutter build apk
iOS:
1$ flutter build ios --release -v
2$ cd ios
3$ fastlane ad_hoc
打包的命令熟悉完毕后, 就到了 Jenkins 的配置了
Jenkins 的配置
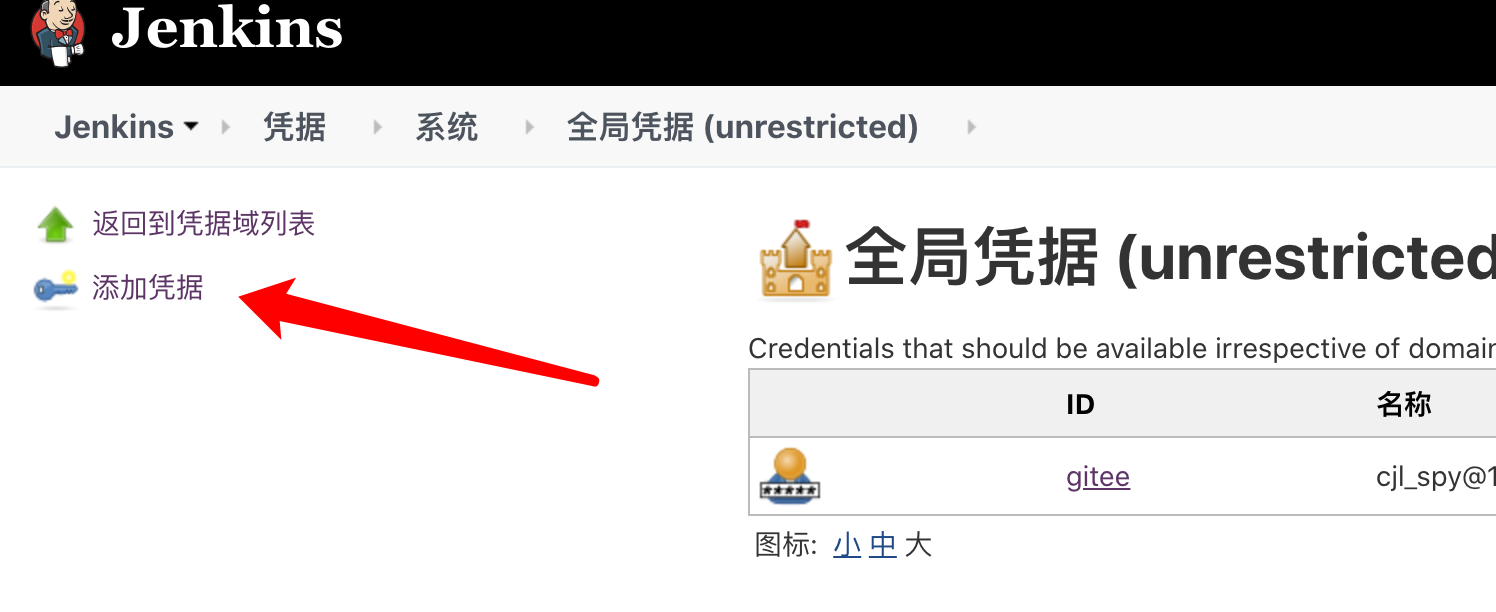
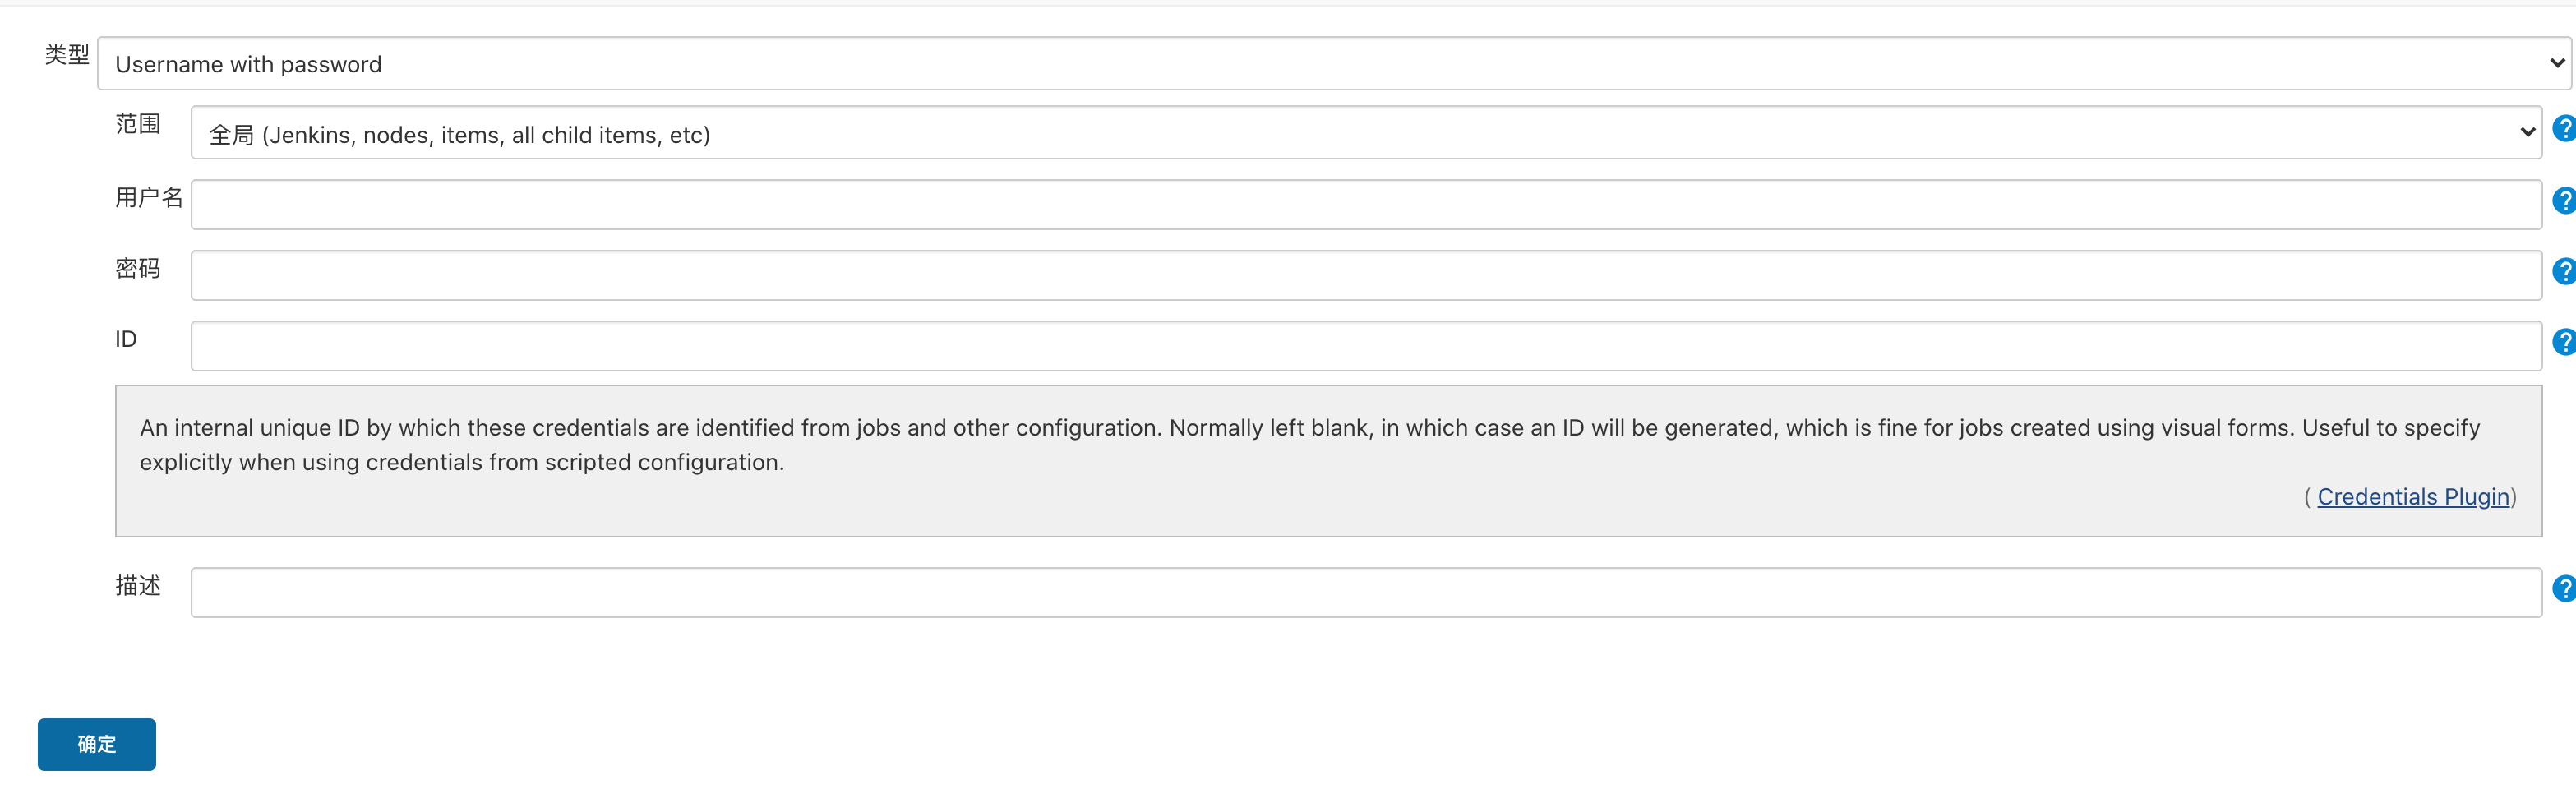
配置仓库权限
Jenkins 中支持 git 来管理源码, 然后, git 需要凭证来访问, 我这里是 gitee 的, 你可以根据你的情况自己配置
安卓自动化
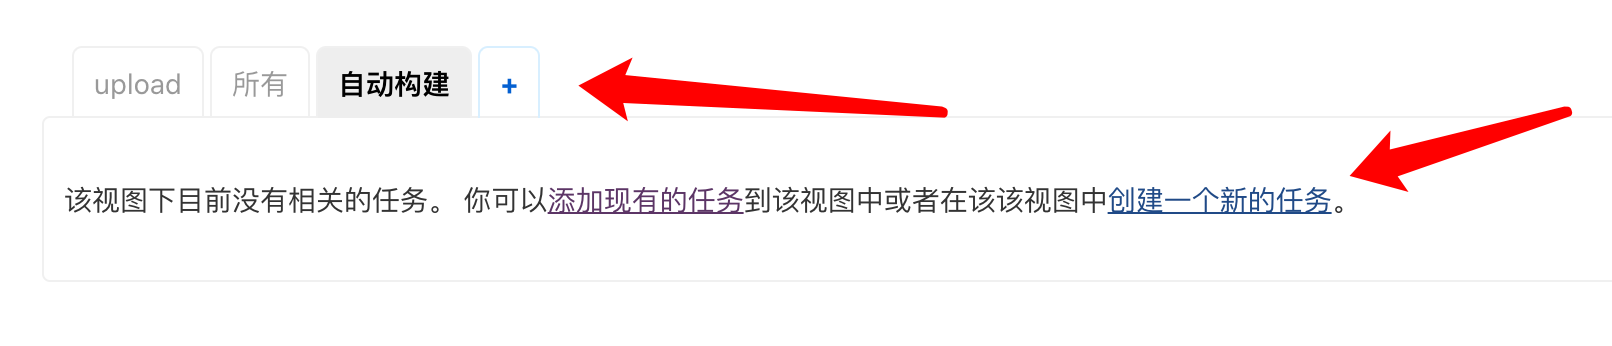
我先新建一个组叫"自动构建", 然后点击创建新的任务
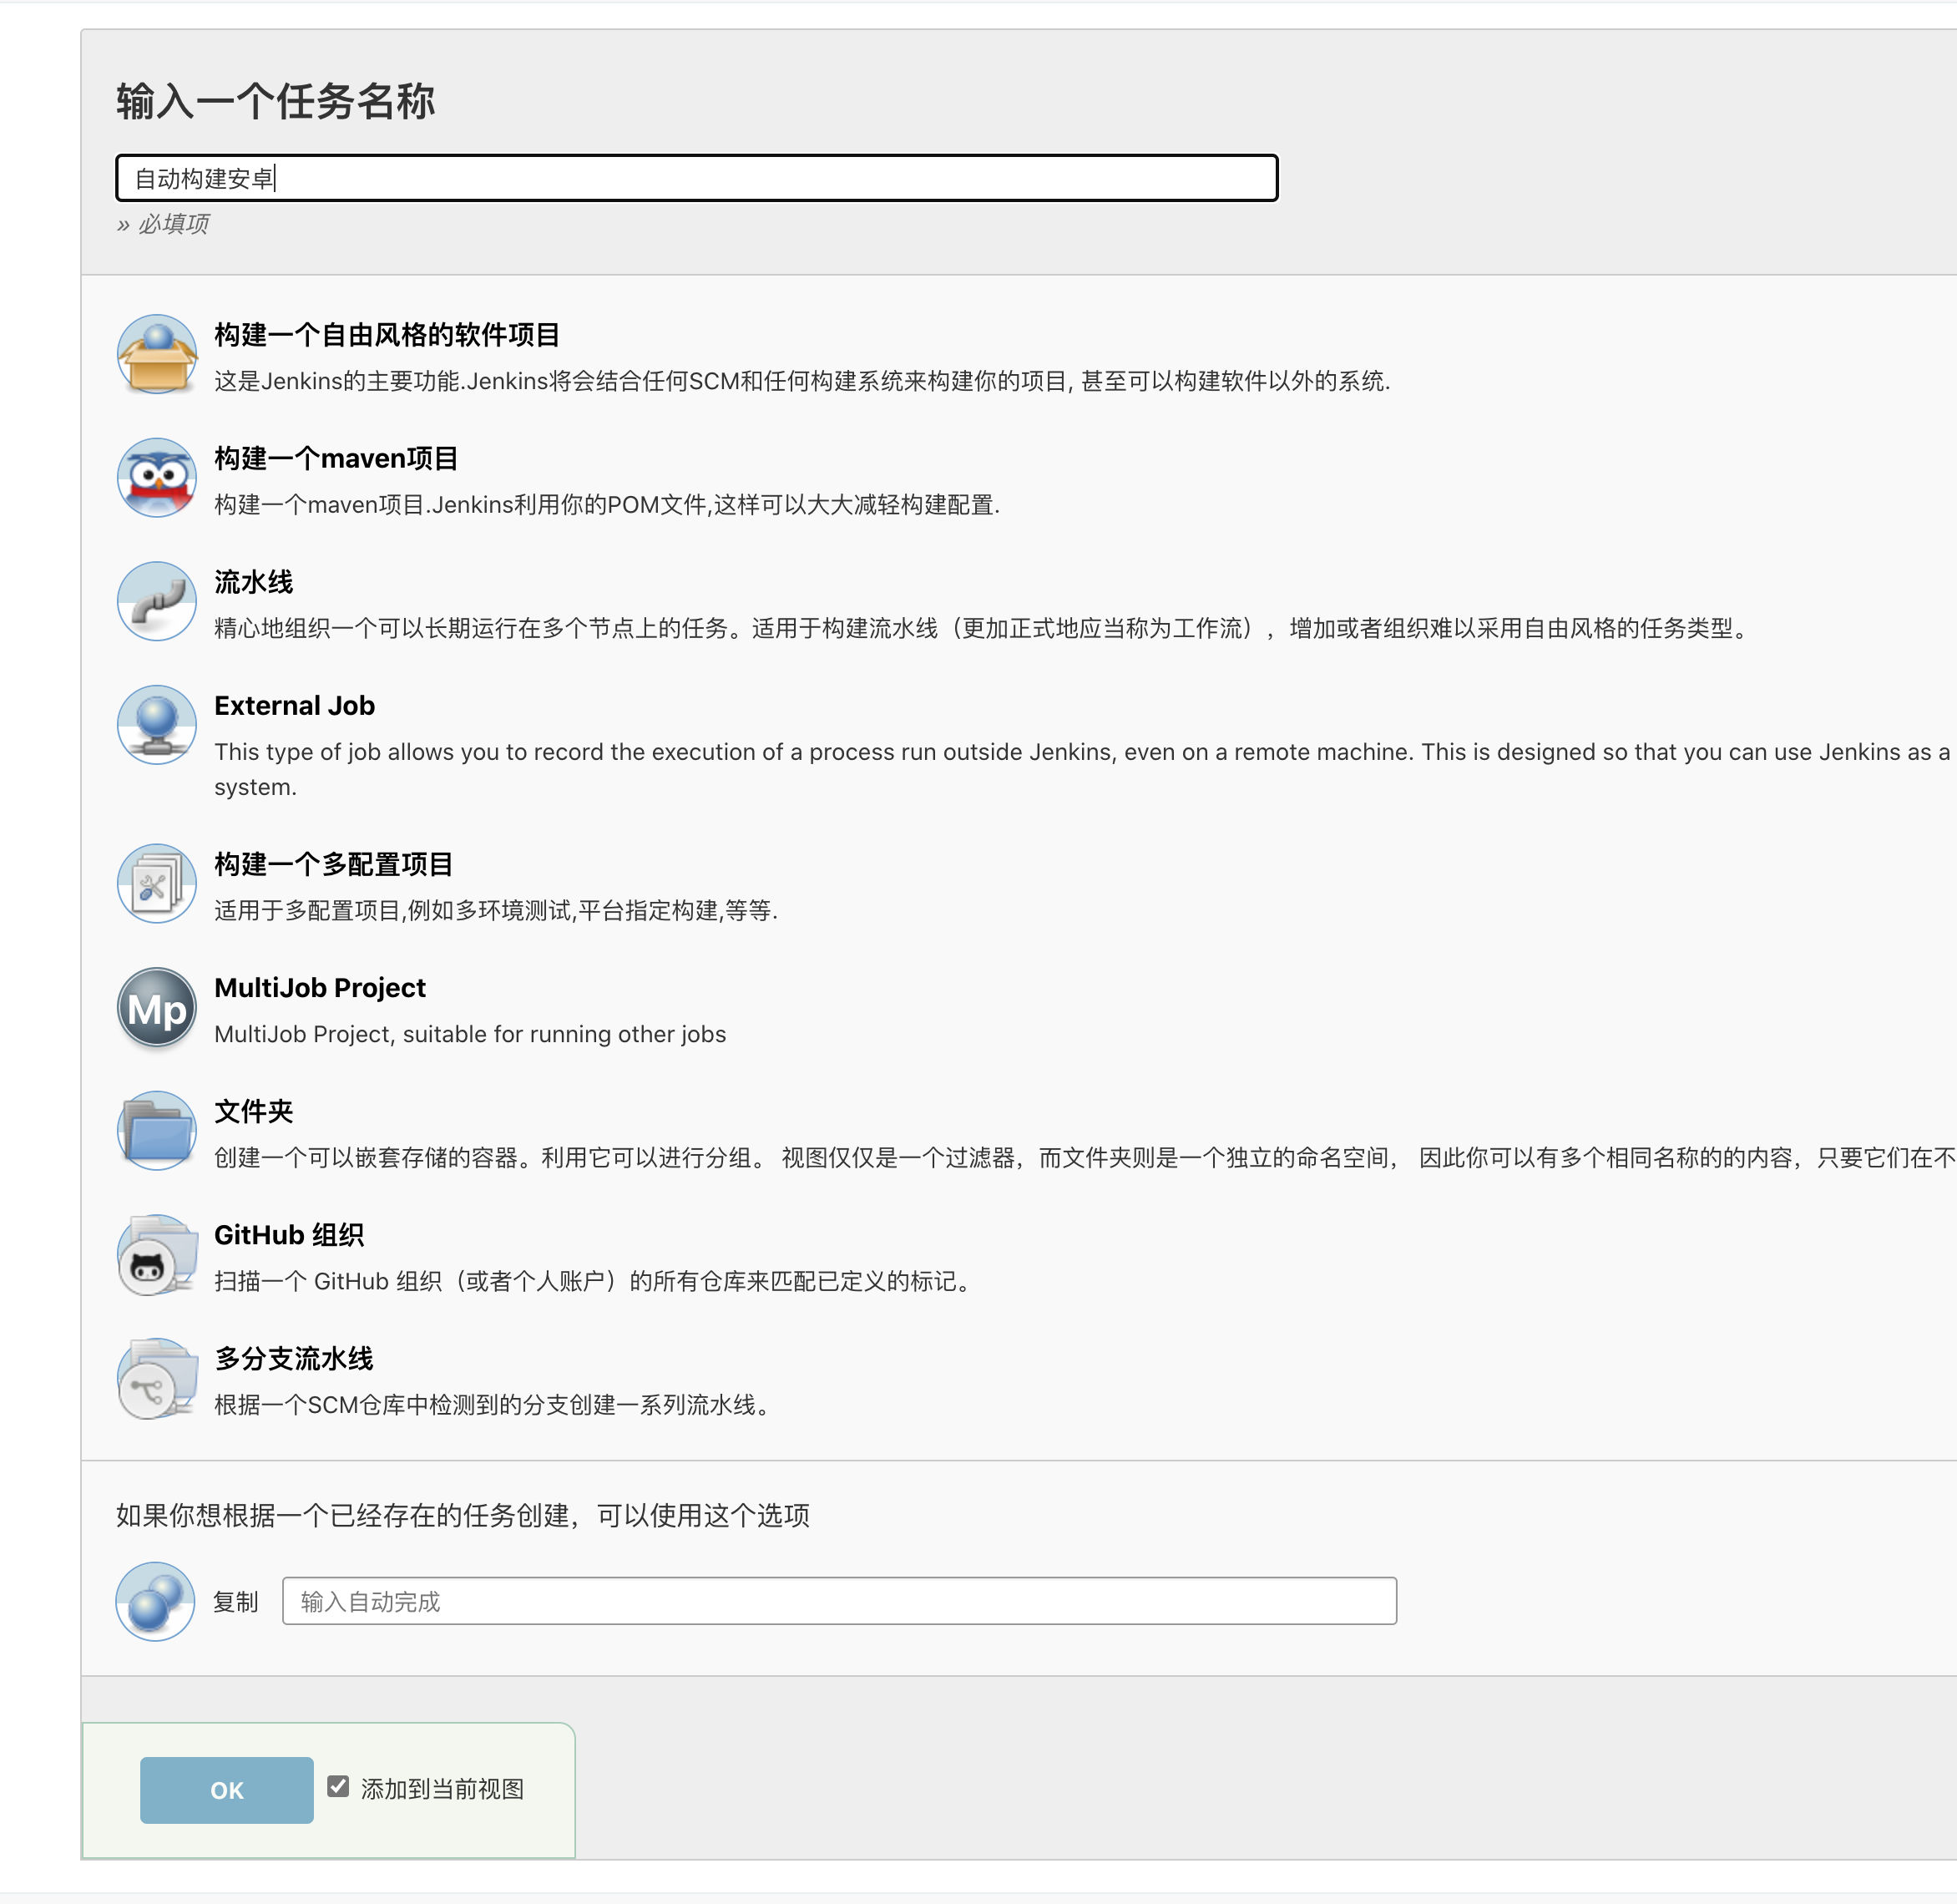
选择构建一个自由风格的软件项目
配置源码
先配置项目的 git 地址
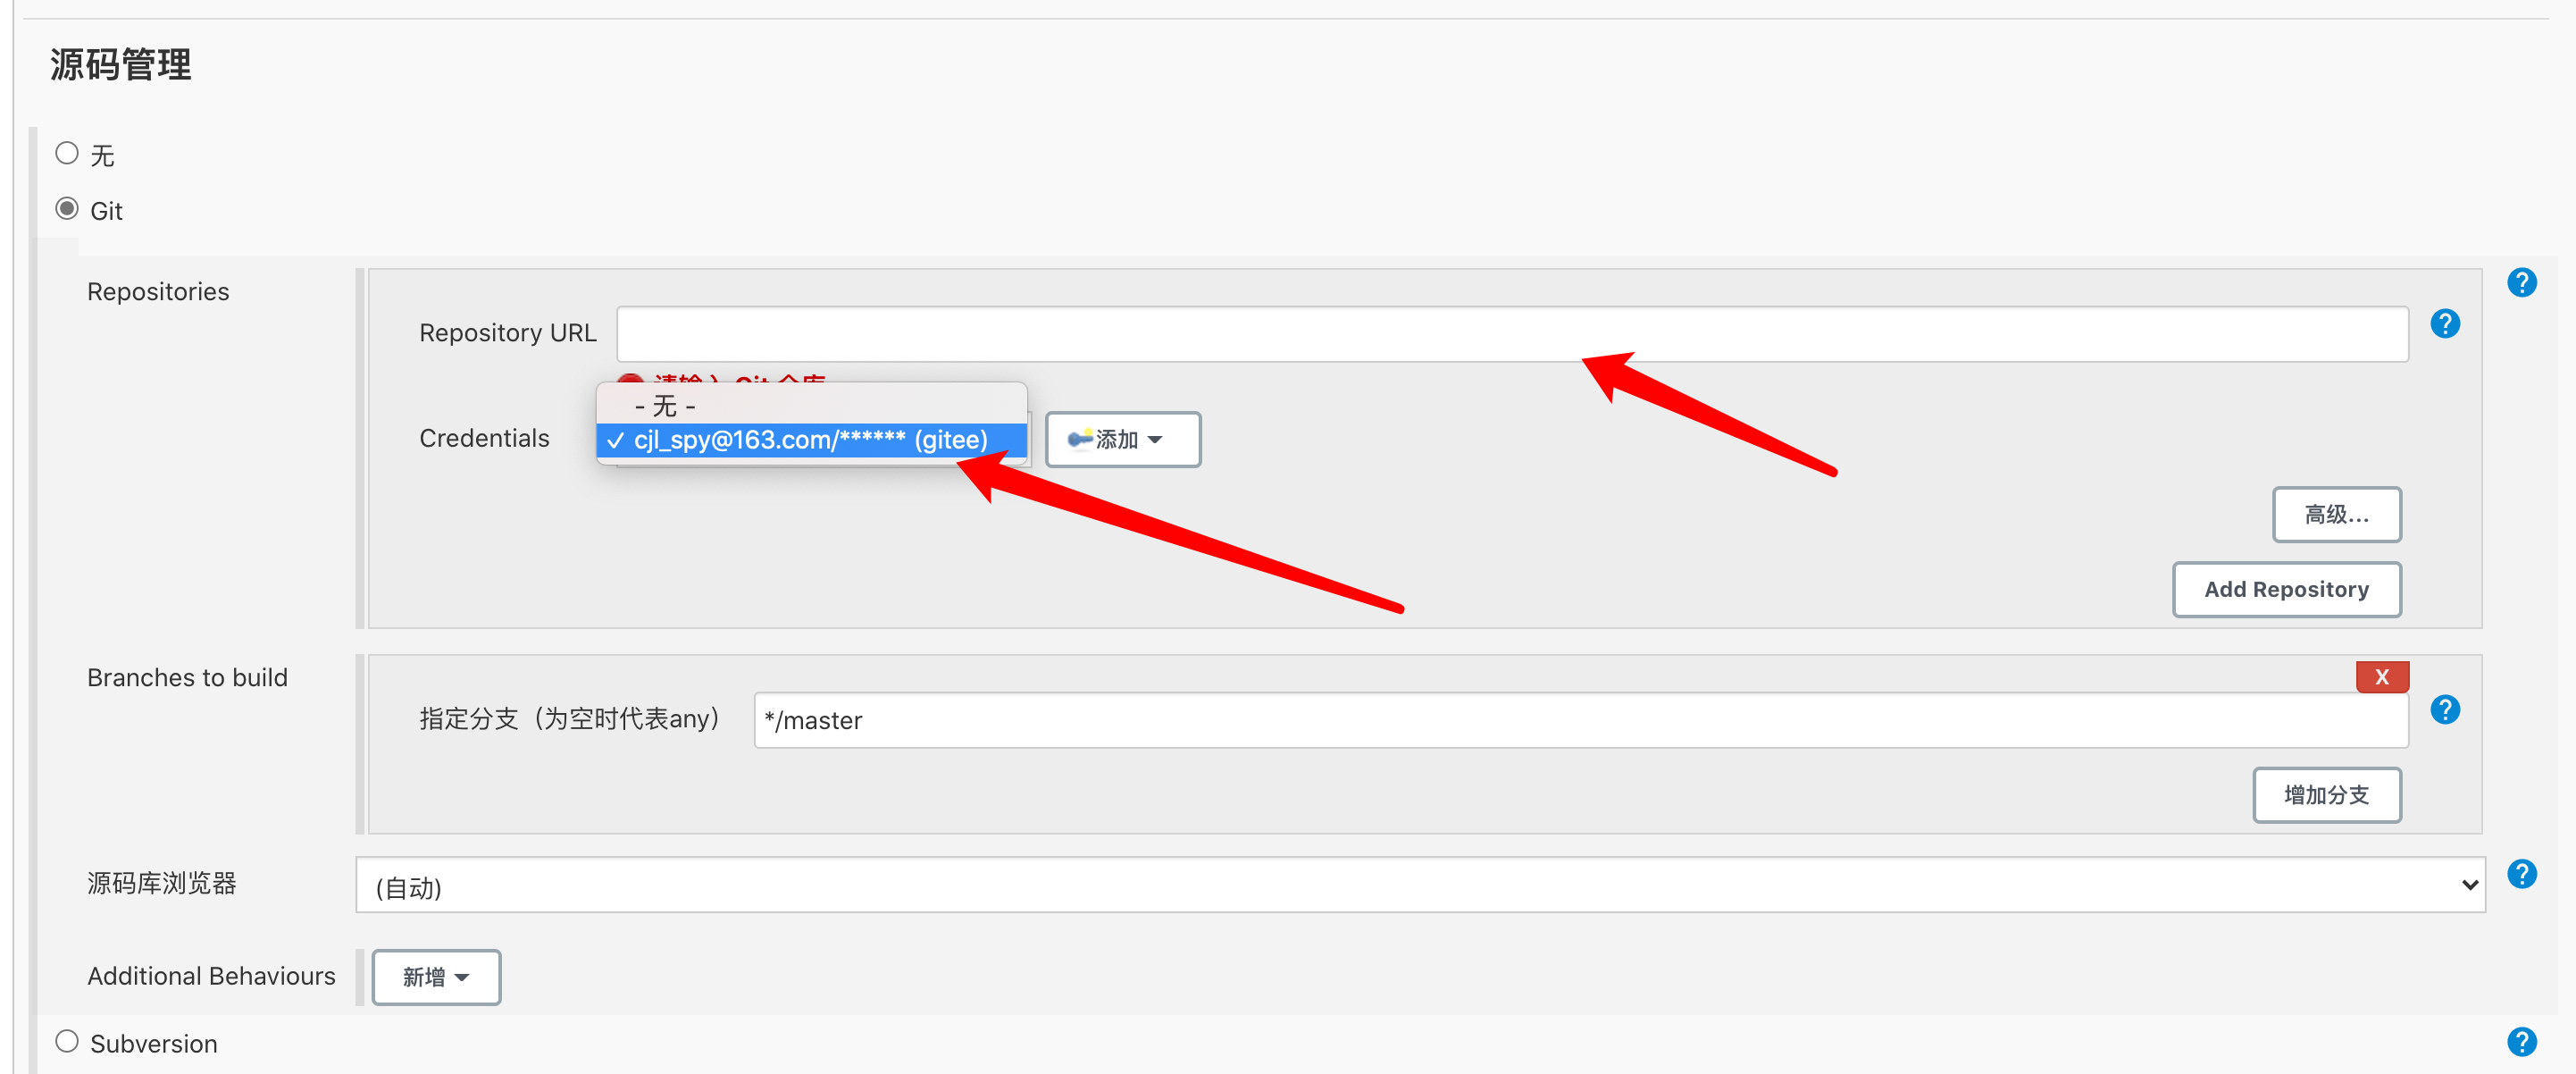
然后选择凭证, 接着确定后, 点下面的保存, 先试试是否能拉到源码
这里构建完成后, 可以看到构建过程
然后点工作空间看看代码
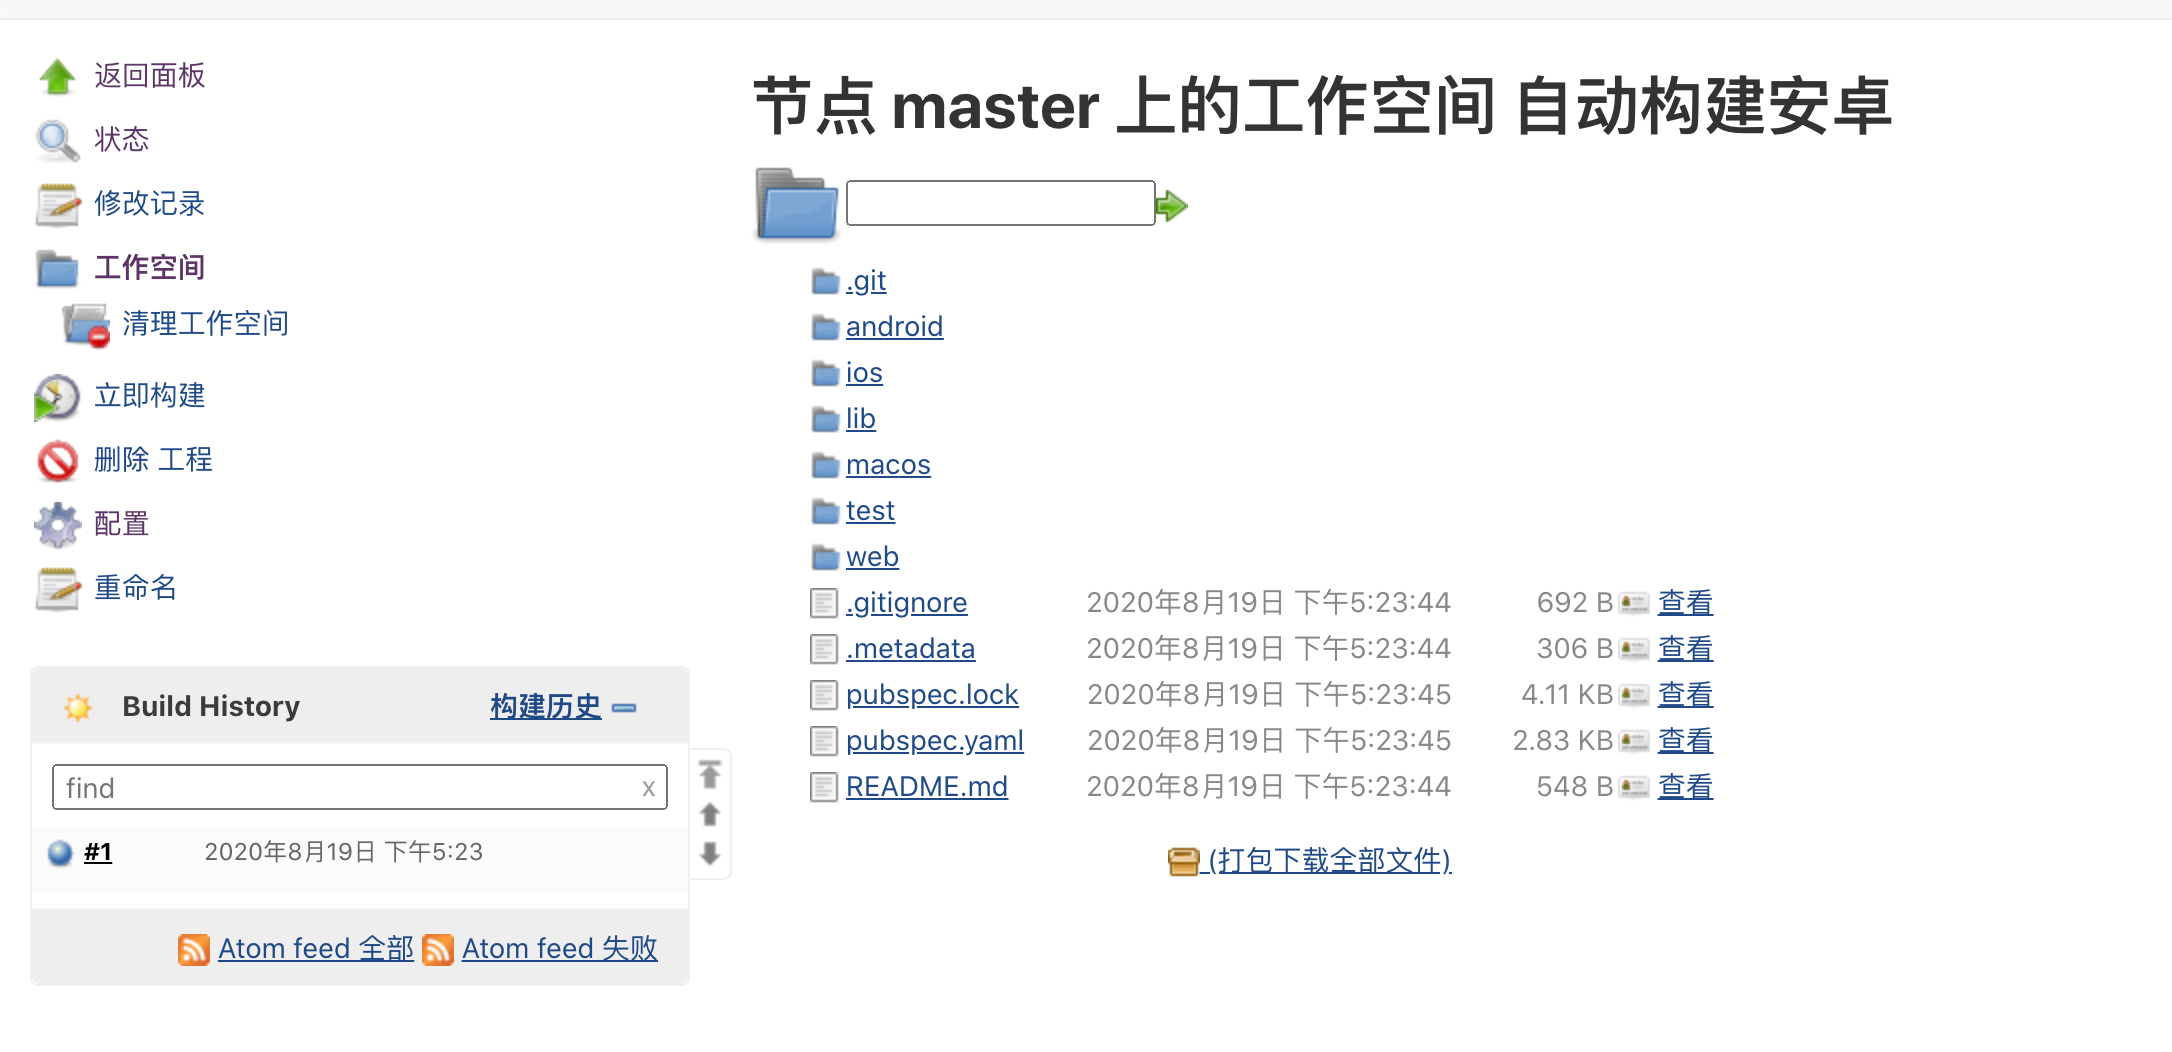
现在, 就能看到完整的代码了
配置打包脚本
这里还没完, 需要配置打包脚本, 继续点击配置
拉到后面, 点击构建=>执行 shell
这里就是自动构建的步骤了.
1flutter build apk --release -v --split-per-abi
2ls build/app/outputs/apk/release/
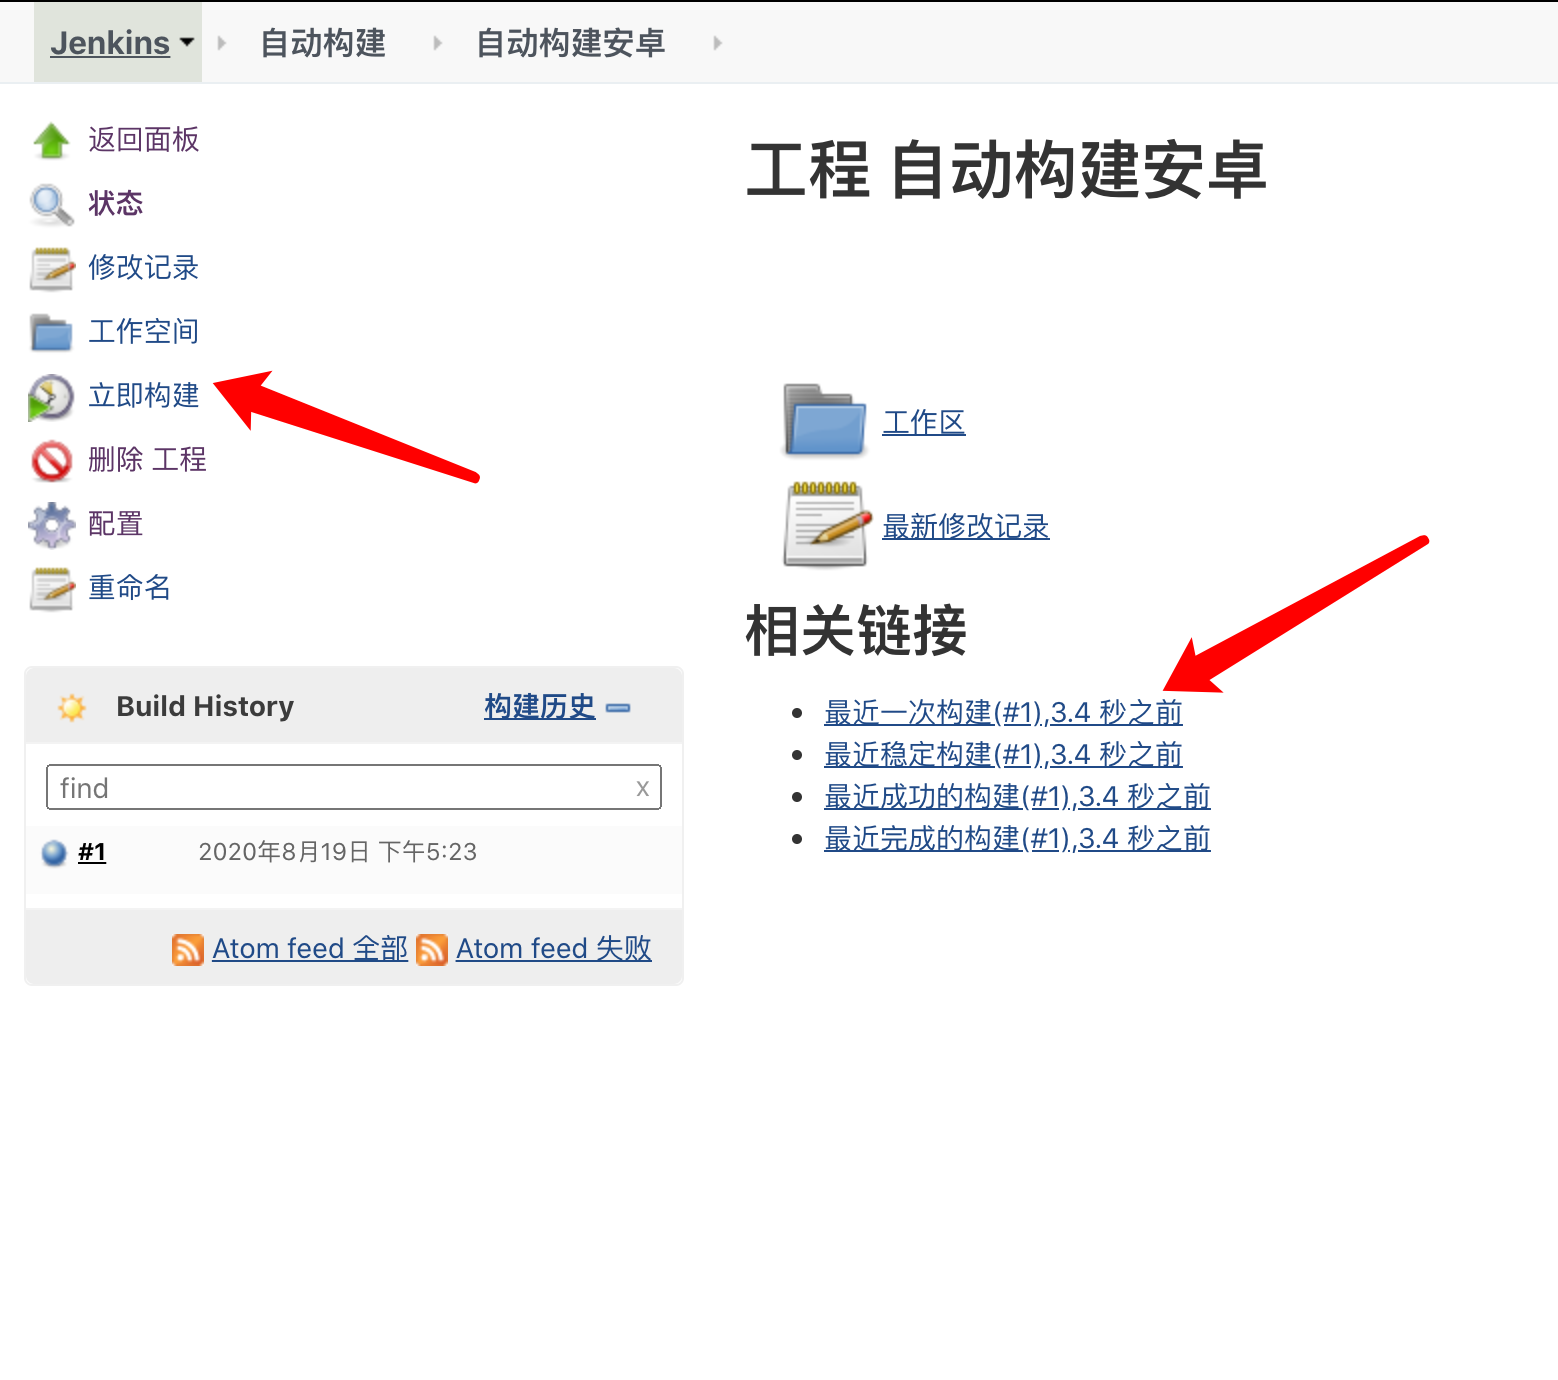
这里简单打包, 然后查看下, 保存后点击立即构建
这里就是打包过程了
查看一下控制台输出
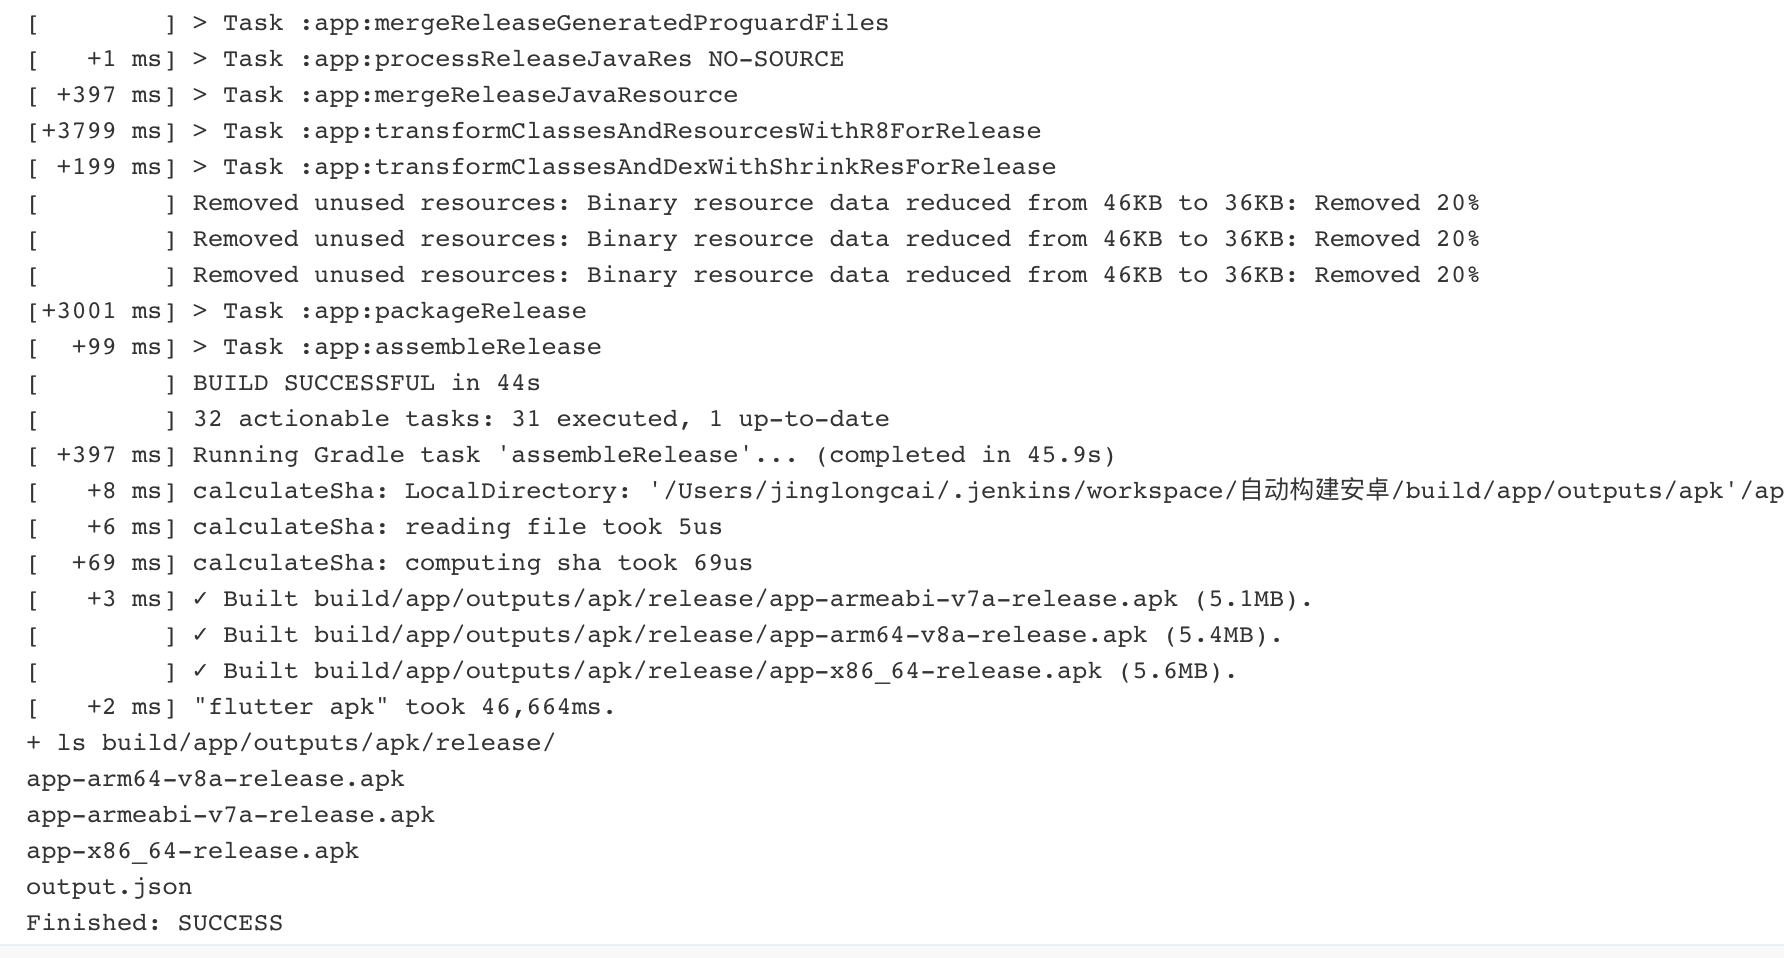
打包完成了, 顺便执行了 ls 命令查看了一下
上传
上传直接使用插件就可以了,还记得之前安装过 pgyer 的插件吗, 如果你要传 fir 或者自己的服务器, 那就需要你自己探索一下了
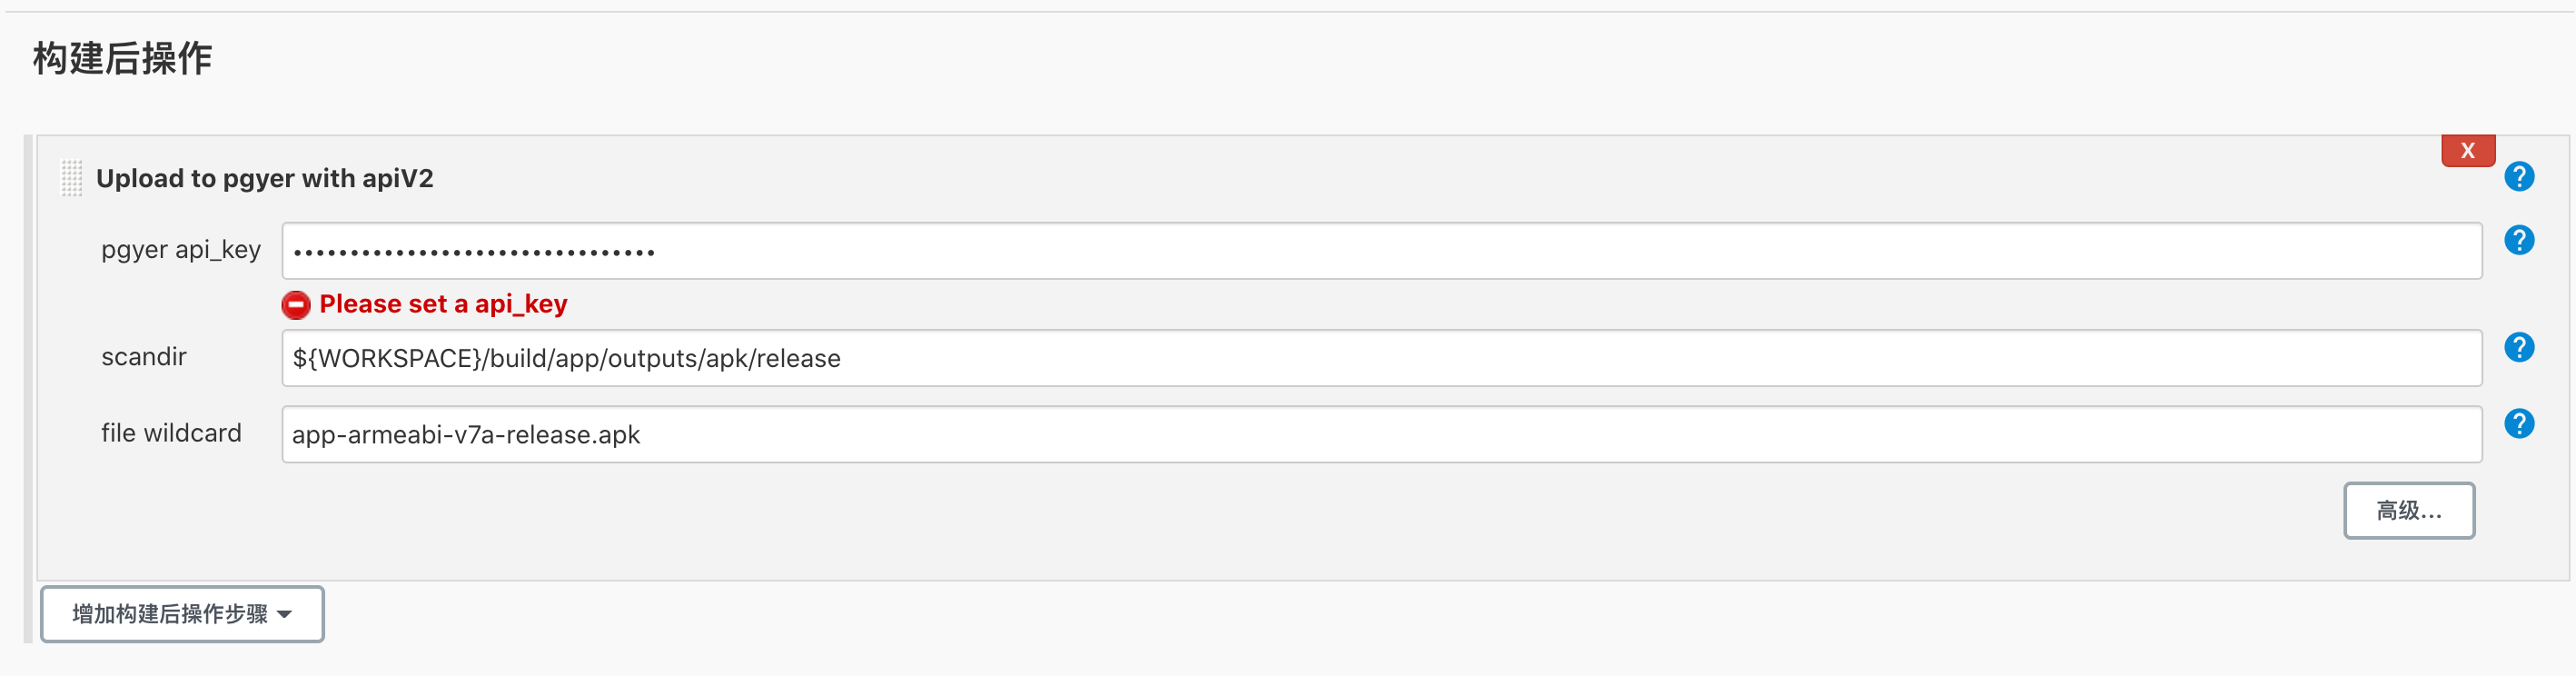
使用 v1 还是 v2 看你自己的情况, 都可以, 我这里使用 v2 的, 把 api_key 放过来, 然后使用
scandir 是你上传的目录 ${WORKSPACE}/build/app/outputs/apk/release 工作空间的根目录, 然后下面是文件名
然后保存, 立即构建
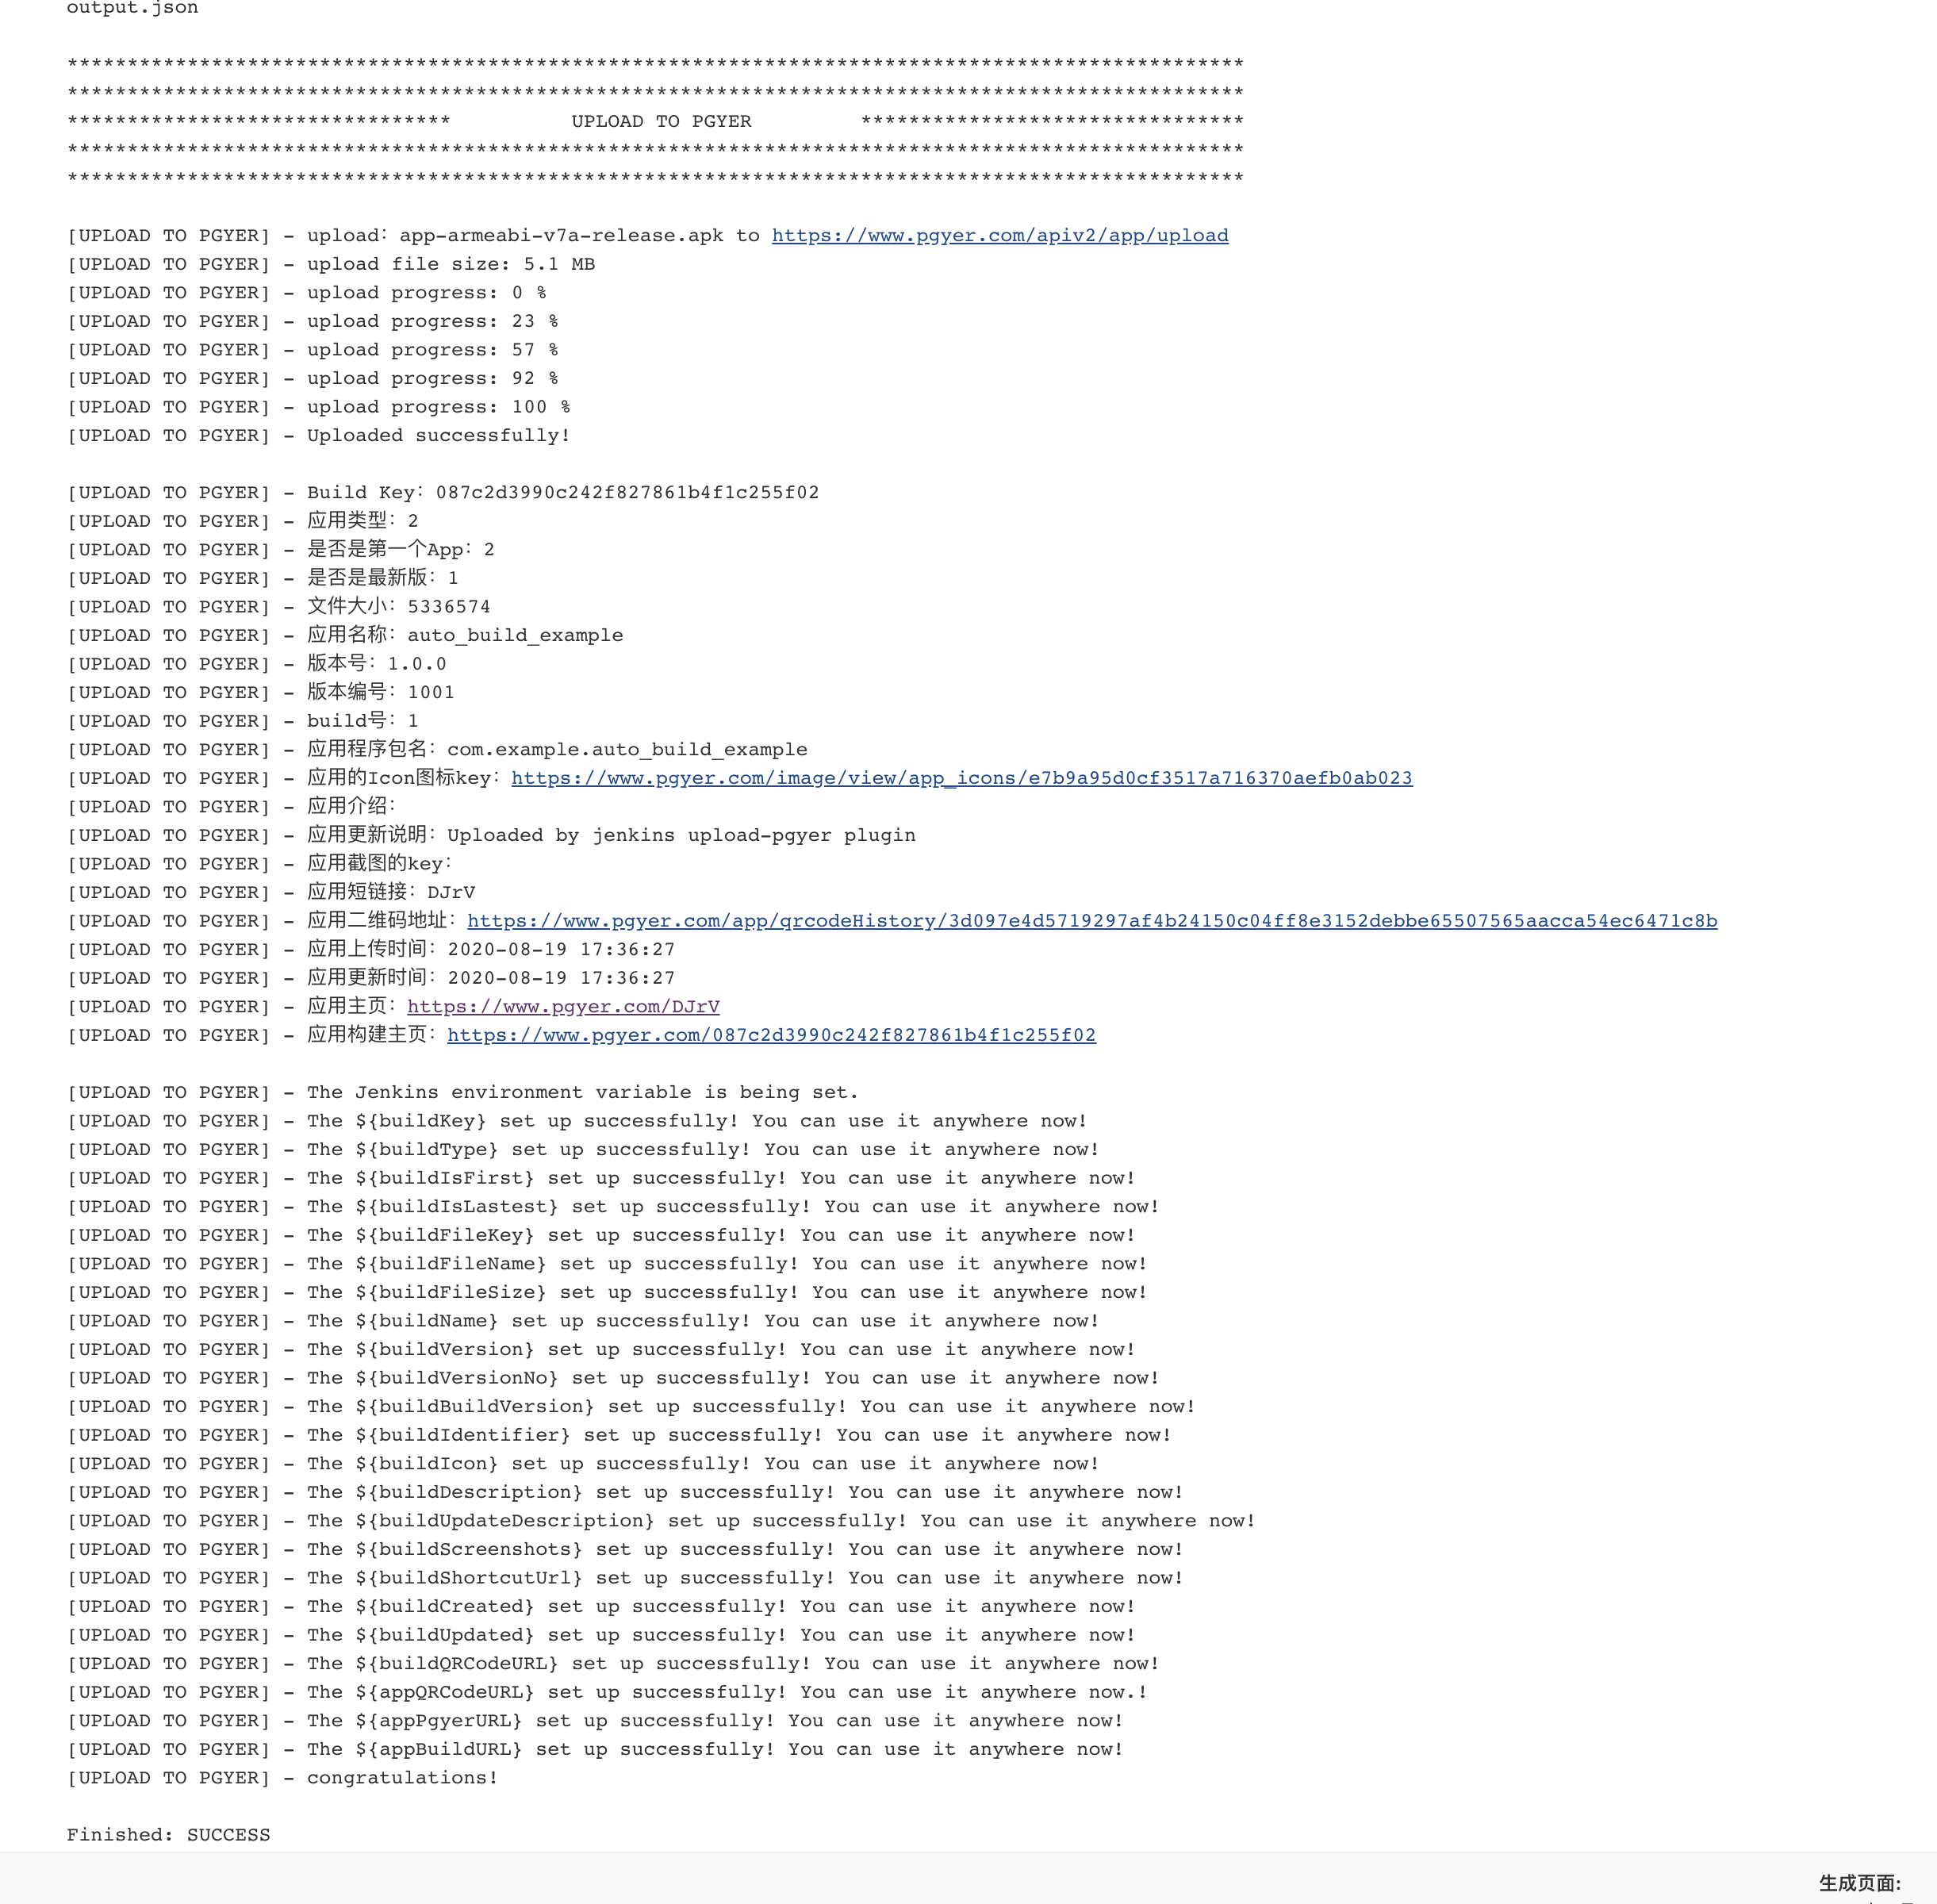
地址:
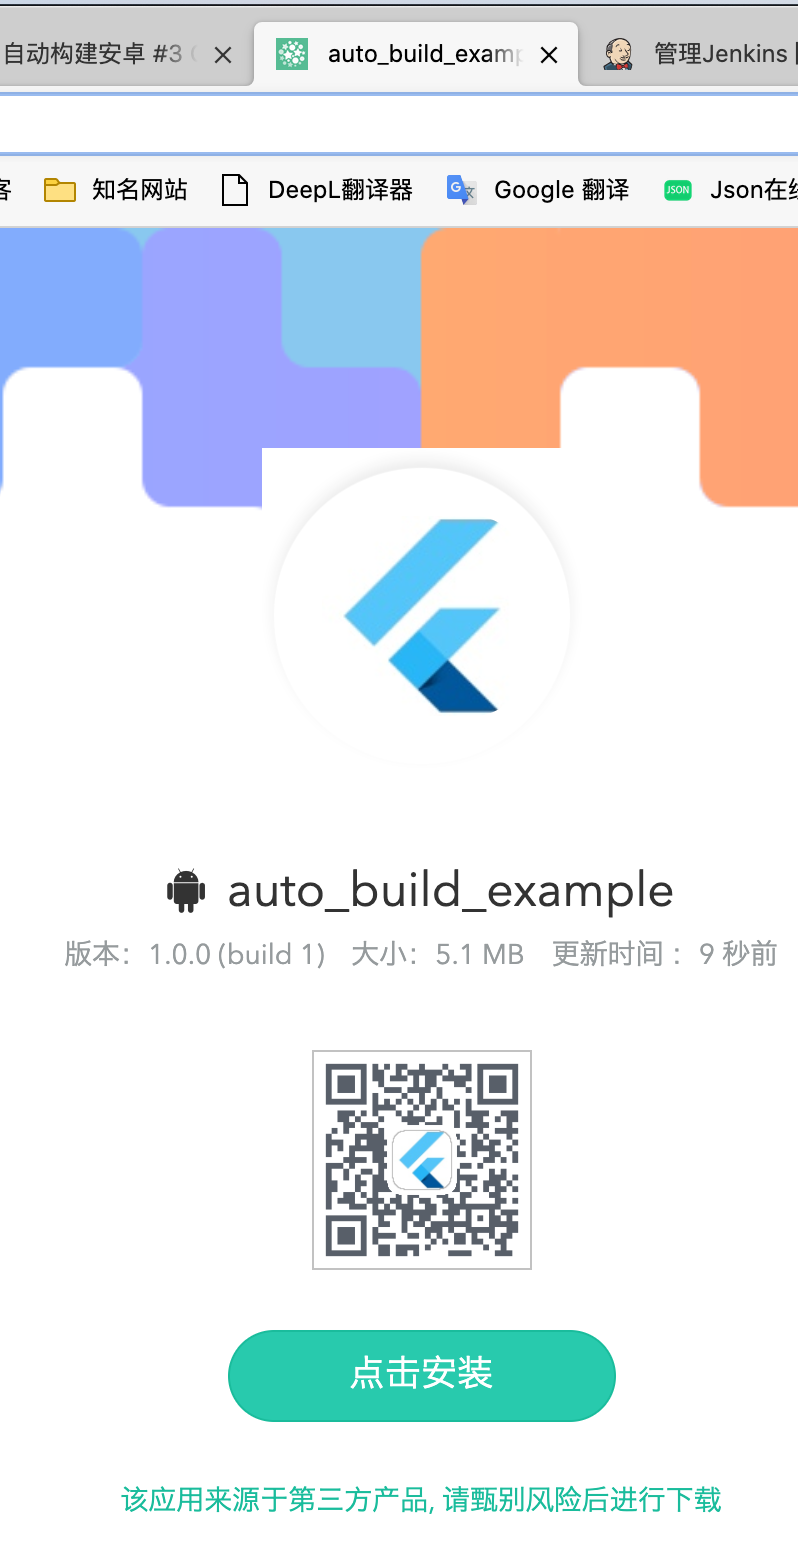
到这一步, 安卓就算是成功了
iOS 自动化
创建一个叫"iOS 自动化"的任务
配置源码仓库
和安卓完全一样, 略过
打包脚本
还是在构建位置,使用 shell 脚本, 但和安卓不同的时, 需要有如下的步骤
- flutter build ios
- 两步验证
- fastlane
1, 3 在外部测试阶段完成了, 也就是说, 唯一需要注意的是两步验证的问题, 仓库里储存有 cookies, 这个东西就是用来干这个的了
编写脚本
1flutter build ios --release -v
2cd ios
3export FASTLANE_SESSION=$(cat login_cookie)
4fastlane ad_hoc
5ls Runner.*
上传
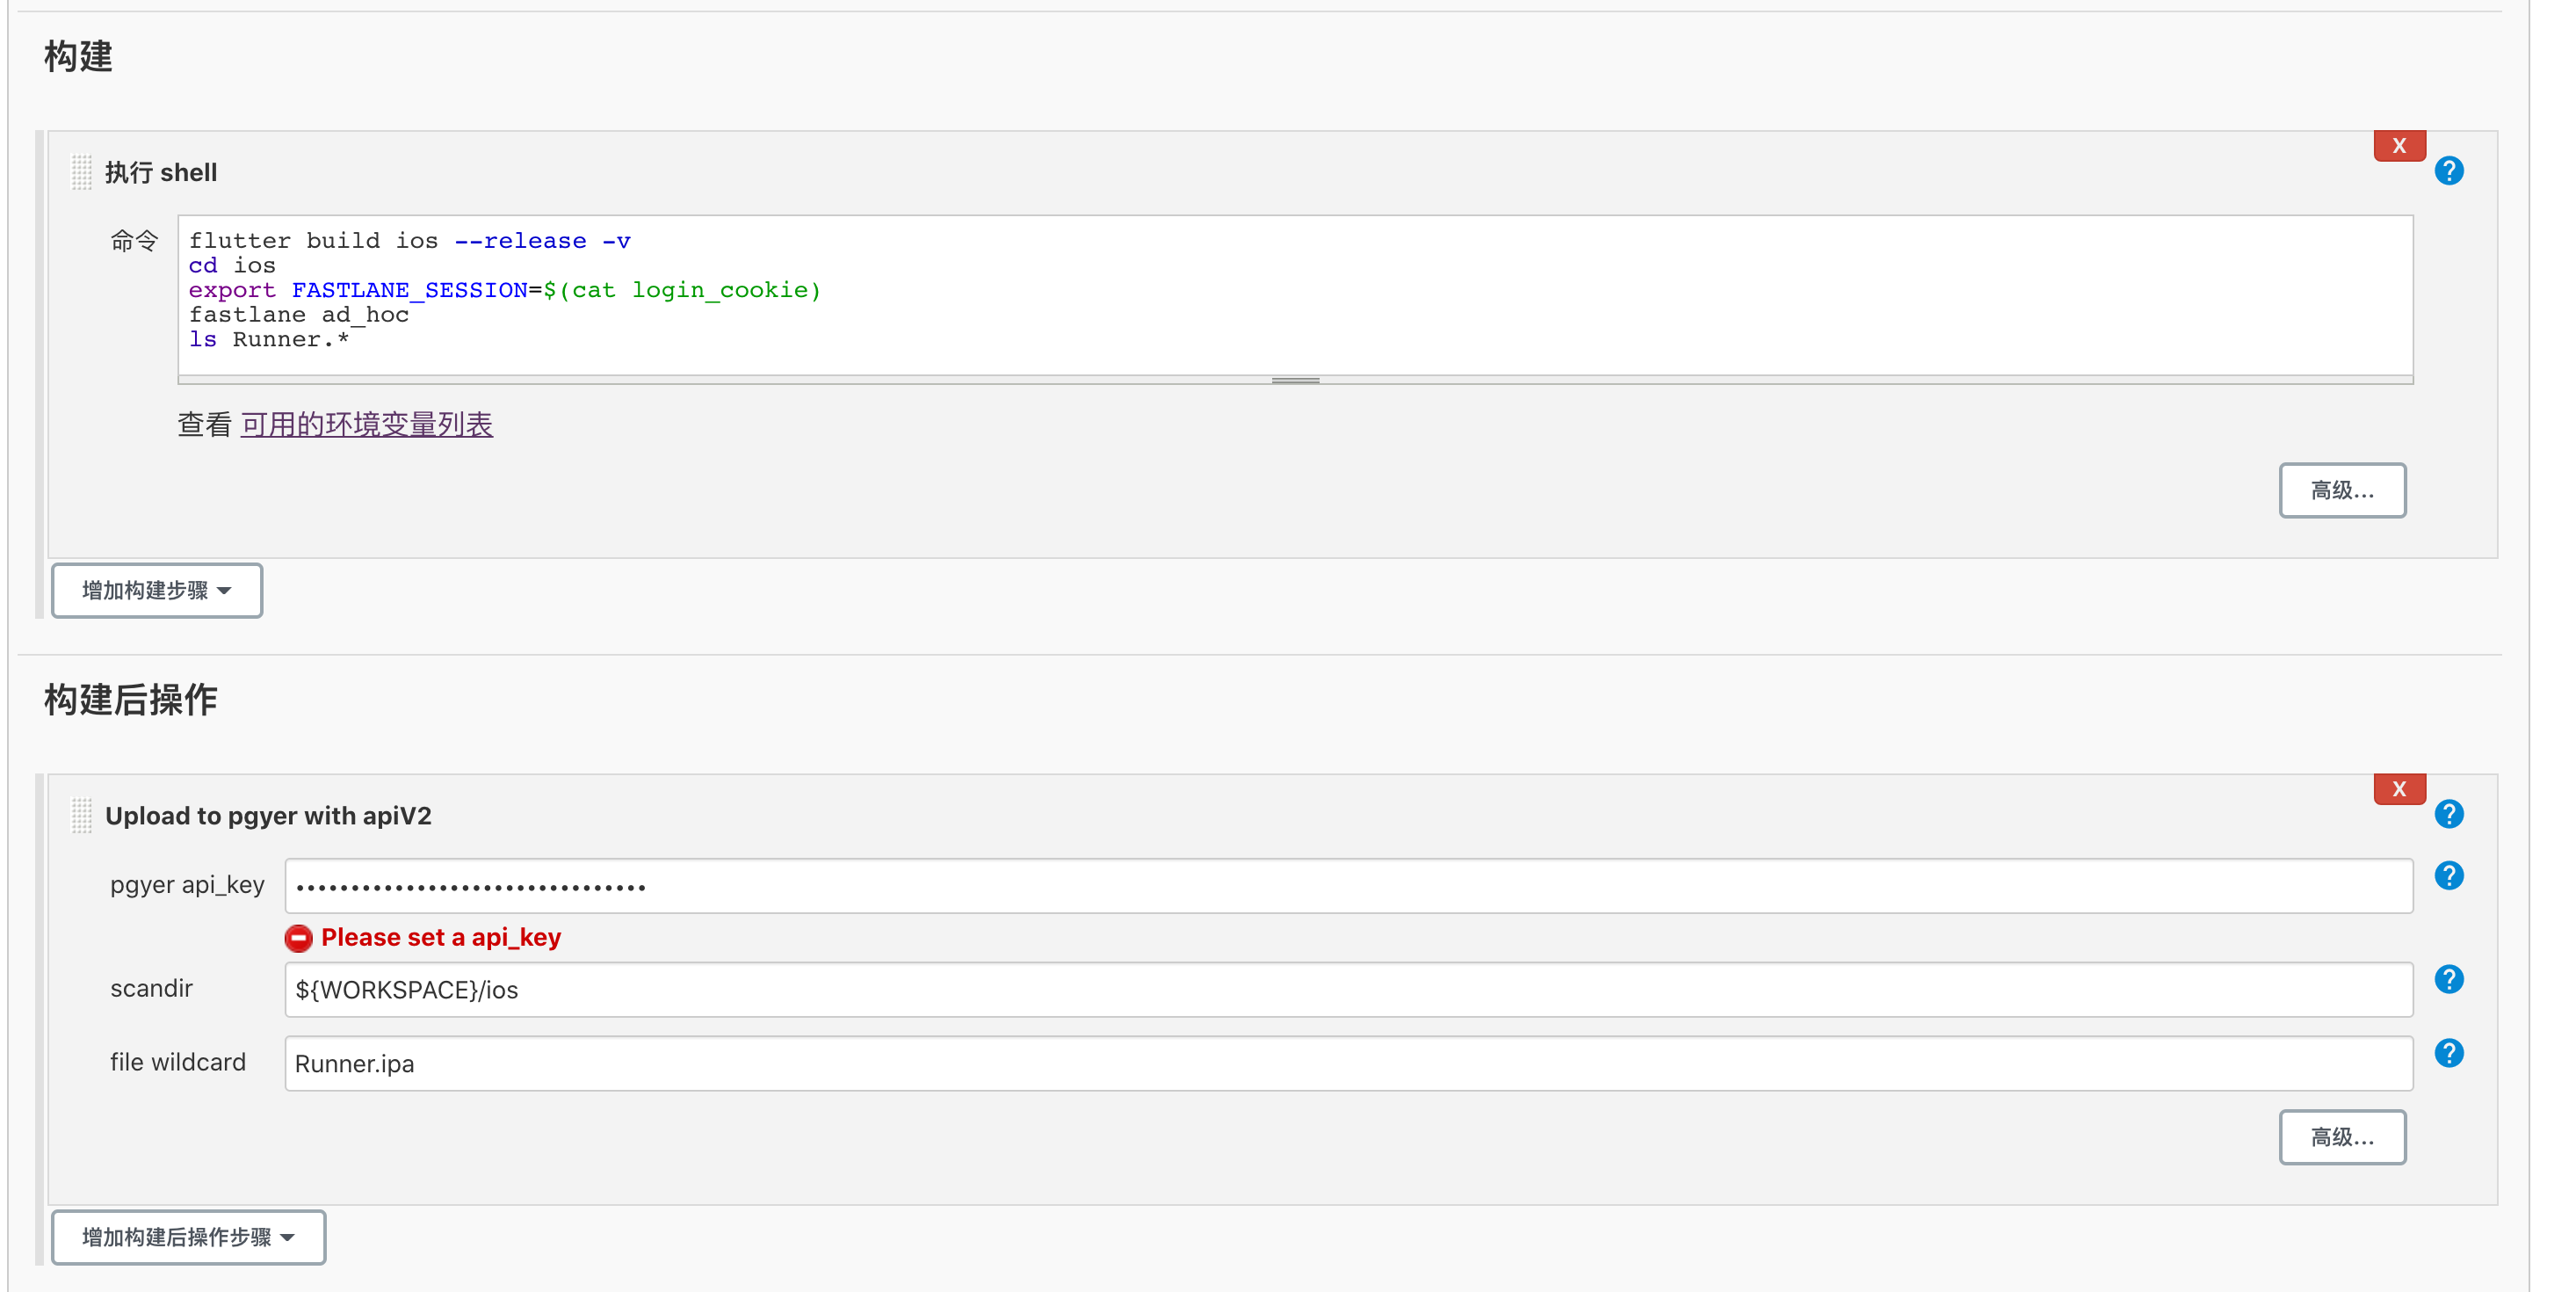
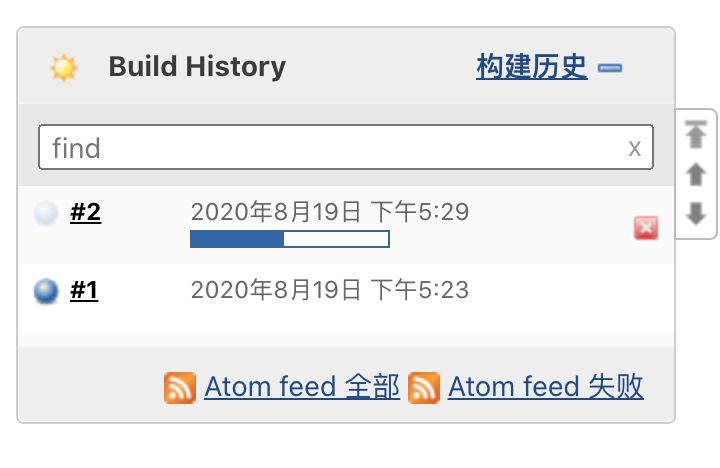
然后, 我们遇到了一次失败

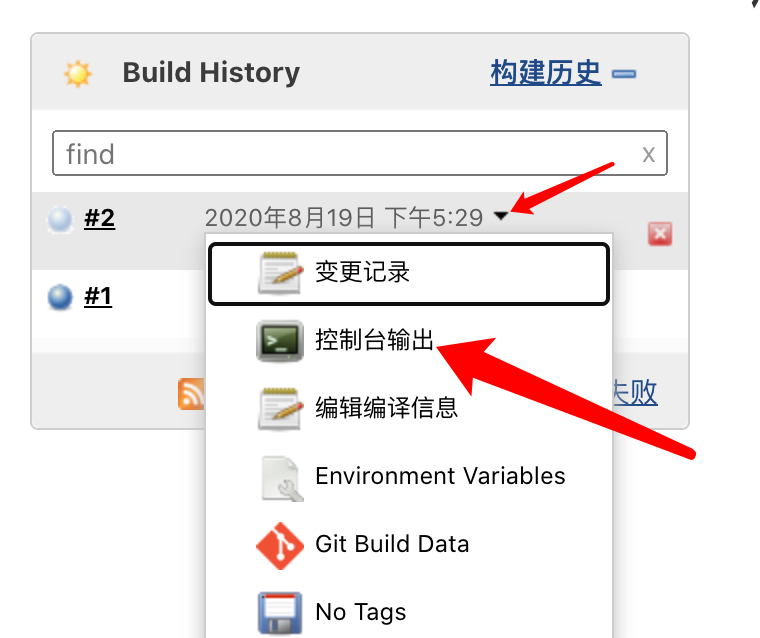
去查一下原因吧, 进入控制台输出
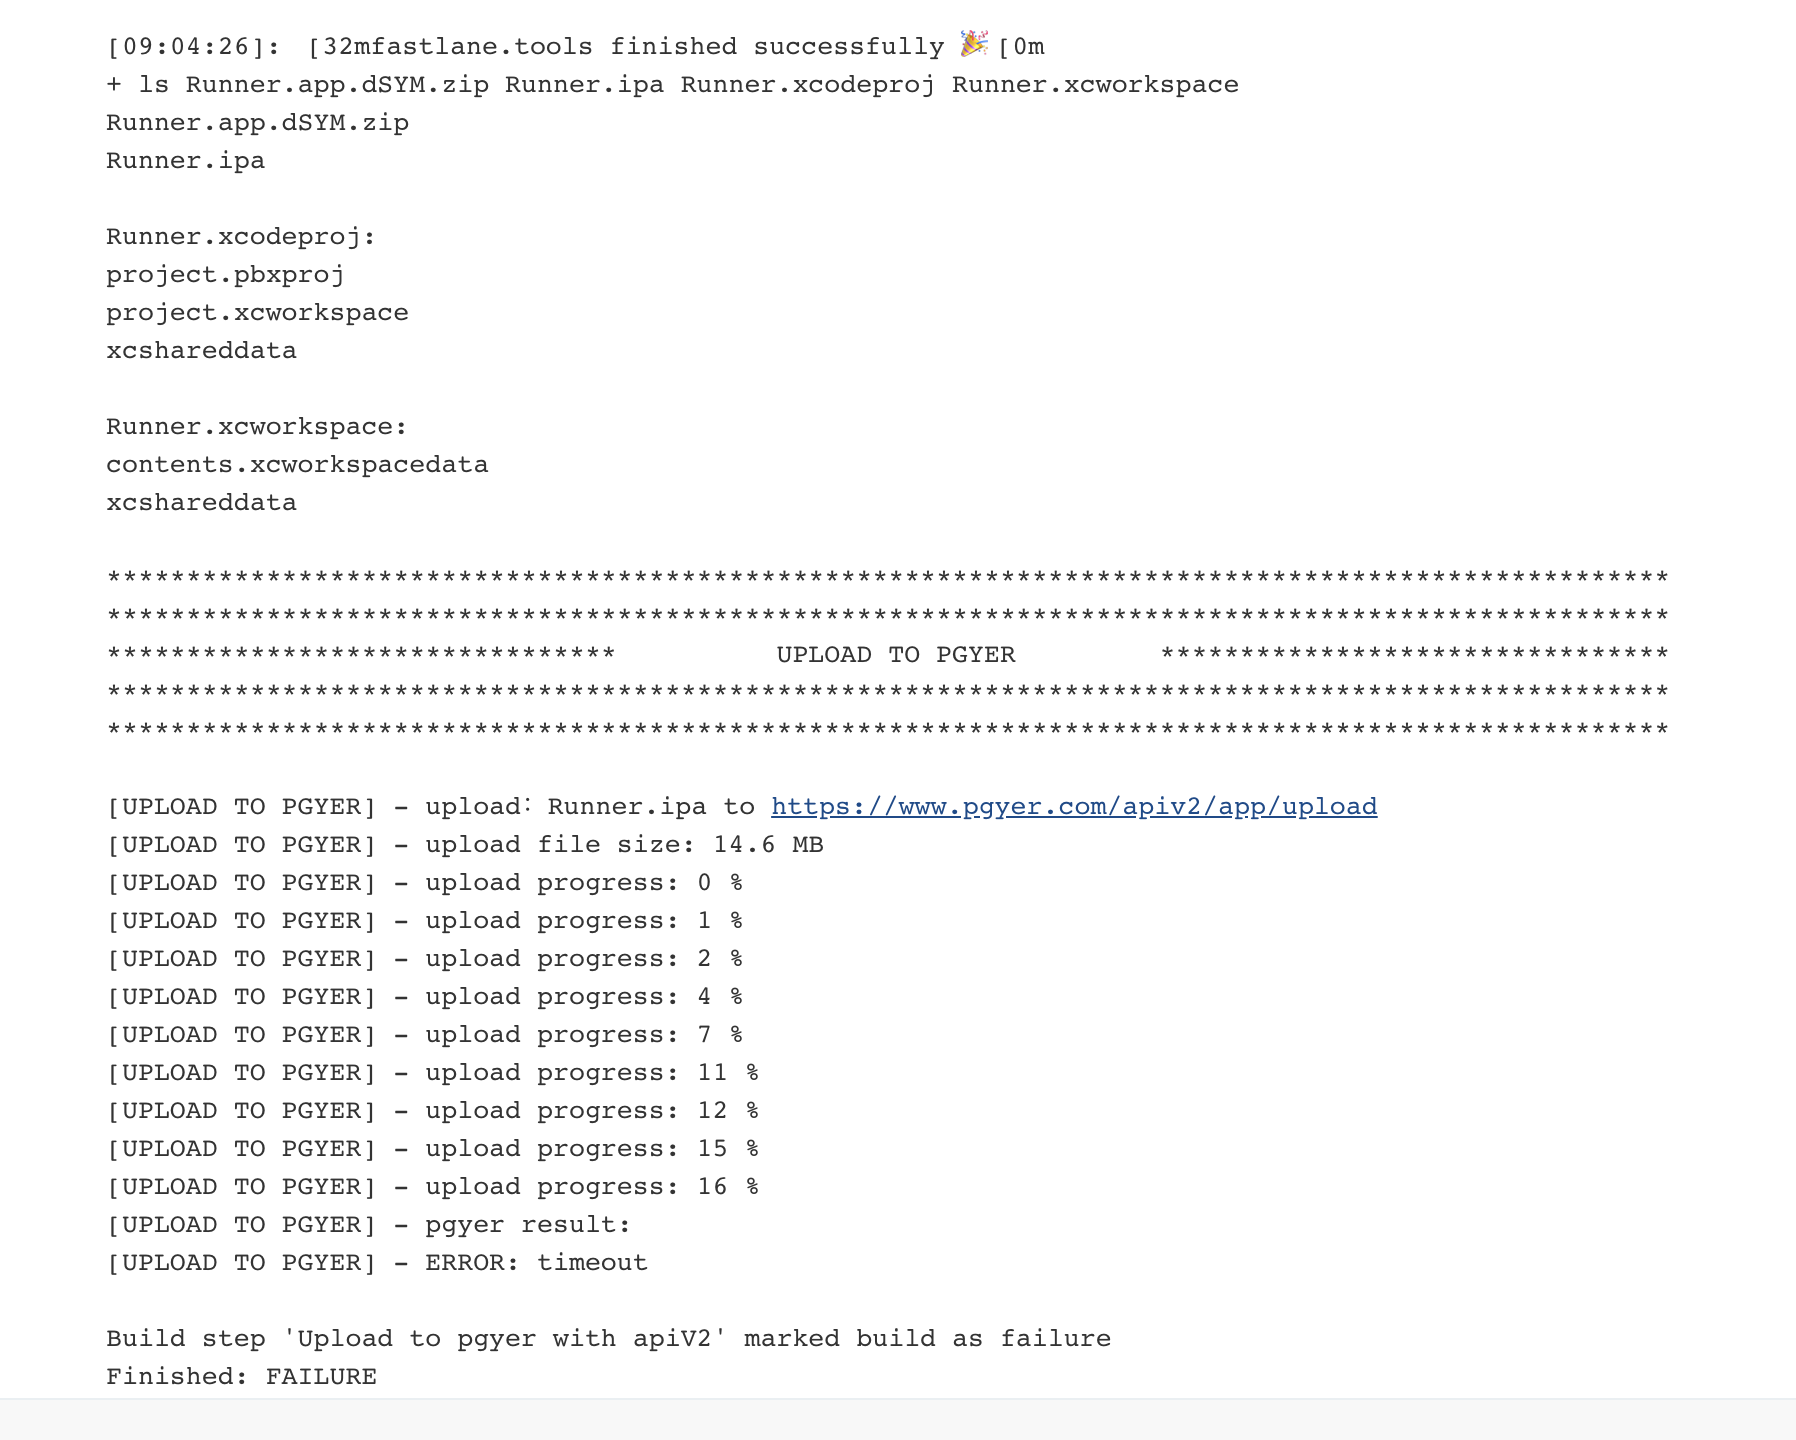
我们看到, 蒲公英上传失败了.
嗯, 那我们换一个方式, 不通过 jenkins 的插件了, 而是通过 fastlane 的 pgyer action 直接在 fastlane 里完成这一步,
先添加
1$ fastlane add_plugin pgyer
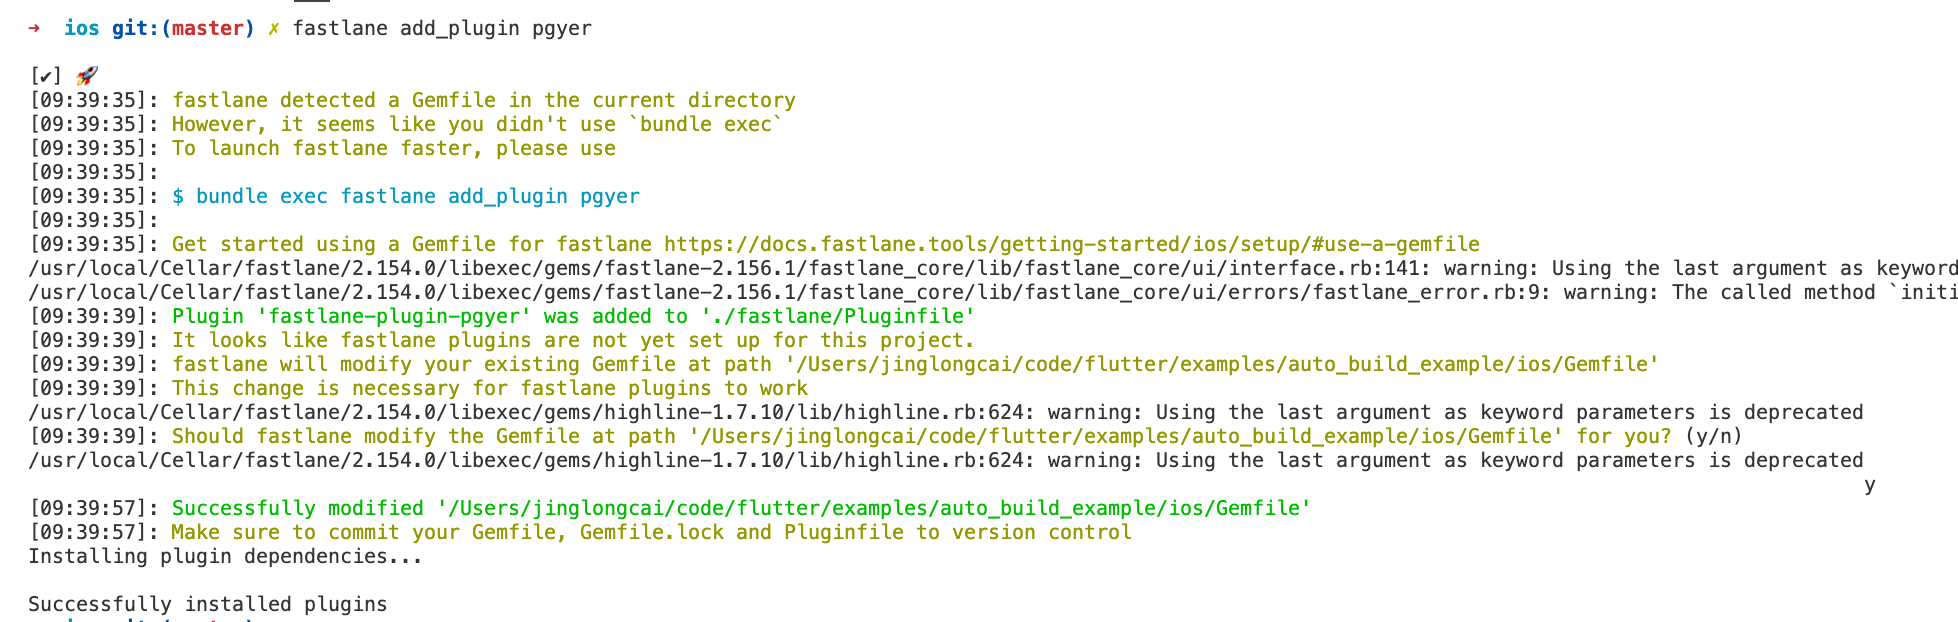
中间需要 y,确定一下
然后, 修改 fastfile
 1default_platform(:ios)
 2
 3platform :ios do
 4  desc "Description of what the lane does"
 5  lane :ad_hoc do
 6    # add actions here: https://docs.fastlane.tools/actions
 7  	...
 8    build_ios_app(
 9      scheme: "Release",
10      export_options: {
11        method: "ad-hoc",
12      }
13    )
14    pgyer(api_key: "75123fxxx10", user_key: "4853910323xxx22105382")
15  end
16end
把 pgyer 的 action 直接加载 build_ios_app 后, 然后设置到 api_key 和 user_key, 在 查询
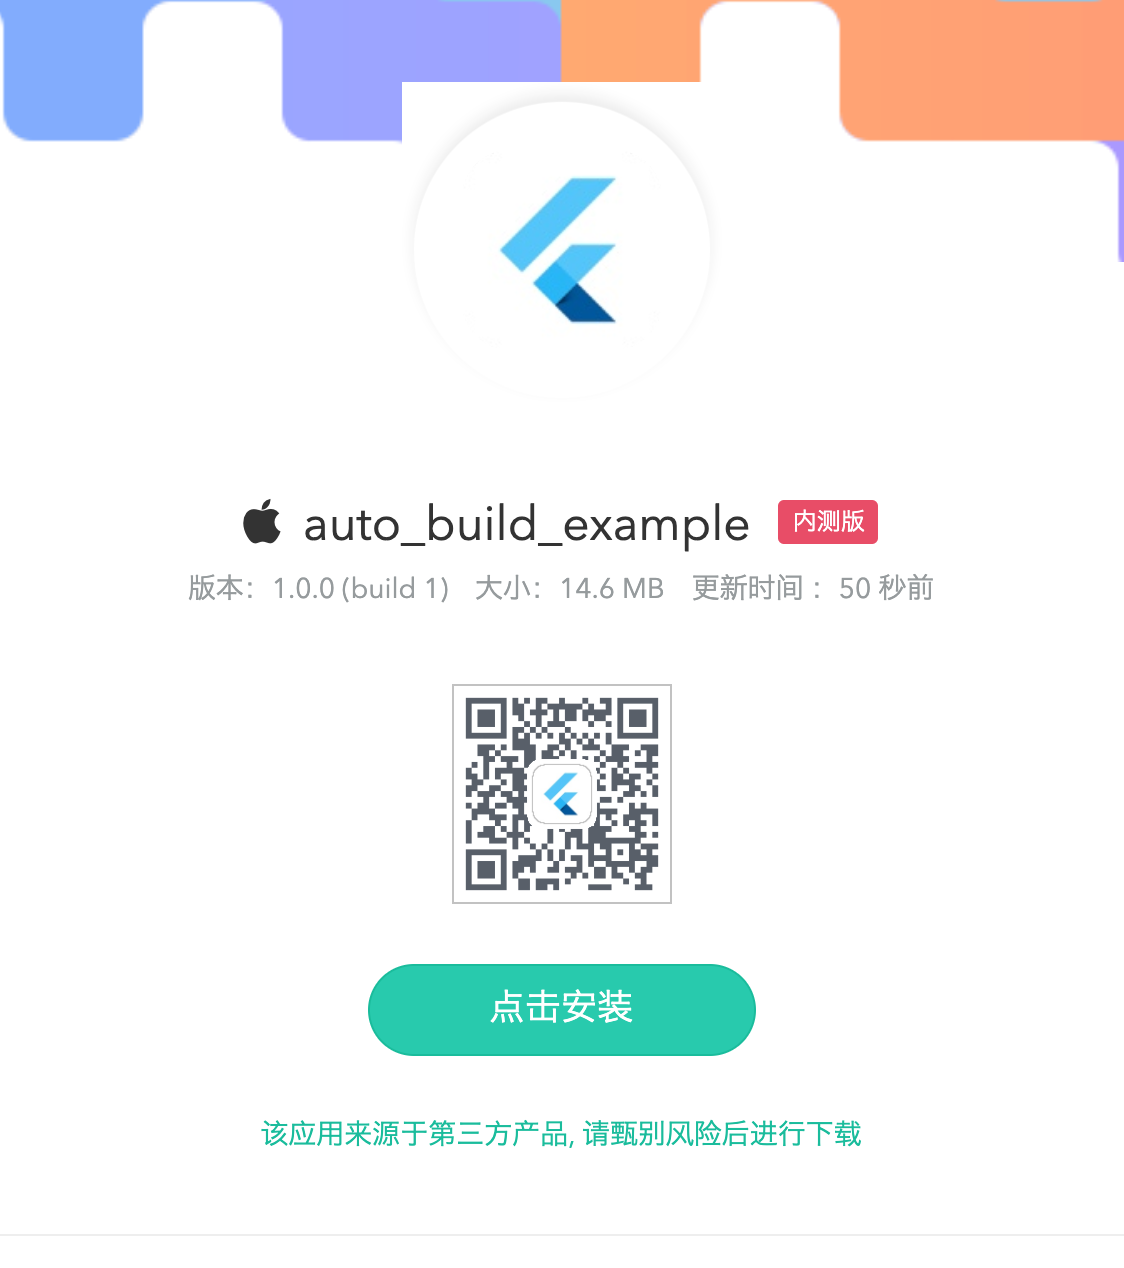
接着点击立即构建, 就可以触发了
上传完毕后是这样
Jenkins 的触发器
Jenkins 支持一些触发器

-
远程触发, 设置 token, 然后通过访问 url 的方式, 或是脚本之类的方式触发
-
其他工程构建后触发, 顾名思义, 就是比如我构建完安卓, 触发构建 iOS 的操作, 这样是可以细化构建步骤, 但如果本身没有关联, 强行搞到一起反而不美
-
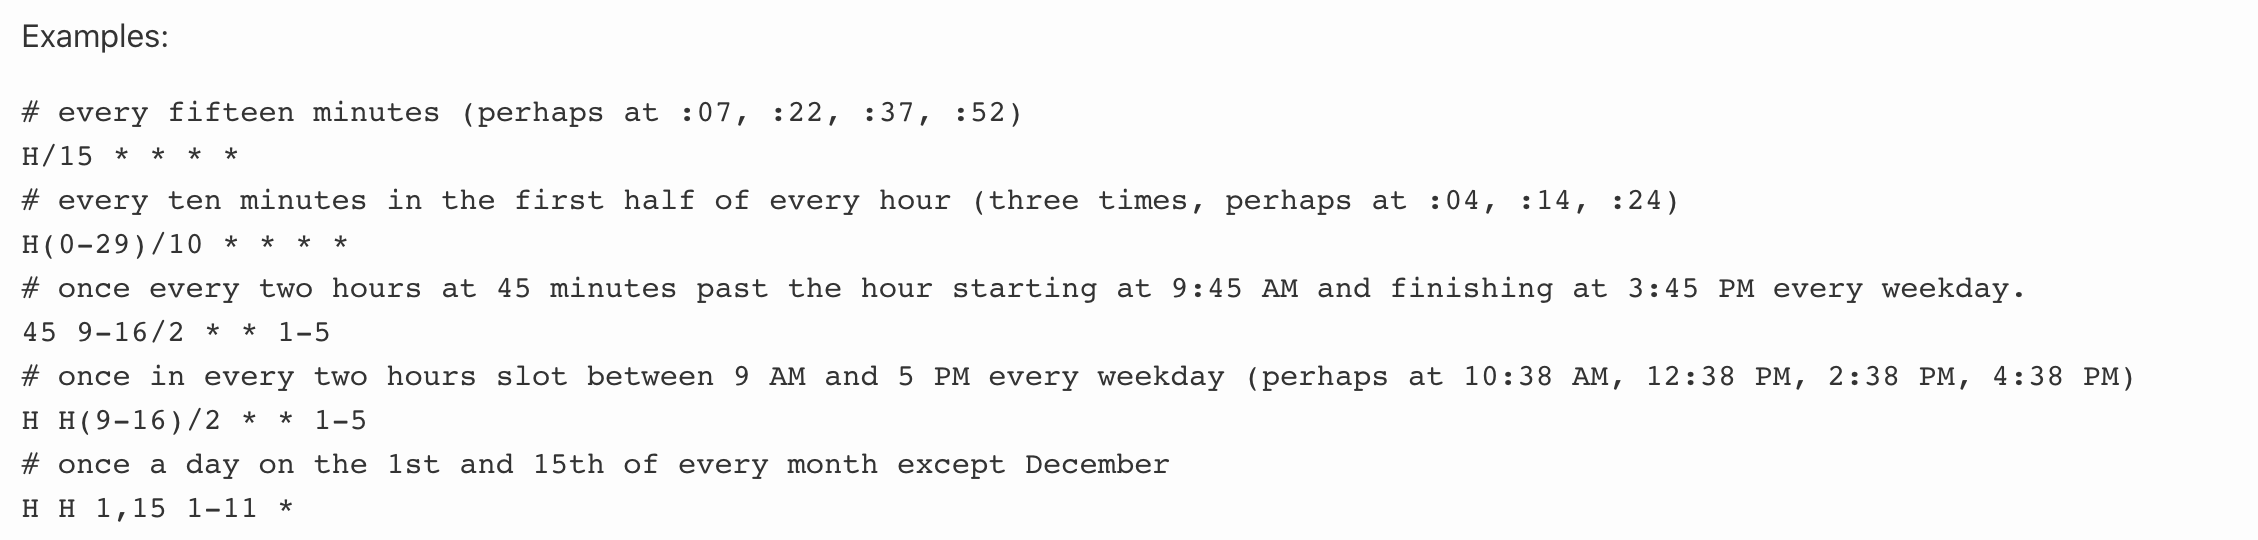
定时构建, 这个支持比较多的方式, 很类似于 Spring 的定时任务, 具体语法可以查看说明或示例
-
github 的钩子
-
轮询 SCM
Fastlane 的一些配置
fastlane 其实也支持安卓, 不过本篇因为安卓 flutter build apk 已经足够简单, 所以个人考虑不需要使用这个, 如果你的项目是 flutter module 配合 maven 或 aar 的方式置入原生的, 需要更多步骤的情况下, 可以尝试使用 fastlane 来帮你解放双手
后记
本篇主要探索了测试阶段如何解放双手, 使用 jenkins 配合 fastlane 达到自动打包, 上传的过程
如果需要额外告知某些人员, 可以尝试对接办公系统的 api 来达到自动通知的目的, 钉钉等程序应该都有对应接口
本篇设计到的文件相对完整版
之所以是相对, 是因为有一些敏感信息, 例如 pgyer 的 api key, 苹果的登录 cookie, 签名仓库等等, 并不方便向所有人开放
-
安卓篇
-
Jenkins 构建脚本
1flutter build apk --release -
构建后
scandir:
${WORKSPACE}/build/app/outputs/apk/releaseFile name:
app-armeabi-v7a-release.apk
-
-
iOS 篇
-
Fastfile
1# This file contains the fastlane.tools configuration 2# You can find the documentation at https://docs.fastlane.tools 3# 4# For a list of all available actions, check out 5# 6# https://docs.fastlane.tools/actions 7# 8# For a list of all available plugins, check out 9# 10# https://docs.fastlane.tools/plugins/available-plugins 11# 12 13# Uncomment the line if you want fastlane to automatically update itself 14# update_fastlane 15 16default_platform(:ios) 17 18platform :ios do 19 desc "Description of what the lane does" 20 lane :ad_hoc do 21 # add actions here: https://docs.fastlane.tools/actions 22 match( 23 type: "adhoc", 24 app_identifier: "top.kikt.autobuildexample", 25 team_id: "xxx", 26 ) 27 build_ios_app( 28 scheme: "Release", 29 export_options: { 30 method: "ad-hoc", 31 } 32 ) 33 pgyer(api_key: "xxx", user_key: "xxx") 34 end 35end -
Matchfile
1git_url("https://gitee.com/kikt/test_adhoc_sign_store.git") 2 3storage_mode("git") 4 5type("adhoc") # The default type, can be: appstore, adhoc, enterprise or development 6 7app_identifier(["top.kikt.autobuildexample"]) 8username("xxx") # Your Apple Developer Portal username 9 10# For all available options run `fastlane match --help` 11# Remove the # in the beginning of the line to enable the other options 12 13# The docs are available on https://docs.fastlane.tools/actions/match -
Pluginfile
1# Autogenerated by fastlane 2# 3# Ensure this file is checked in to source control! 4 5gem 'fastlane-plugin-pgyer' -
jenkins
1flutter build ios --release -v
2cd ios
3export FASTLANE_SESSION=$(cat login_cookie)
4fastlane ad_hoc
5ls Runner.*
-
以上